Contents
- 1My top tips for Wildlife Photography
- 1.1Create Opportunities
- 1.2Learn your camera
- 1.3Have your camera in your hand!
- 1.4Shoot on multi-shot
- 1.5Think about the time of the day in context
- 1.6Charge your battery, have spares and an extra card
- 1.7Don’t sacrifice shutter to get your ISO down
- 1.8Know your subject
- 1.9Don’t fill the frame for flight
- 1.10Set your white balance to cloudy
- 1.11Pre-focus if possible
- 1.12Think about separation and background
- 1.13Think about the rest of the scene
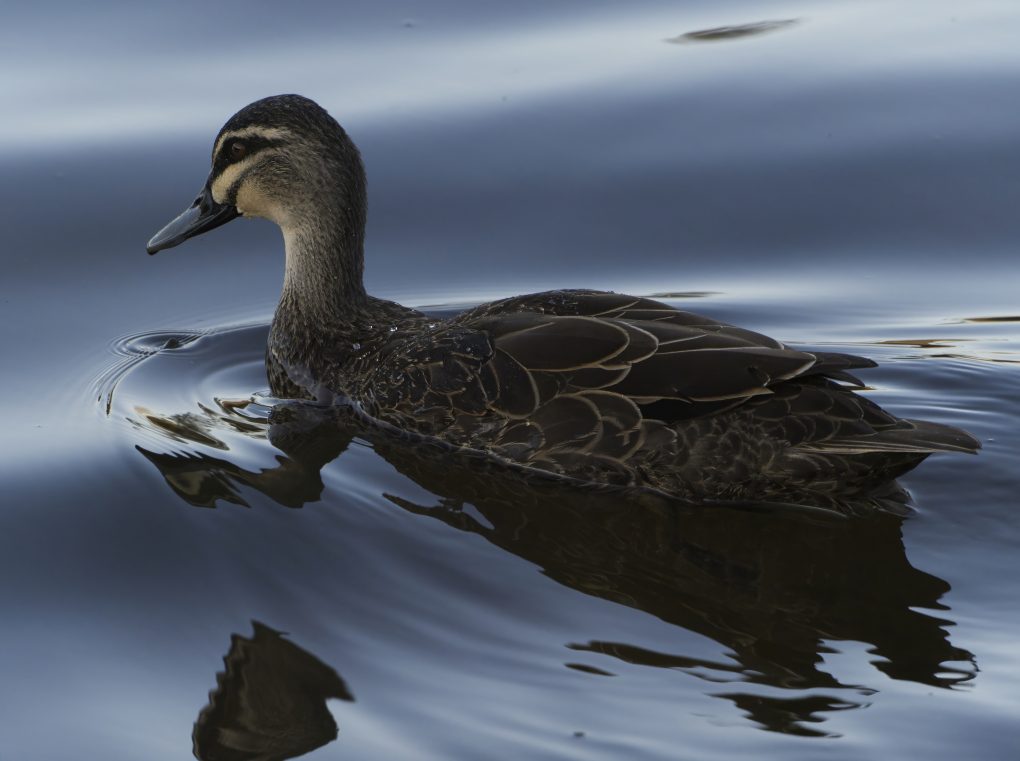
- 1.14Focus on the eyes
- 1.15Don’t be afraid to use Portrait orientation
- 1.16Get low
- 1.17Exposure Compensation
- 1.18Auto-ISO
- 1.19Custom modes
- 1.20Double your aperture for Macro Wildlife Photography
- 1.21Be patient and observe
- 1.22Shoot in Raw
- 1.23Keep one eye in the field
- 1.24Shoot first, move later!
- 2Wildlife Photography Settings
- 3Best budget camera for Wildlife Photography
- 4Best lens for Wildlife Photography
Let me just say at the outside I’m not an award-winning wildlife photographer (lets call that a work in progress) but it is something I spend a lot of time doing, and I’m constantly doing different wildlife photography workshops and courses to learn as much as I can. I’m a big believer that no matter what your experience level there is always something you will learn from a workshop or instructor.
So I thought I would put together some of the top tips from my own experience or that of others, that I’ve found the most useful when it comes to getting amazing wildlife pictures.
This post contains affiliate links. Making a purchase through these links earns a small commission at no additional cost to you and is a great way of showing your support for this site.
My top tips for Wildlife Photography
Create Opportunities
How good a photographer you are is irrelevant if you never take your camera out of the house. I recently took 4 months leave from work and went shooting nearly every day. Did I get better with the constant practice – no doubt – but I also got the shots I got because I was out there with my camera looking for the opportunities.
You don’t even have to go far! Some of my favourite shots this year were taken metres from my front door. Go to the local lake or ocean where there is going to be plenty of birdlife, or Zoos can be a great place to practice techniques. If you can find Pelicans they are great for practicing flight shots as they fly super slowly!

Look for opportunities to learn too. Keep an eye out on your local Photography schools, Photography clubs and Eventbrite for workshops where you can get some hands-on practice with different expertise.
Learn your camera
When I got my first interchangeable lens camera I did an 8 week course with the local Community College to learn the basics. One of the best tips I took away from it was to learn the effect that changes in your settings have on your images. Pick an object uniform in colour and sit in the bright light of the day and take a photo on each of your different settings. Then stick your card on the computer and look at how the images vary from f4 to f16, or 100 to 6400 ISO. The ISO is important to understand if you don’t have the latest in noise removal software to clean up an image in post-processing. Without it there’s only so much you can retrieve from a noisy photo and it’s good to understand at what point on your own camera the noise level becomes unusable.
The other setting that I found important to understand is the focus setting you are on, and this may vary somewhat between cameras. If a subject is still I love to shoot on Single Auto Focus – Manual Focus, because it allows me to really tweak that focus where I want it rather than relying on the camera to pick it. For movement I’ll shoot on Continuous Auto Focus Tracking which does better at catching movement in focus.
Also learn any special options your camera has for capturing wildlife. The new model Olympus has great bird detection software.
Have your camera in your hand!
I know this seems ridiculous, but you will be kicking yourself if that moment when you let your camera hang for a moment is when the perfect photo presents itself. Often you only have a moment to grab a shot and the time spent getting the camera up to your eye can mean its gone before you get a focus locked.
Shoot on multi-shot
When it comes to any kind of motion photography, have your camera set to fire off multiple shots when you press the button. I can’t tell you how many shots I missed before I switched this setting. Shooting in multi enables you to capture those moments you would never get on reflex because they happen too fast, and enables you to have a sequence of images to work with.

Think about the time of the day in context
A lot of wildlife photographers subscribe to the idea that the best time for wildlife is first thing in the morning and last of the day. I once heard Andy Rouse say this is because of the harsher light and shadows created by the sun sitting high, but some wildlife you also have a better chance of seeing if you are shooting at dawn and dusk.
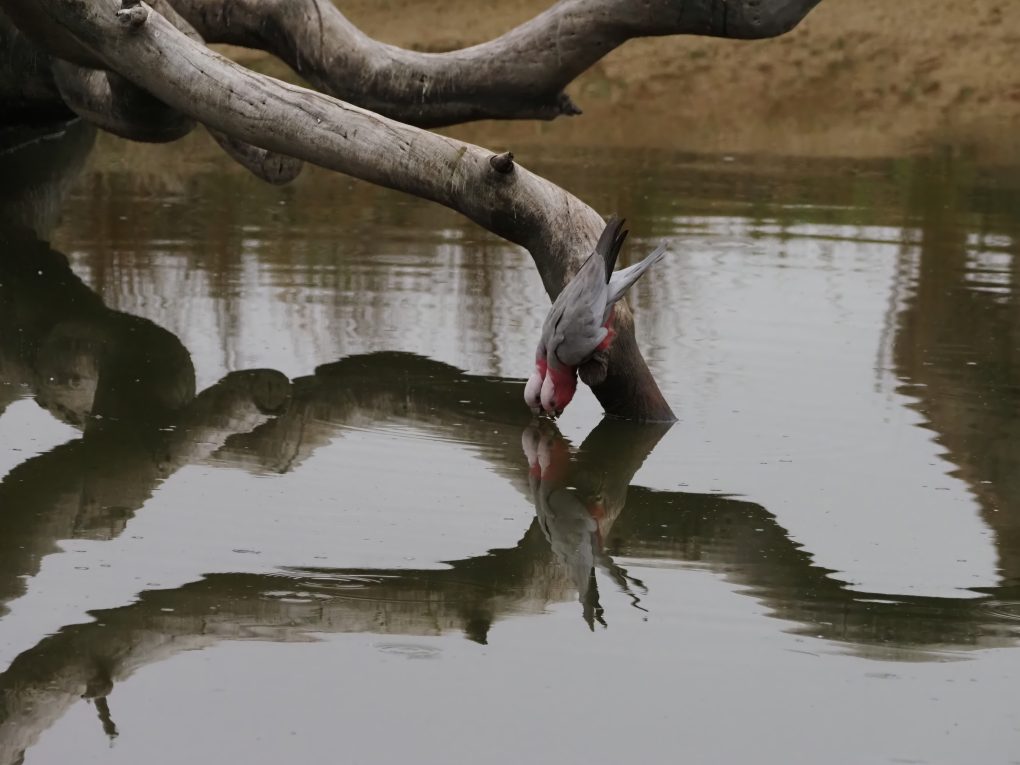
While that’s great in theory, I tend to think there’s a little more information which needs to factor into that. If you don’t have a fast lens or great post-processing software then you may struggle to manage the lower light of this time of day, and I’d argue that getting out there is better than not at all. If you happen to be in dense bush or its an overcast day this will also diffuse the light in the middle of the day. There’s a particular location on my street I like to shoot in the middle of the day, because the buildings cast too much shadow early and late. The below photo was taken in the middle of an overcast day.
You may use the time of day as a particular aesthetic too. Andy Rouse loves to shoot his subjects backlit.
Charge your battery, have spares and an extra card
I’m pretty good on the batteries – though I had to lend my spare to a friend who had forgotten to charge hers once – but I’ve been guilty of arriving at a location to find I had left the memory card in the laptop at home on a couple of occasions. I keep a little container in my backpack with my spare batteries (3) and a spare 125 gb card.
Don’t sacrifice shutter to get your ISO down
This is one I heard from Andy Rouse and it’s a mistake I definitely made on earlier shoots. Having to brighten an image in post-processing will bring out noise in the image so you are better off having it the brightness you want. Also be mindful about cutting the shutter speed too fine if you want to capture movement, you can only do so much to save an image that isn’t crisp. Wildlife wont stay still for you while you line up the shot so have your shutter speed set fast as default.
Know your subject
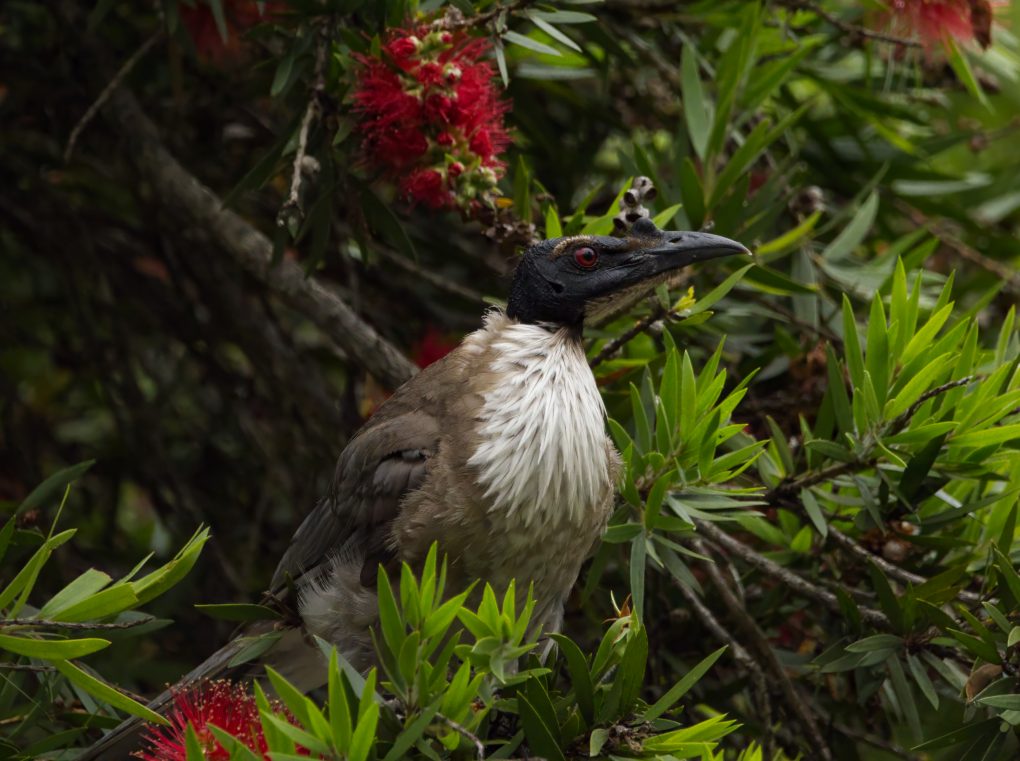
Do you know what it is you want to shoot? Do you know their food source and where to find it? I know particular tracks which are great for wildflowers and therefore honey eaters, and I know where to find the food source for Black Cockatoos – which often gives me that edge when I am heading out to shoot them! Learn what your desired subject sounds like too. Often I’m just heading to a location to see what presents itself, but when I recognise a call it takes me off in search of that species.
E-bird is a great resource for finding out where particular bird species have been sighted, as well as the local groups on social media.
I once read an article in Australian Photography that mentioned that birds will often poo before takeoff. If you’re looking for those flight shots keep an eye out for that tail lift!

Don’t fill the frame for flight
While we’re on the topic of flight shots, don’t zoom right in on the bird and fill the frame because unless you’re super dooper quick it’s going to be leaving your frame in a second. I’ve missed so many flight shots this way, yet I still keep trying to move quick enough!
Here’s a great example of this blunder! Still a great shot but imagine if I’d been just a little more zoomed out! Remember you can crop tighter but you can’t put in what you haven’t captured.

Set your white balance to cloudy
I don’t remember where I read this one, I think it was mentioned in a Facebook group. I’ve done it ever since.
Setting your white balance to cloudy will give you more vibrance in the colours of your raw files.
Pre-focus if possible
This is more applicable to when you’re staking out a location for a particular shot. If you know where you want the shot to be taken be ready with the focus on it so you can respond that much quicker if you’re lucky enough that your subject lands where you want it to!
Think about separation and background
This was a tip I picked up from John Wiseman at a workshop and it’s something I now consciously think about when I am lining up a shot.
What colour is your subject? What colour is behind it? Is it blending into the background?
You want to create separation between the subject and the background so that they don’t blend into each other. While a wider aperture will help by blurring your background, often you can improve the shot just by moving your position a little.
Think about the rest of the scene
This is one I heard from Andy Rouse, but was something I had been gravitating towards creatively on my own.
While a great close-up is lovely, and definitely a challenge, there’s only so much that’s of interest in the image. Whereas if you zoom out some you expand the scope of the story you are telling and there’s more for the viewer to take in.
So while your animal is the subject, think about what else is around it and how you can use it to create a better image. If you look at winning photos from wildlife photography competitions you’ll see this a lot. If you shoot wide you can crop in but you don’t have the ability to go the other way.
Focus on the eyes
This one might seem obvious but I was playing with different focus points in a workshop once and the instructor said if the eyes are in the image and not in focus then it just becomes a distraction. The eyes are what the viewer will form a connection with.
Don’t be afraid to use Portrait orientation
Another John Wiseman tip, this wasn’t something I had played a lot with and often still don’t think about. Turning that camera round can give you a great result in the right circumstances though!

Get low
I first heard this one from the famous photographer Jordan Matter who’s subject is people. Depending on what wildlife you’re shooting this is absolutely a pointer to consider if it puts you on their level rather than shooting down at them and it will create more connection with your image.
Exposure Compensation
This was a tip I got from another local wildlife photographer when trying to shoot a bird against a bright sky, resulting in effectively a silhouette of the subject without detail. Exposure Compensation can lift the light on the subject and let you capture some more detail.
Auto-ISO
I used to manually adjust my ISO for all my photos in an effort to keep it down, but I soon learned what ISO I could and could not manage and realised allowing the camera to adjust ISO enabled me to respond quicker to changing light situations between photos.
There have been times when the camera gets it wrong, resulting in an overexposed image of a bright sky for instance, but it’s easy enough to switch between auto and manual.
Custom modes
Does your camera have the ability to save a set of settings? Setting these up can enable you to quickly switch in and out of a pre-set setting rather than adjusting them each time.
Double your aperture for Macro Wildlife Photography
I learned in a Macro workshop that the depth of field is effectively halved in Macro shots because of the close proximity. To get more of the subject in focus you need to double the aperture you’d normally shoot at.
Be patient and observe
Now I shoot Australian wildlife, and particularly birds, but I don’t see how this wouldn’t extend to other wildlife.
You can get far better results if you are prepared to wait for them. Getting out there in the first place is the first step of course, and you’ll fluke some good shots just by being there, but if you sit back and watch for a bit you’ll increase your chances of getting that epic capture.
I once chased a Scarlet Robin around a site without getting any great shots. When I stopped to watch it for a bit I saw that it continued to go back to the same patch of fence to sit. So I went and sat in the perfect position to capture that spot and I waited. It took about 40 minutes, but I got the shot. You moving around will deter wildlife from being in the vicinity of your camera, but stay still for a while and they’ll slowly start to venture closer to you.
Is there a particular tree they return to for feeding? Can you line them up with a nice reflection or lovely light? By sitting back and watching you can be more strategic in your photography.
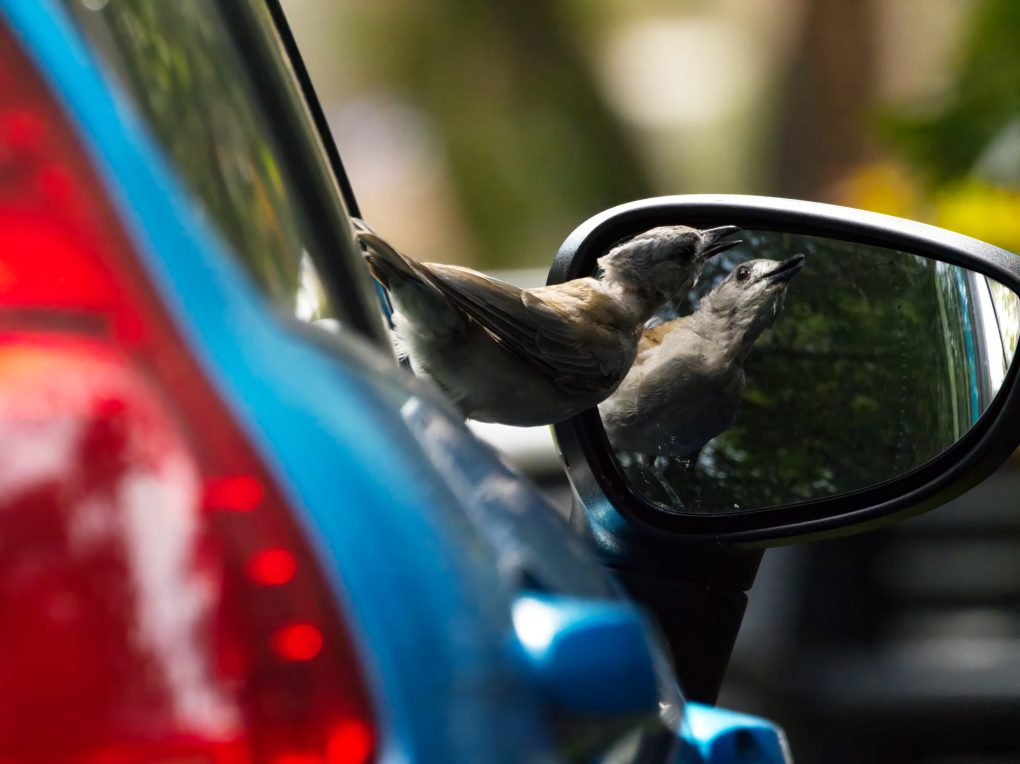
I watched the Grey Shrike-Thrush below as it went from car to car near my house. I found a car with which I could line up a reflection shot and waited.
Shoot in Raw
I begrudgingly came to this realisation after a while shooting with my first camera that had the ability to shoot in raw. You really can bring out so much more from an edit because of the larger amount of information that has been captured, as opposed to trying to work with an already compressed file.
I know photographers who shoot only raw, I capture my images in both raw and jpeg. While it is many more files to work with it means I can move images onto devices while in the field and there have been rare instances where I actually chose to use the jpeg rather than the raw file. This is very much a personal preference though.
The below image shows the benefit of being able to work with a raw file. In the original the bird was dark and almost entirely in shadow. Because I was working with the raw file I had details in the colours I could still pull out, which weren’t captured in the jpeg.
Keep one eye in the field
This was a realisation I came to recently when shooting an endangered Regent Honeyeater. I was so focused on the flower I thought that it was heading for, if I’d looked up I would have seen it was in the one above lined up for a lovely shot that was out of my frame.
Shoot first, move later!
You never know how long you have to get a shot before wildlife decide to leave, and while its natural to want to get as close as you can to the action, sometimes that results in you scaring it away or missing your chance.
Get the shot, then move closer. I stop moving at intervals to get closer shots before creeping again. At least then if it leaves you have something you might be able to work with.
Here’s an example of this in practice. I’d been beside where these Glossy Black Cockatoos were feeding in the bush when they flew together to a tree ahead of me on the trail. I wasn’t in the best position for the shot but fired off a sequence immediately before I moved closer. The instant I moved they were off!
It’s not the best photo in the world, but getting a family shot of these endangered birds is pretty special nonetheless.

Wildlife Photography Settings
I always ask about aperture settings any time I do a workshop as it can be a very individual thing. The best answer I’ve had so far was John Wiseman, who said the default answer is F8 or F9 but it depends what effect you are looking for with the depth of field.
Personally I will usually start by shooting at F8 because I like having more of the image in focus. If I need more light or I’m particularly looking to get that background bokeh effect then I’ll shift to the maximum allowed by my big lens, which is either F5.7 or F6.3.
As mentioned in the tips I use auto-ISO which allows the camera to adjust for changing light without me having to play with other settings between shots. If you don’t have access to a good noise removal software (I use Topaz) then your tolerance level for high ISO will be lower and its a good idea to work out what that tolerance level is.
Shutter speed should be high by default to enable you to capture any movement. Personally I set it at 3200 but will go down to 2000 if I need the light. A good rule of thumb I heard from a pro-photographer friend is to always have your shutter speed double your focal length to account for any lens shake that might bring some blur into the image.
Best budget camera for Wildlife Photography
There’s an old and oft spouted adage; the best camera is the one you have. I’m a big believer in this, and I think its meaning is actually twofold. Its not just having the camera that’s important, its having a camera that you actually feel comfortable using so that you do take it out with you!
Being an Olympus shooter I am a little biased here, but there’s also a growing number of photographers moving to the Olympus system for wildlife photography. This includes Andy Rouse, who is well regarded as one of the best wildlife photographers in the world.
As a Micro 4/3 system the Olympus has a great advantage of being compact and lightweight. If you’re on the move seeking out the wildlife then it helps to not be carrying heavy gear. Even the big telephoto lenses are significantly lighter than the full-frame competitor equivalent. The latest models also have some great bird detection options in the settings that make Olympus top of its game for wildlife photography.
I shoot on an Olympus Em5 Mark III, which is now the OM5.
Best lens for Wildlife Photography
If you’re shooting wildlife then you are going to need the big lenses, which inevitably means big cost.
Again Olympus have an advantage for wildlife photography here with some really nice lenses that aren’t necessarily cheap, but they come at a fraction of the price of their full-frame competitor equivalents.
While the Olympus 300mm prime lens is a popular choice for wildlife, I personally chose to go with the 100-400mm because I like the flexibility that comes with a zoom lens. All the photos above were shot on the 100-400mm.
If you’re after a budget alternative then the Olympus 75-300mm is absolutely worth a look. At less than AU$600 it’s an attractive option and I shot with this lens before purchasing the 100-400mm and was really happy with the results. In the right conditions I would still choose it over the 100-400. The below image was captured on the 75-300mm.
What do you think of these tips? Is there something great that works for you? Let me know in the comments below!
