Why December is not the best month to visit New Zealand

We all know that even the best laid plans go wrong.

I’m not the lay on a beach and relax kind of traveller. I take the attitude that you may only get the chance to visit a place once, and you should suck in the experience while you can. I generally build my trips around particular destinations and book the accommodation and things I particularly want to do, while leaving room for spontaneous activities as I go.

No matter how prepared or well planned you are, if you travel enough it is just a statistical truth that sooner or later a trip is going to go wrong.

I had a good run really.

Pssst…this post contains affiliate links.

Making a purchase through one of these links earns a small commission at no additional cost to you and is a great way to show your support to this site.


Adventures and Misadventures in New Zealand

New Zealand, December 2019. My second trip to New Zealand and my first to the South Island. December seems on face value a great time to visit New Zealand, beat the rush of family travel when school holidays starts, Summers kicked in and the weather should be lovely and ripe for enjoying the waves!

Yeah maybe not so much.

At this point please note that I absolutely love New Zealand and can’t wait to travel there again. This is also intended to be somewhat tongue in cheek and aimed to show that you can make the best out of a situation that doesn’t go how you expected.


It all started with a plane

Until writing this I had actually forgotten that I nearly missed my flight out of Sydney by somehow ending up at the wrong gate. I have no idea how that happened, but I was having a merry old time chatting away with a cute guy until they announced that boarding was commencing for Chile. My Merrell hiking shoes were put to an entirely different test that day!

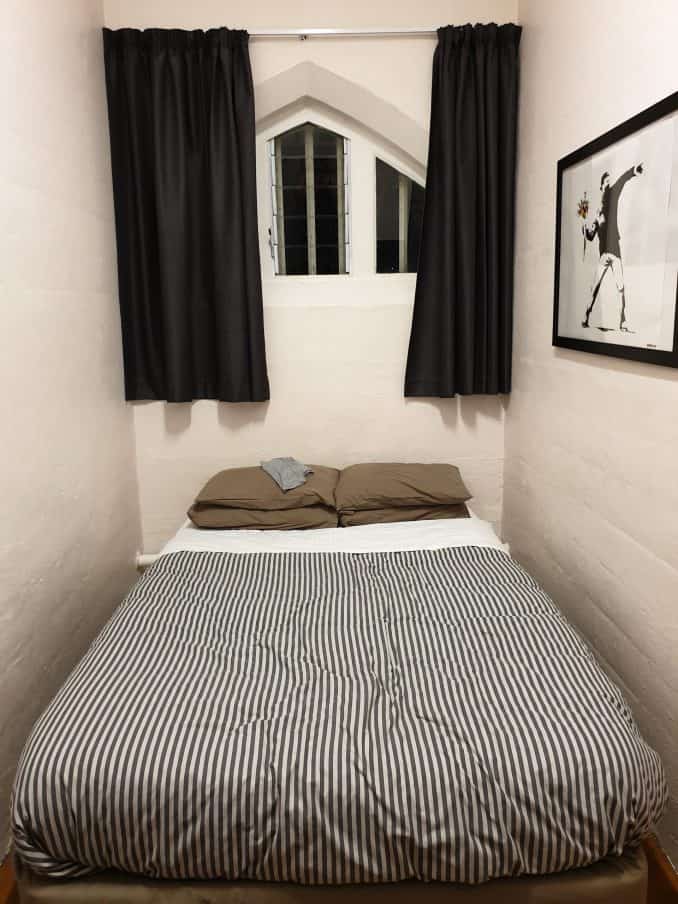
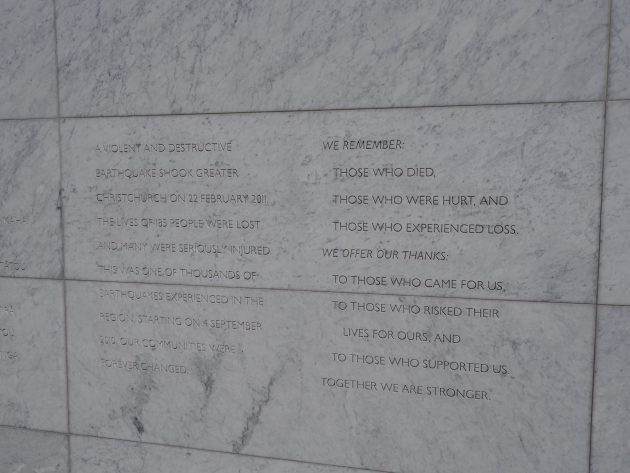
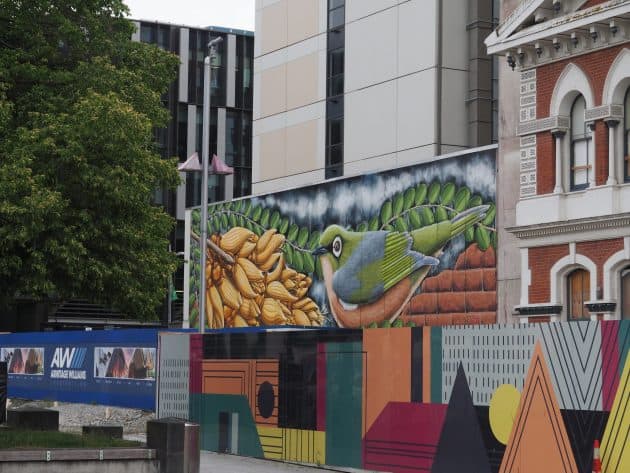
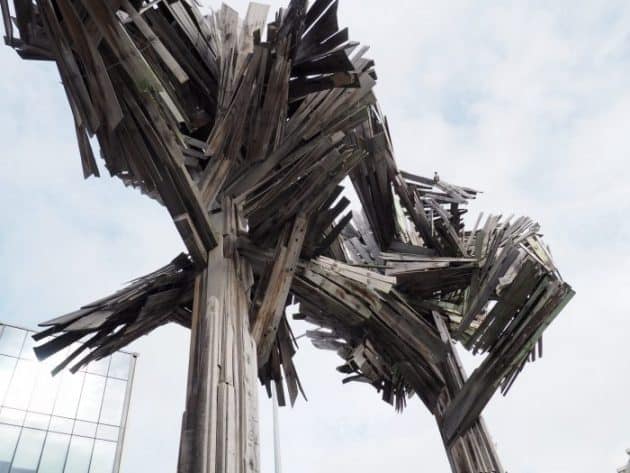
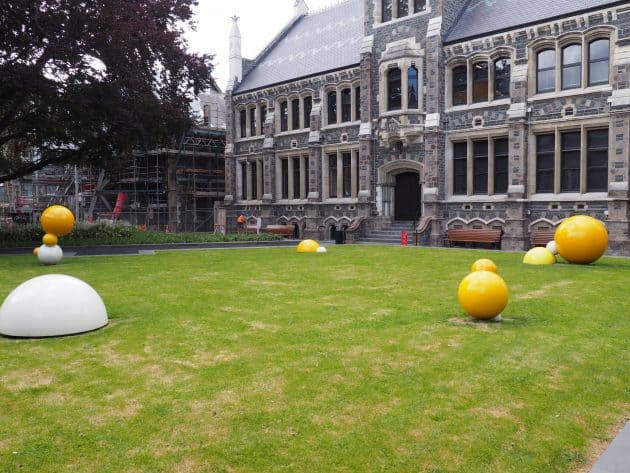
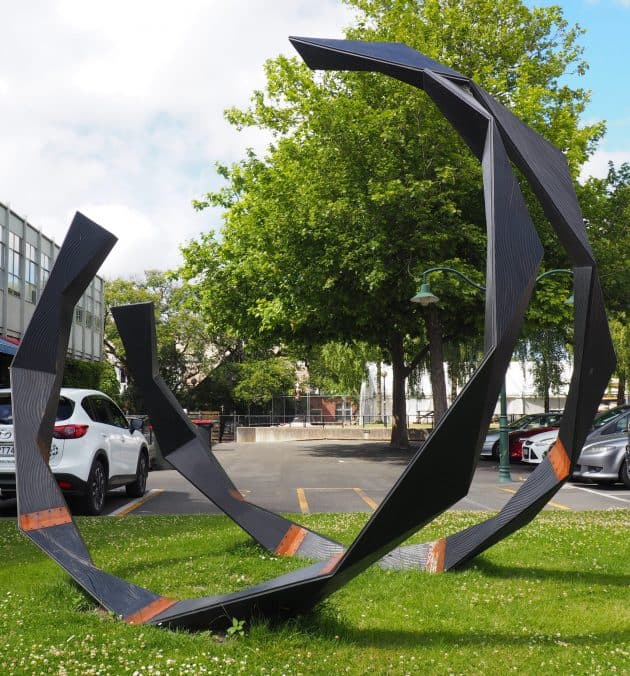
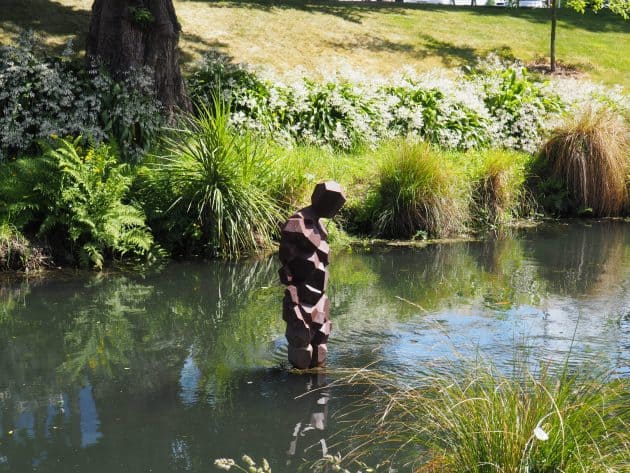
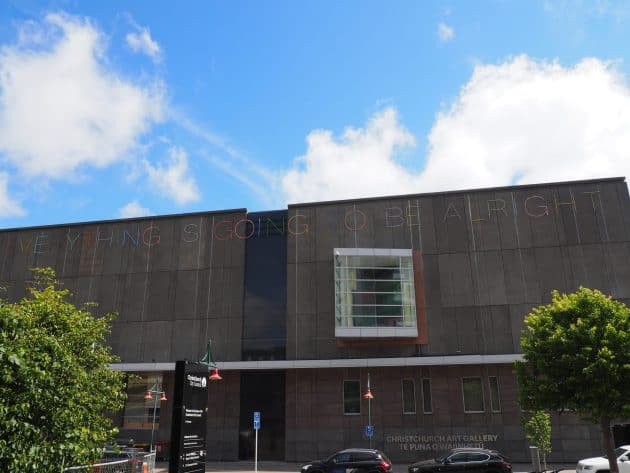
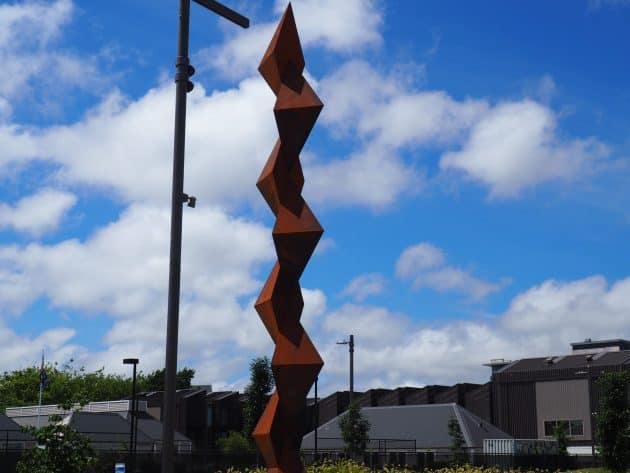
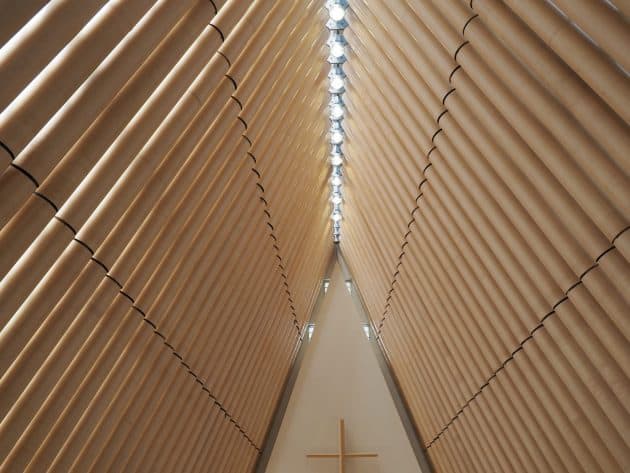
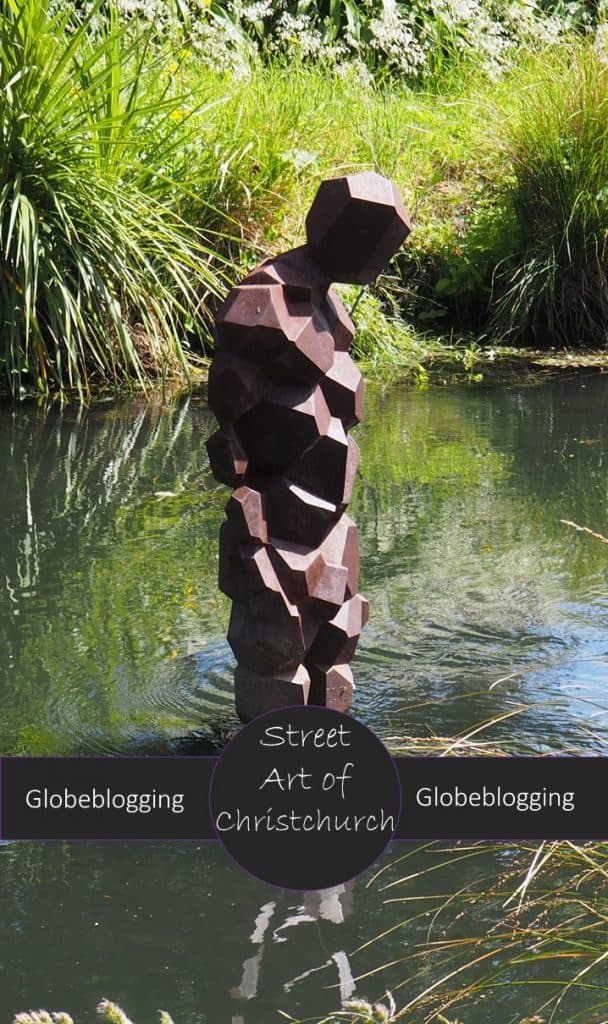
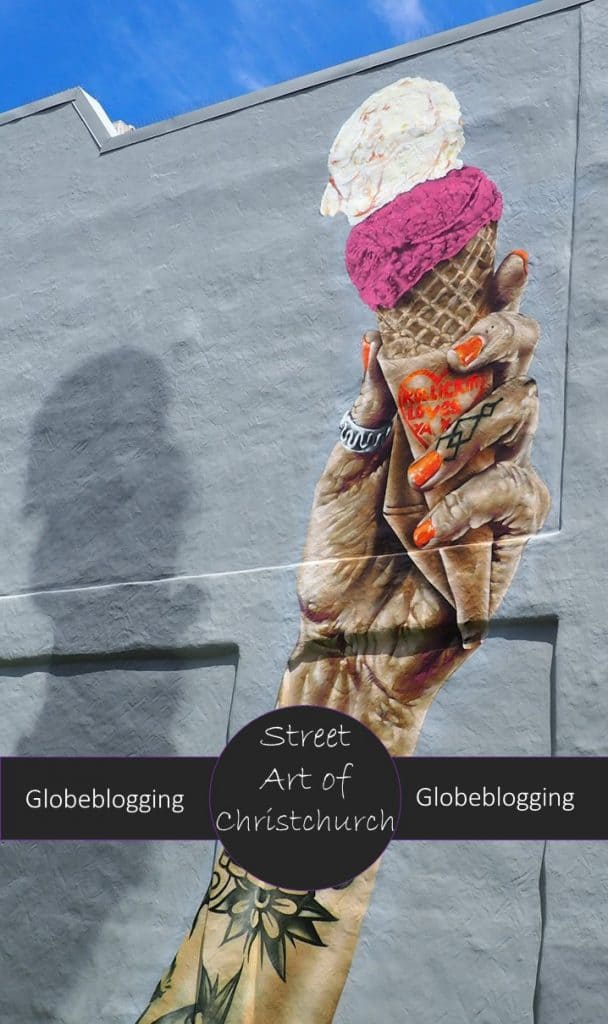
Things went smoothly enough upon my arrival into Christchurch. I was here for just one night and booked on the Tranz-Pacific train up the coast to visit an old friend from school in Blenheim the next morning. My Uber to my hotel was more than I’d expected but otherwise my room was spacious and comfortable, I wandered into town, saw some sights, checked out the street art, got some food and grabbed some provisions for my train ride the next morning which I was super excited about.


Then there was the Coastal Pacific train

The next morning I was packed and ready in front of reception for my next adventure to begin. I’d booked this particular motel for its inclusion of a ride to the station.

Soon enough I had taken my appointed seat and waited for departure.

And waited, and waited, and waited. The novelty of riding a train, featuring open air carriages, twisting its way along the Pacific coastline was suddenly seeming not such a swell one. I only had a small window of time in Blenheim with my friend and was disappointed to have it being eaten into.

As the hours went by messaging my friend with updates on the status, it transpired that there had sadly been a fatality on the line ahead and the train was unable to proceed just yet. We were told that it would be departing at some point, just not when. A family sitting across the aisle from me said they would hire a car if the train didn’t leave, and as they were going to Picton which was beyond Blenheim they would be able to give me a lift. It started to seem like that contingency may become a reality.

It was somewhere between 2.5 and 3 hours later that we pulled out of the station. And it definitely was a fabulous ride along the coast and a thrill to be able to take photos in the open air while in transit!

The Coastal Pacific train features an open carriage where photographers flock to capture the NZ Coastline
The Pacific ocean and the NZ coastline captured from the open carriage of the Coastal Pacific


A not so Seal Swim Kaikoura

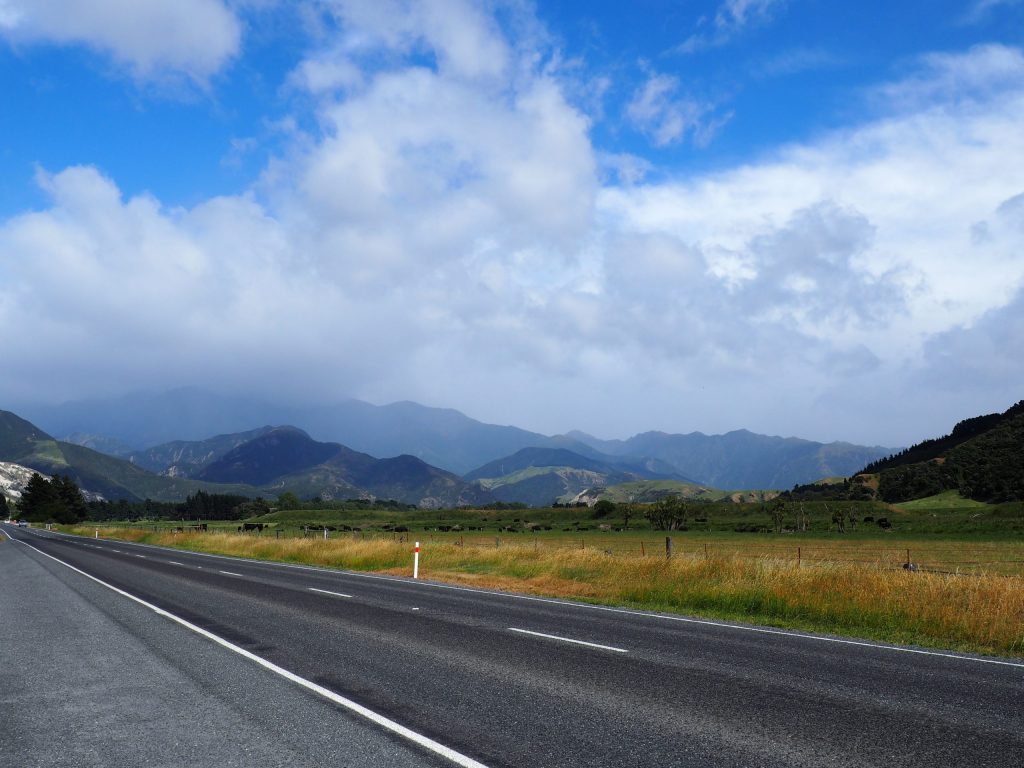
I spent a lovely couple of nights with my friend in the Marlborough region and while the weather wasn’t grand, we made the most of it. He dropped me off at Blenheim to pick up my rental car and kick off the road trip with the drive to Christchurch. I had planned my packing and the drive around arriving in Kaikoura for a swim with seals, which I had no idea I wanted to do until naturally I saw that you could do it. Despite the chill in the air I was really excited to experience it.

Naturally, that was my first cancellation. Shortly after picking up my car they contacted me and advised that the ocean conditions weren’t suitable to conduct the tour today. They promised to contact me if anything changed in the intervening hours, but they weren’t optimistic.

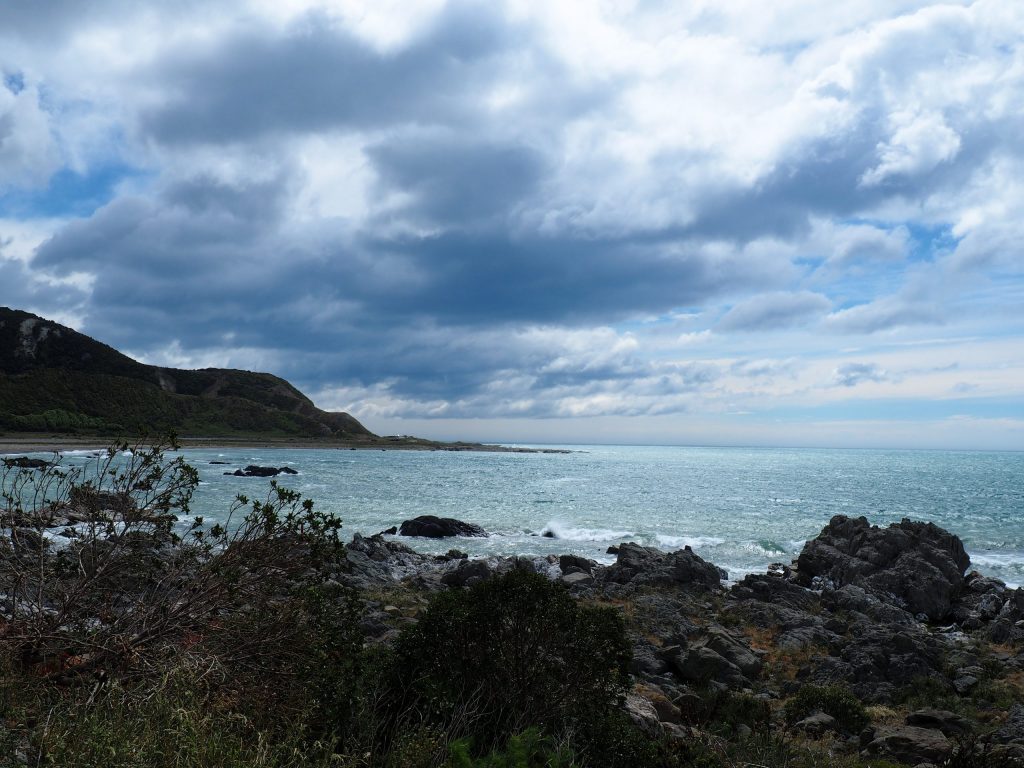
I head for Kaikoura anyway since I still wanted to break up the drive to Christchurch, and figured I could at least swing by and check out the Kaikoura seal colony since it seemed I couldn’t actually swim with them.

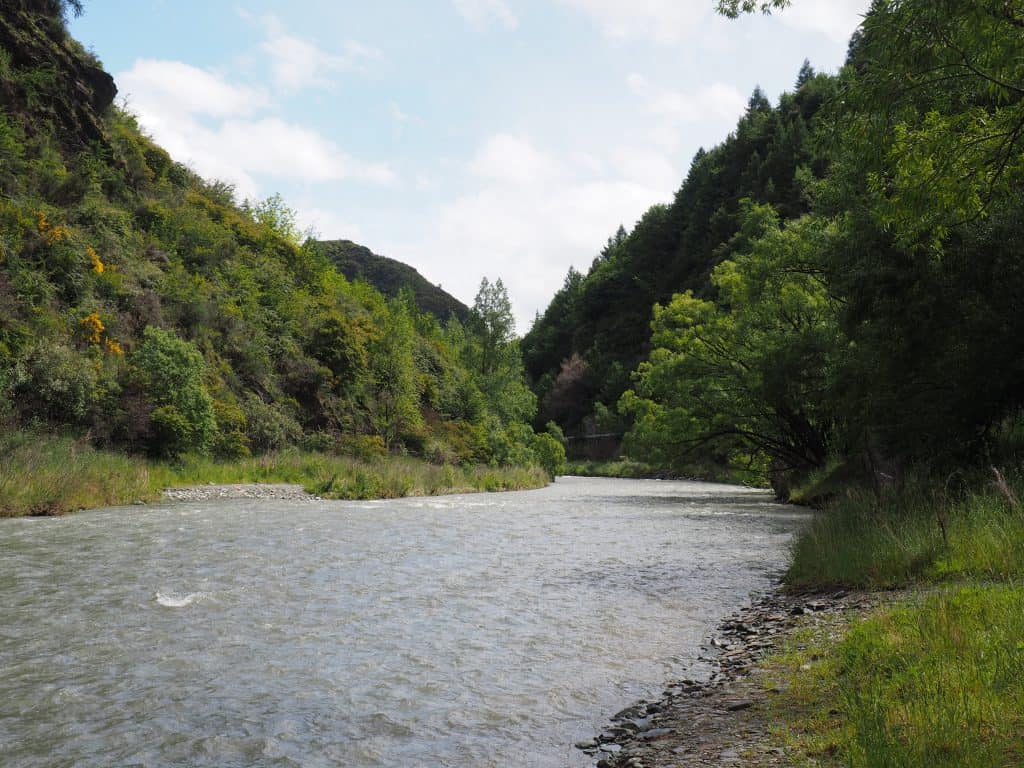
The seal colony wasn’t hard to find. You can park at the car park at half moon bay or alternatively find a spot along the coastline and follow it up on foot. You wont have to look too hard! Parts of the path will enable you to get quite close to where the seals are probably resting. And its a beautiful stretch of coastline so its worth the walk regardless!

You’ll see plenty of seals resting on the rocks or playing in the water, and since the path is above the rocks you’ll be able to get quite close without interfering with them.


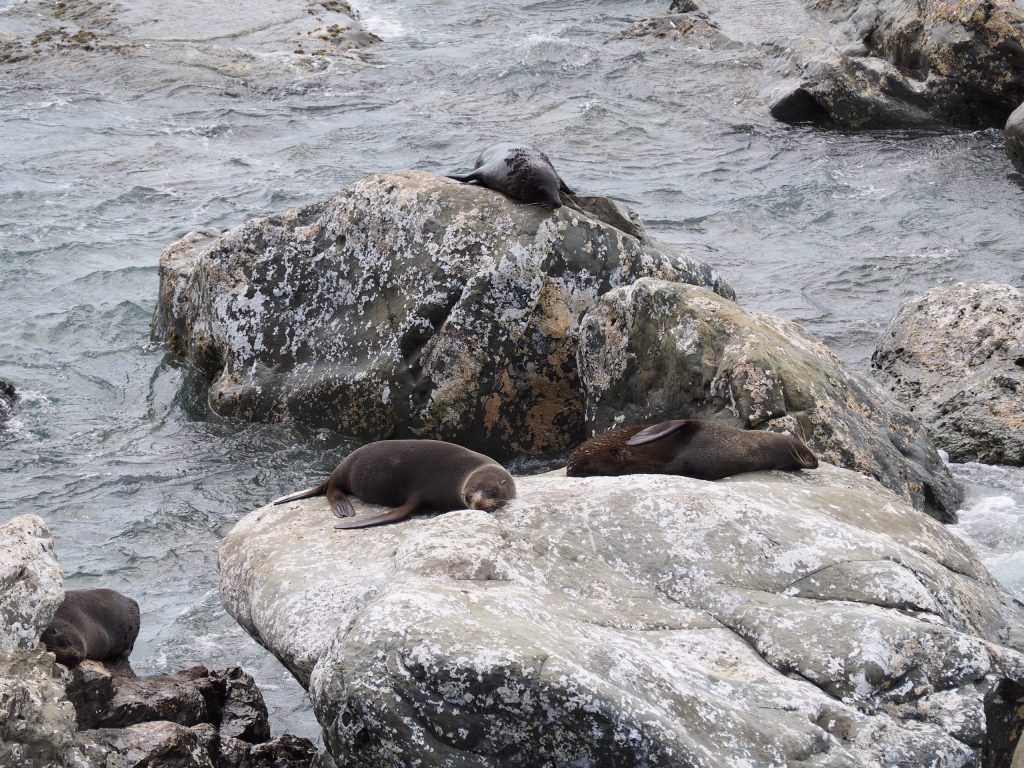
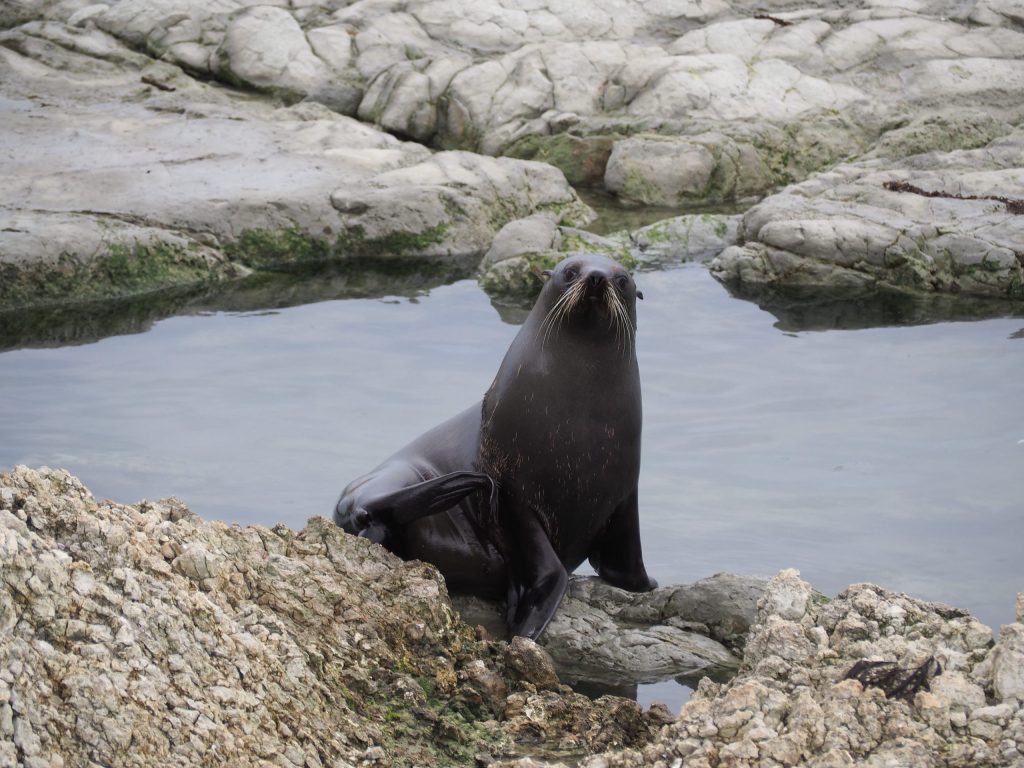
The up side to being in Kaikoura in December is that your chances are pretty good of seeing plenty of these little guys.

While you’re in Kaikoura, don’t miss your chance to try the seafood. It’s renowned for it!

After Kaikoura, other than driving taking longer than planned and running later than expected, things seemed to be going largely to plan. Well for the next two nights anyway!


Te Anau Glowworms

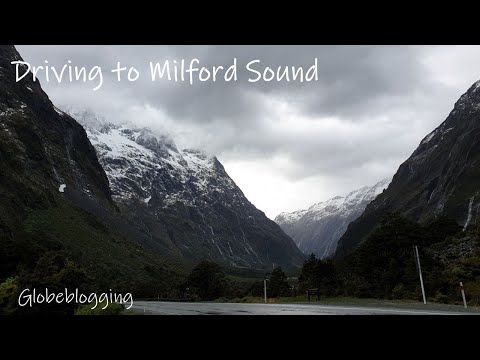
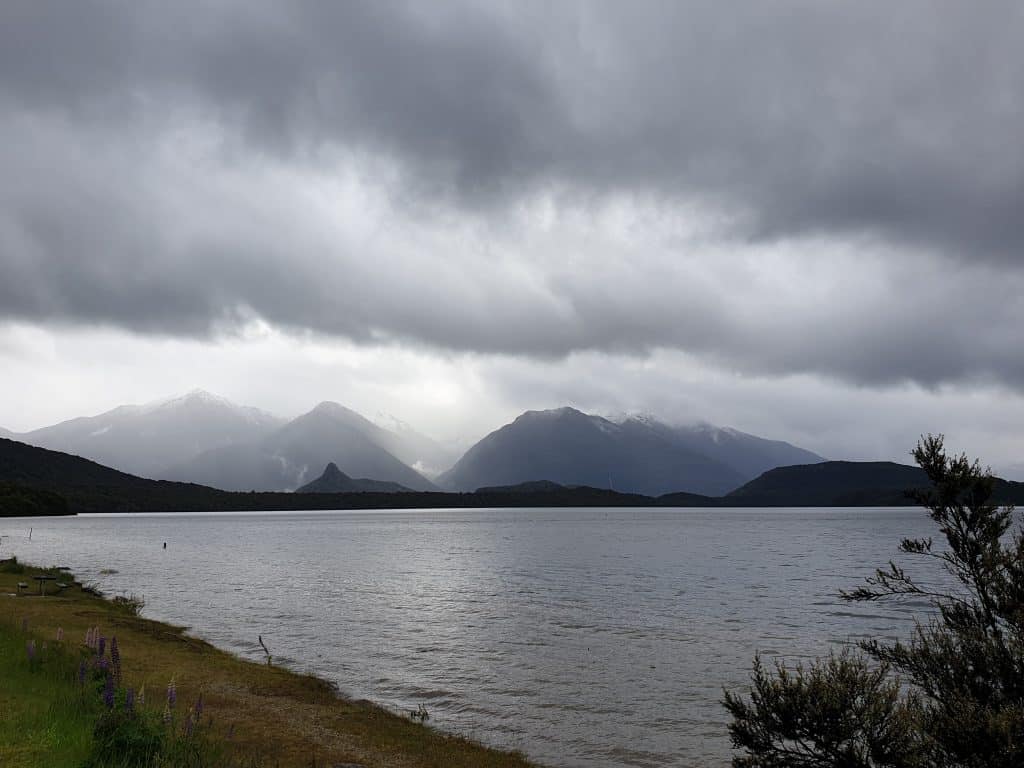
After a night in Christchurch and Dunedin, my next stop was in Te Anau. I’d chosen here for a couple of reasons, one of which as the launch point for a trip to Milford Sound the next morning. The other was for a famous Glowworm caving trip, which again I was very excited about.

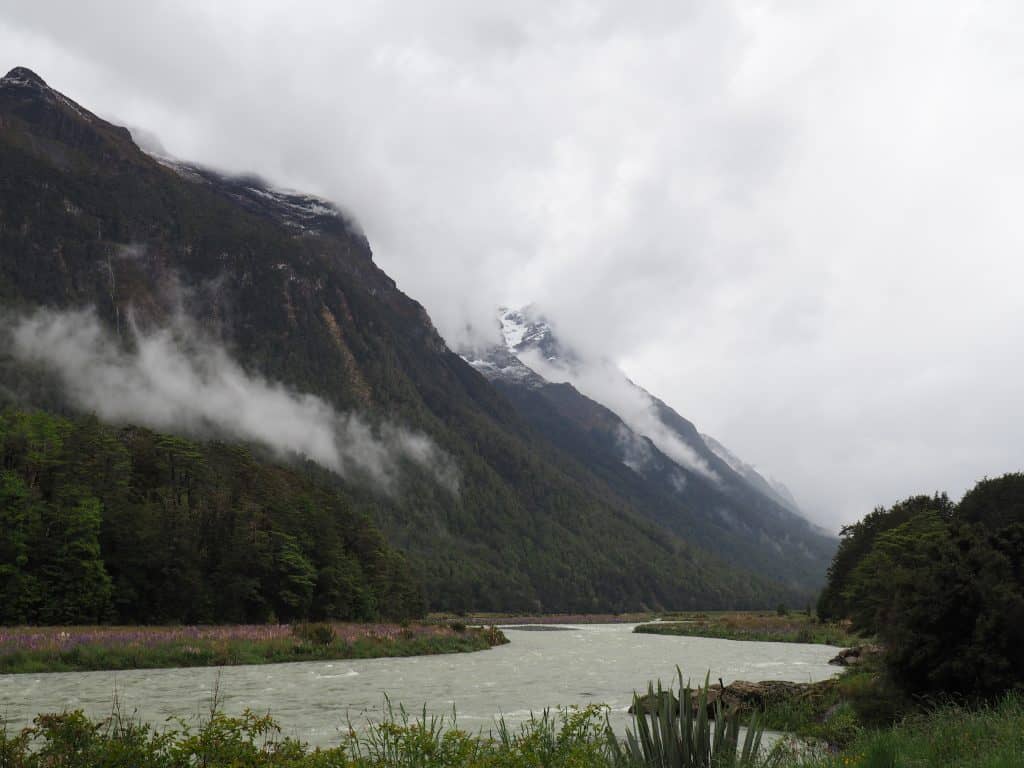
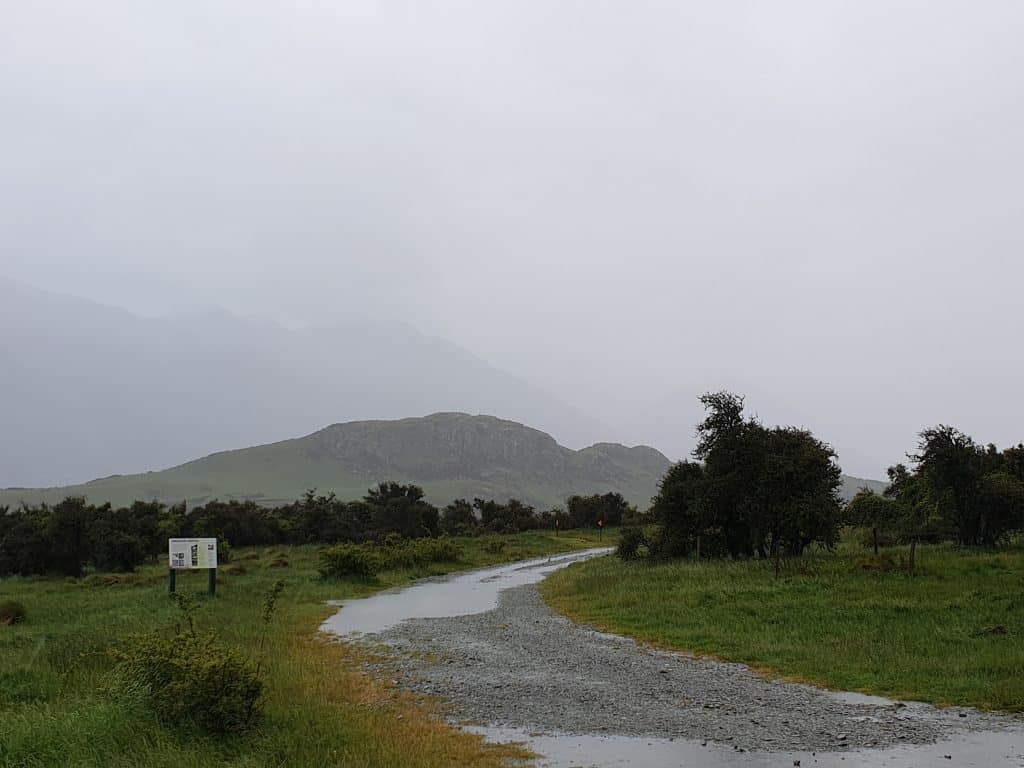
As I approached Te Anau the drizzle was constant, and when I arrived to check in the hostel they asked what my plans were. They told me the Glowworm trips for that night were cancelled as the cave had been flooded with all the rain and offered me the phone to call and confirm. They also weren’t confident I’d be making it through to Milford Sound the next day either as it was often closed due to wet weather.

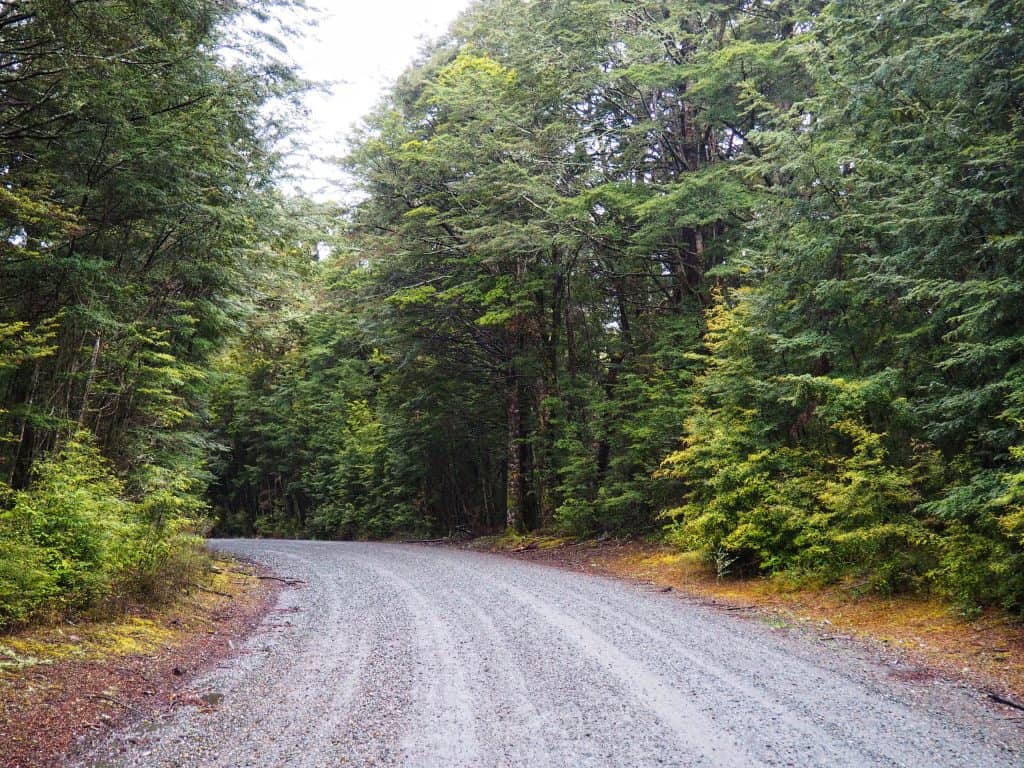
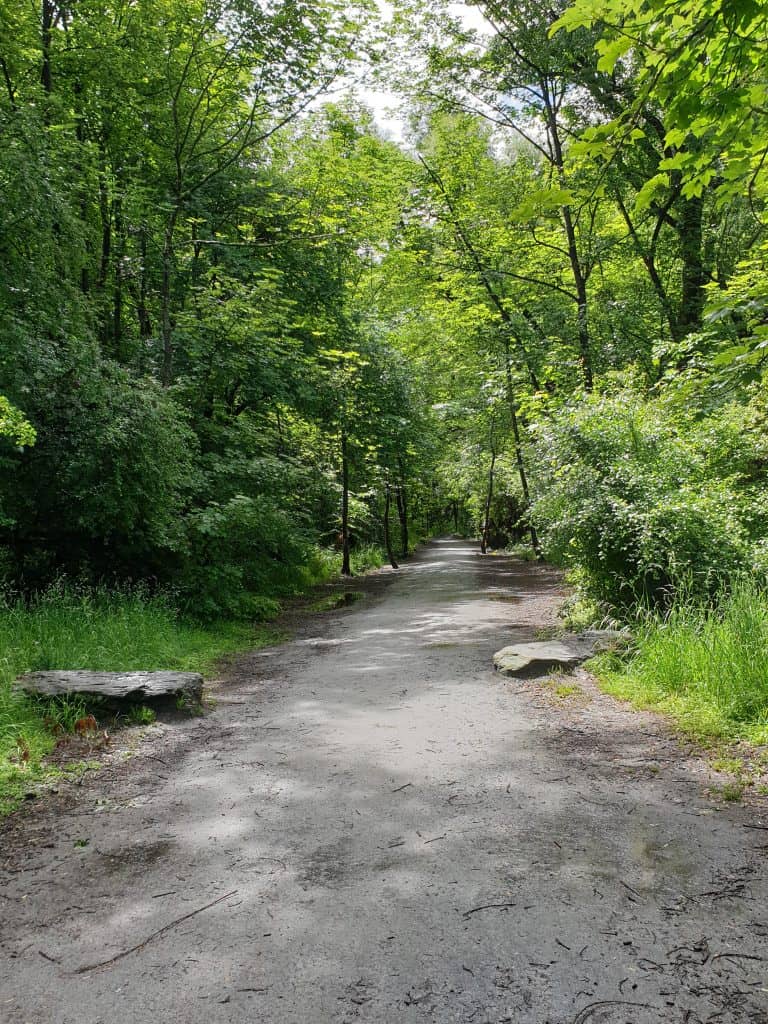
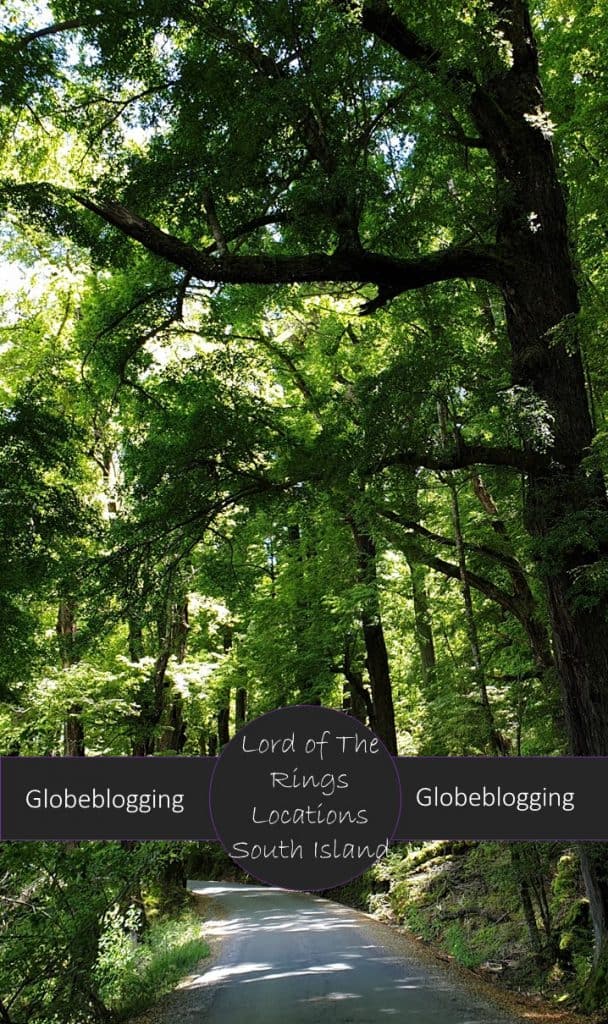
I ended up heading out in search of a couple of nearby Lord of the Rings locations and heading to bed to shake an impending migraine.

The next morning everything was still wet, but at least for the moment it seemed to have stopped raining.

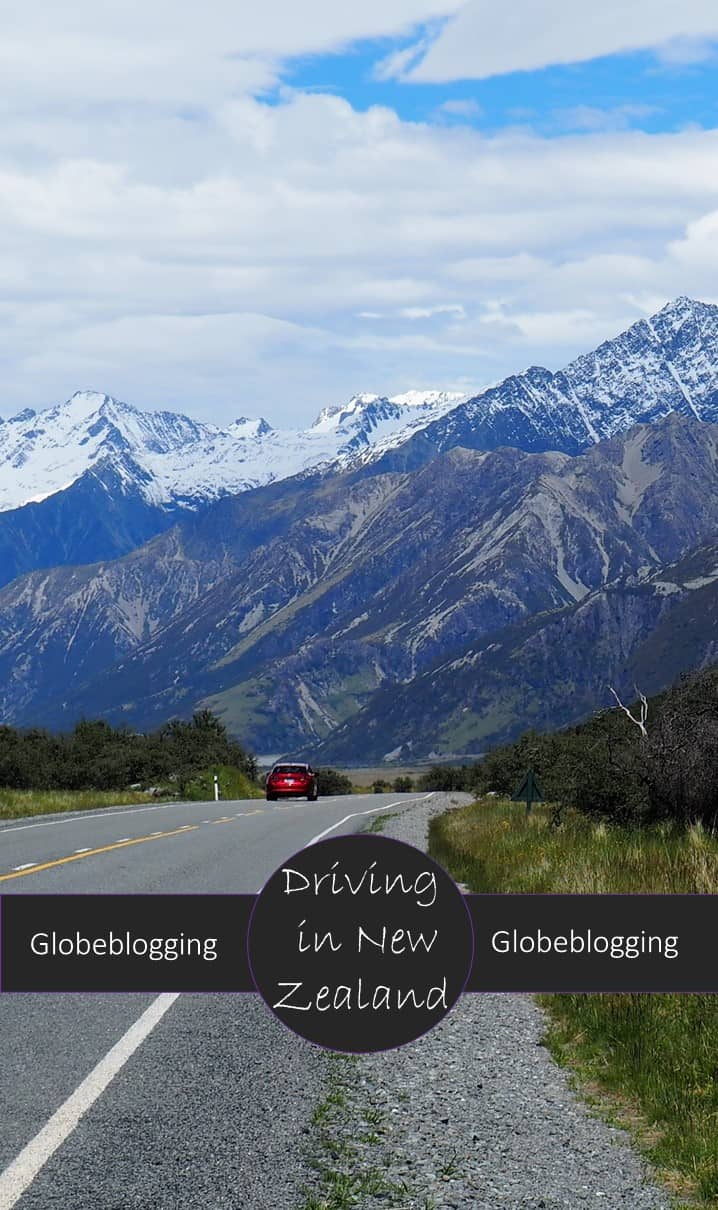
I checked the road status and it appeared that at least for the time being, the one road down to Milford Sound was indeed open. If you’re driving in New Zealand keep an eye on the site for the NZ Transport Agency for up to date information on road closures and conditions.

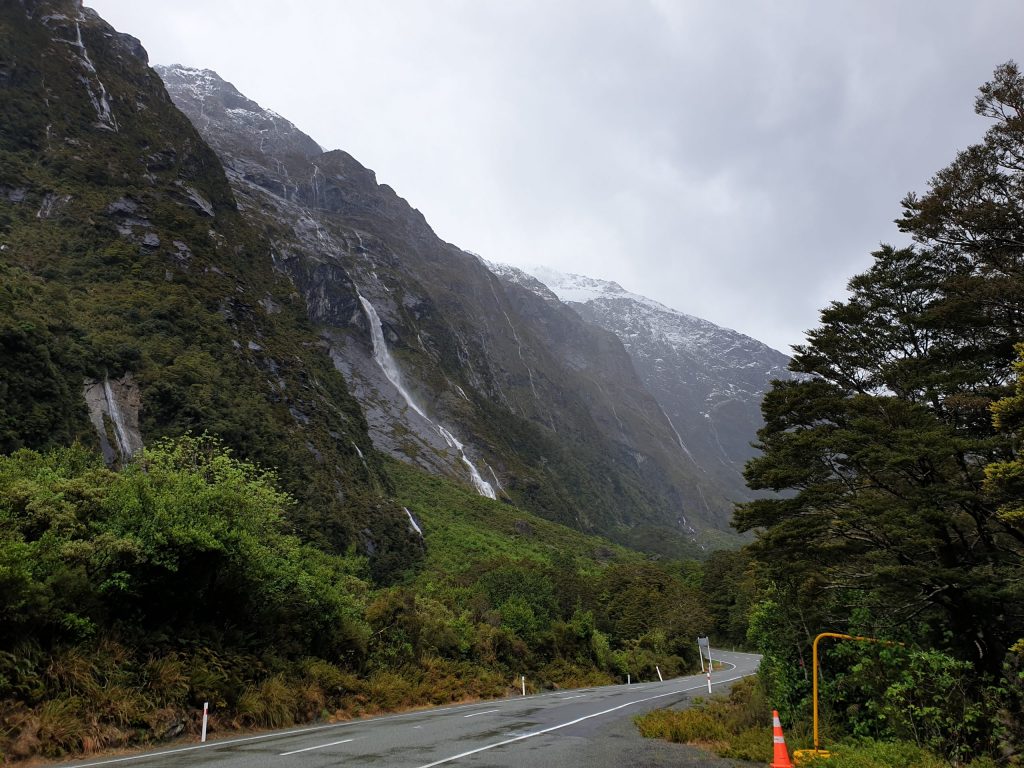
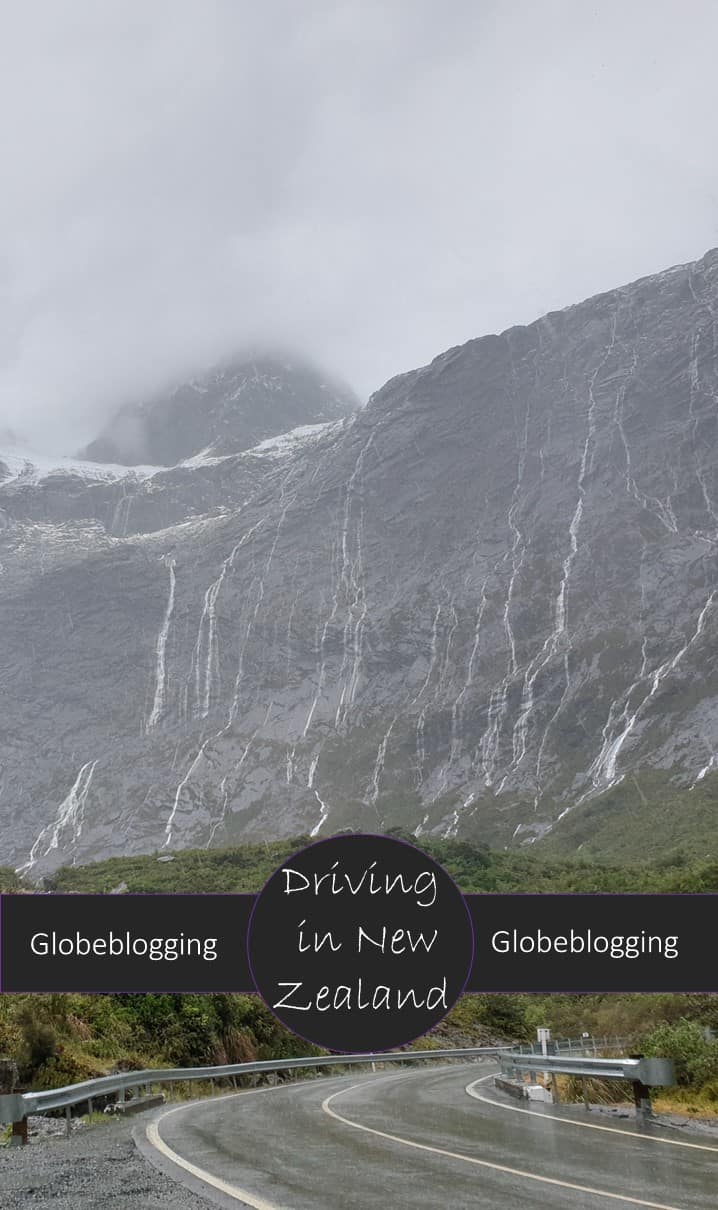
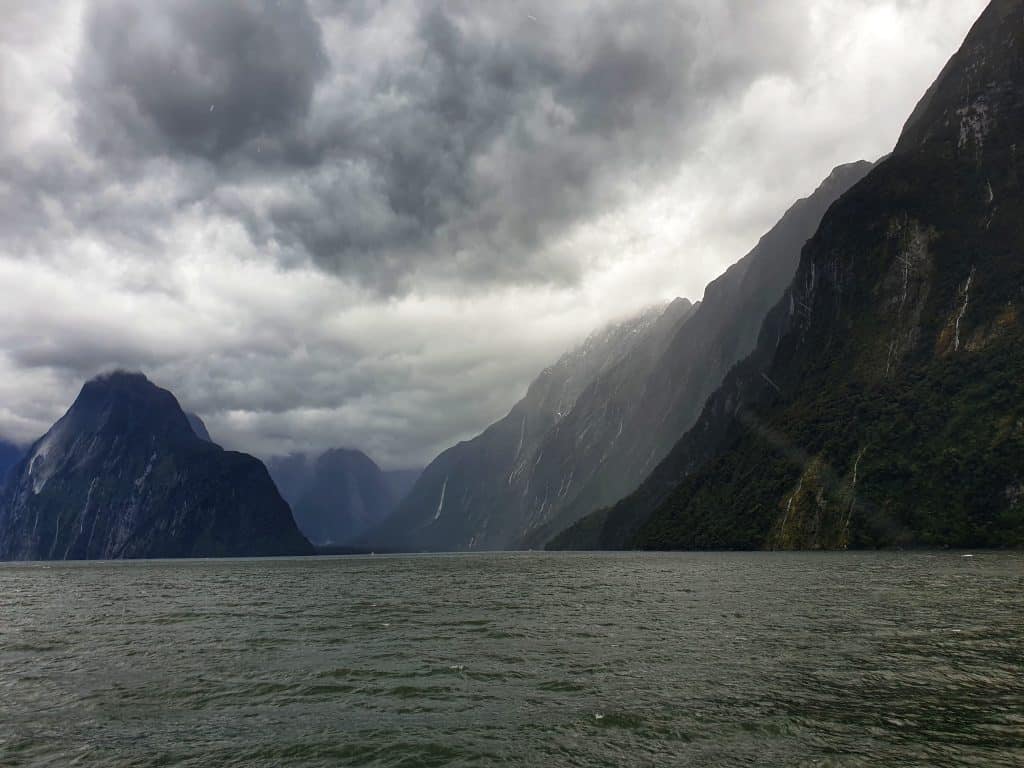
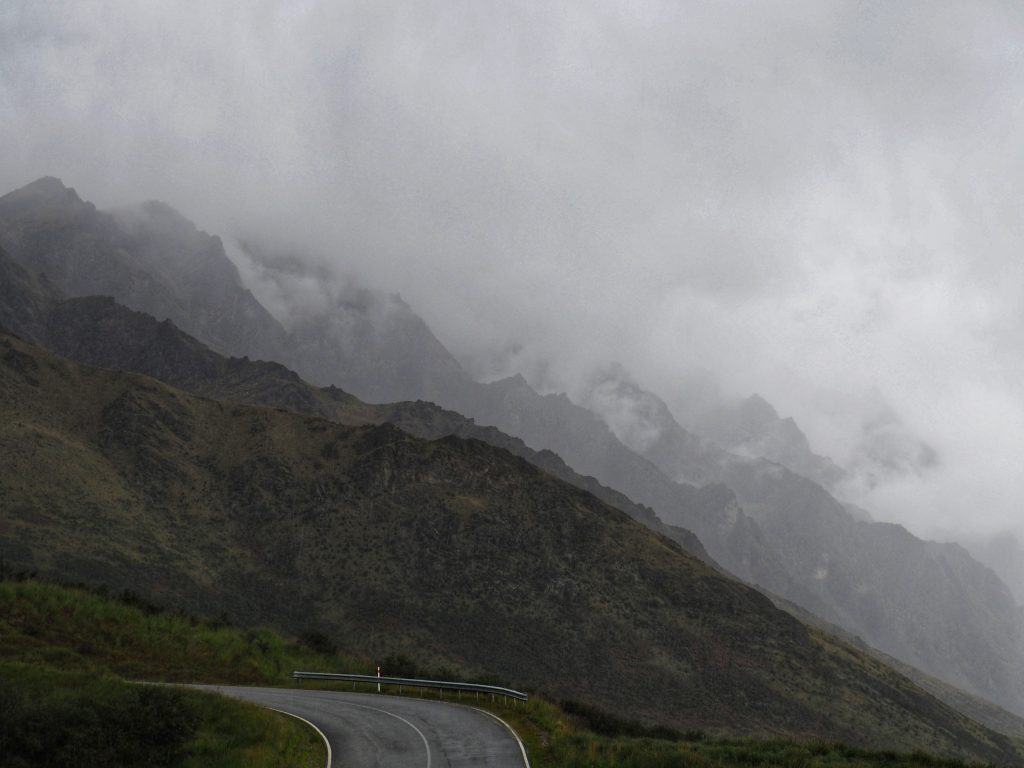
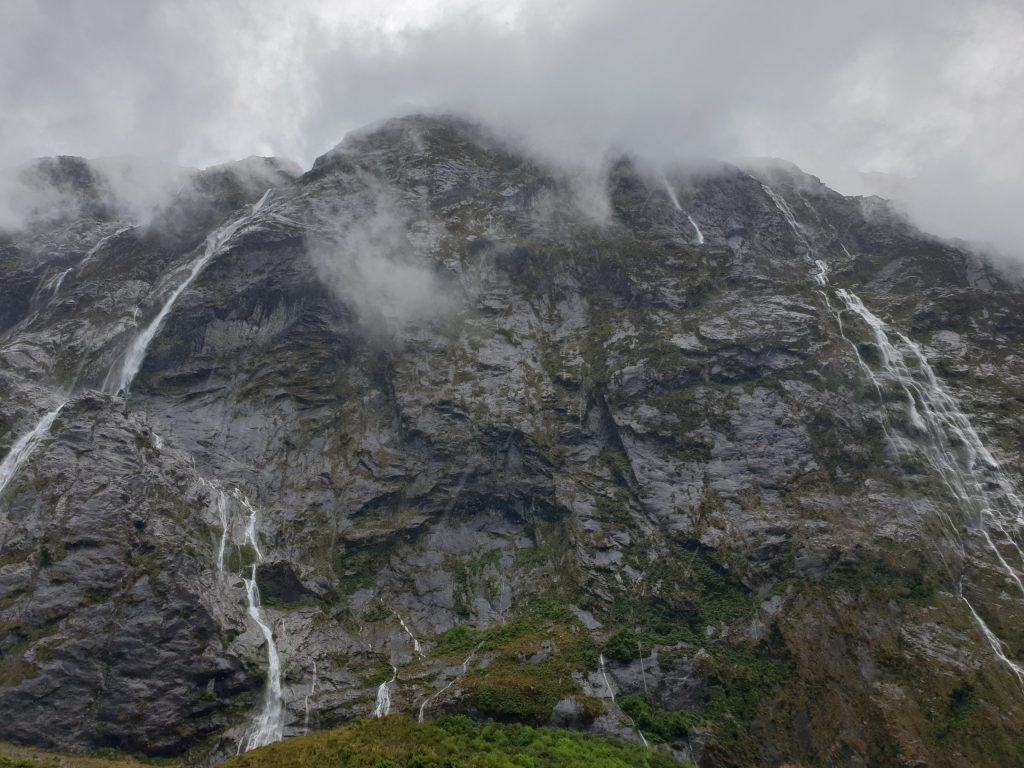
Now Milford Sound is pretty much the wettest place in New Zealand, so realistically you are almost guaranteed to get rain. On the other hand it does add to the atmosphere though!

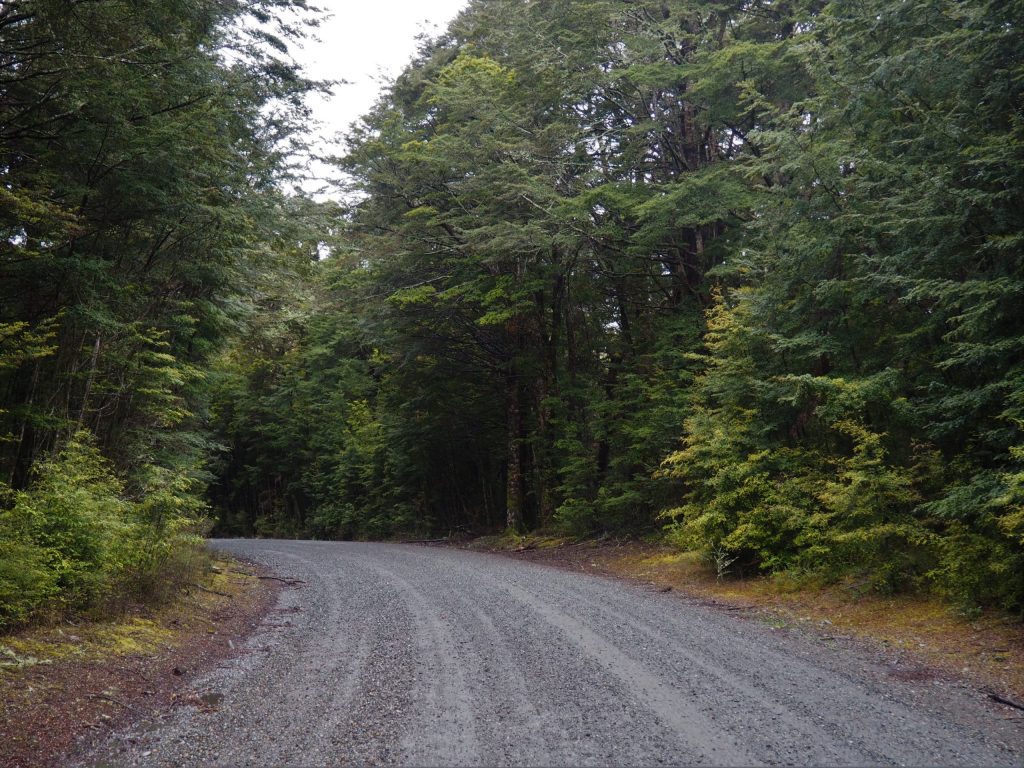
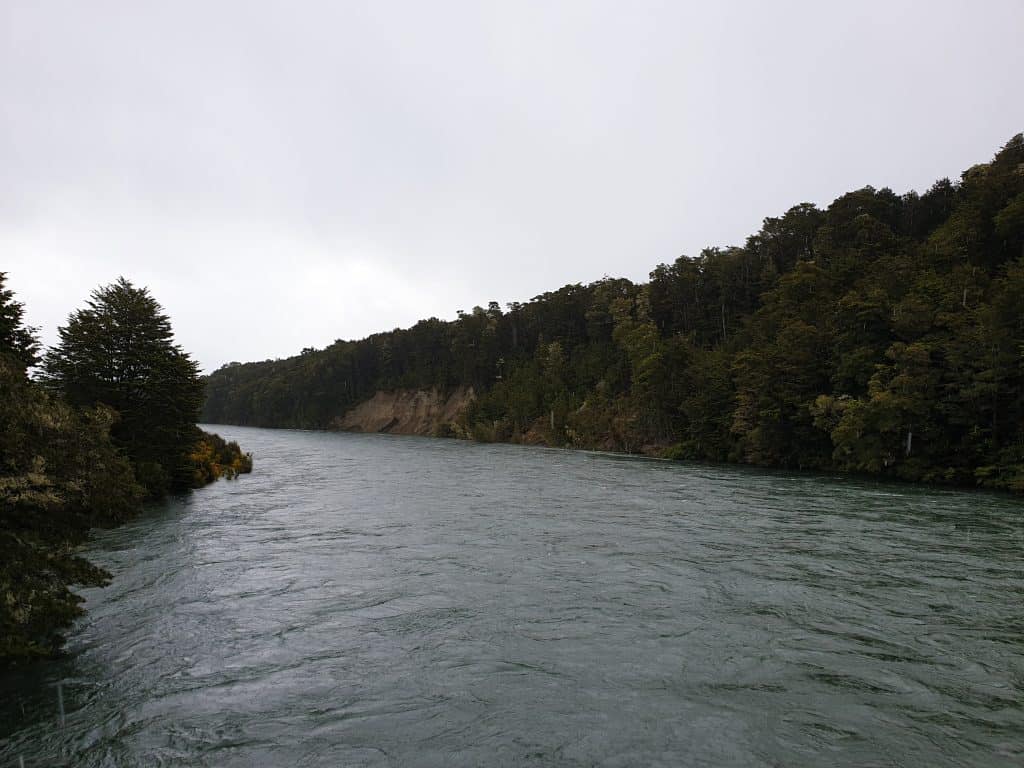
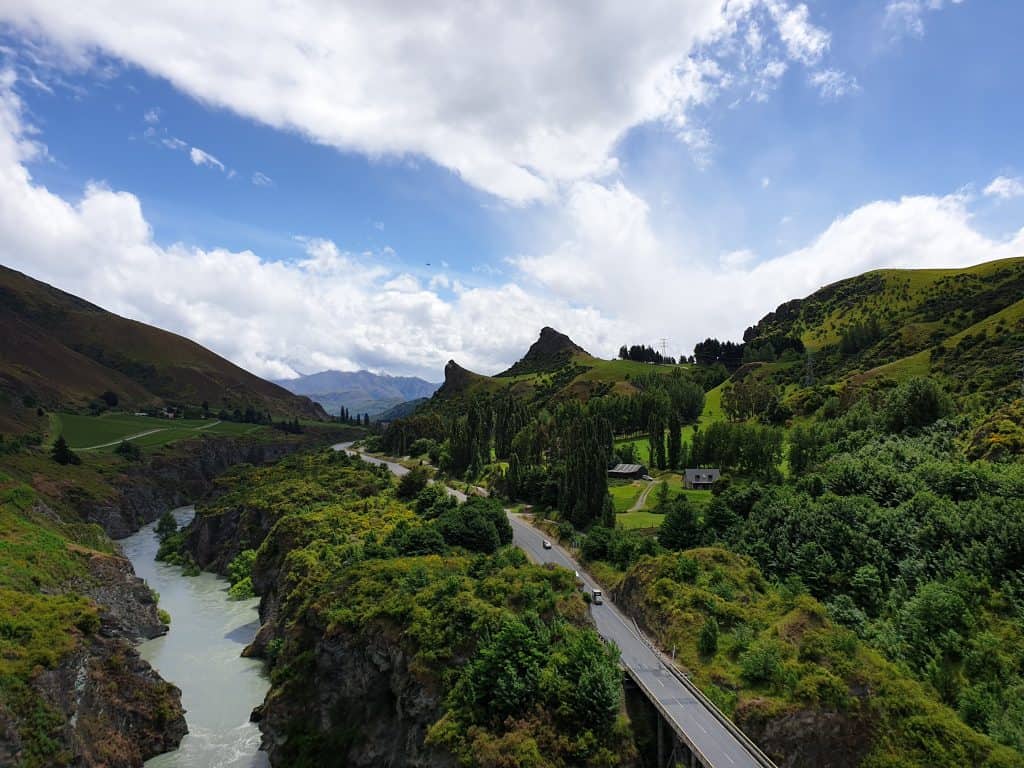
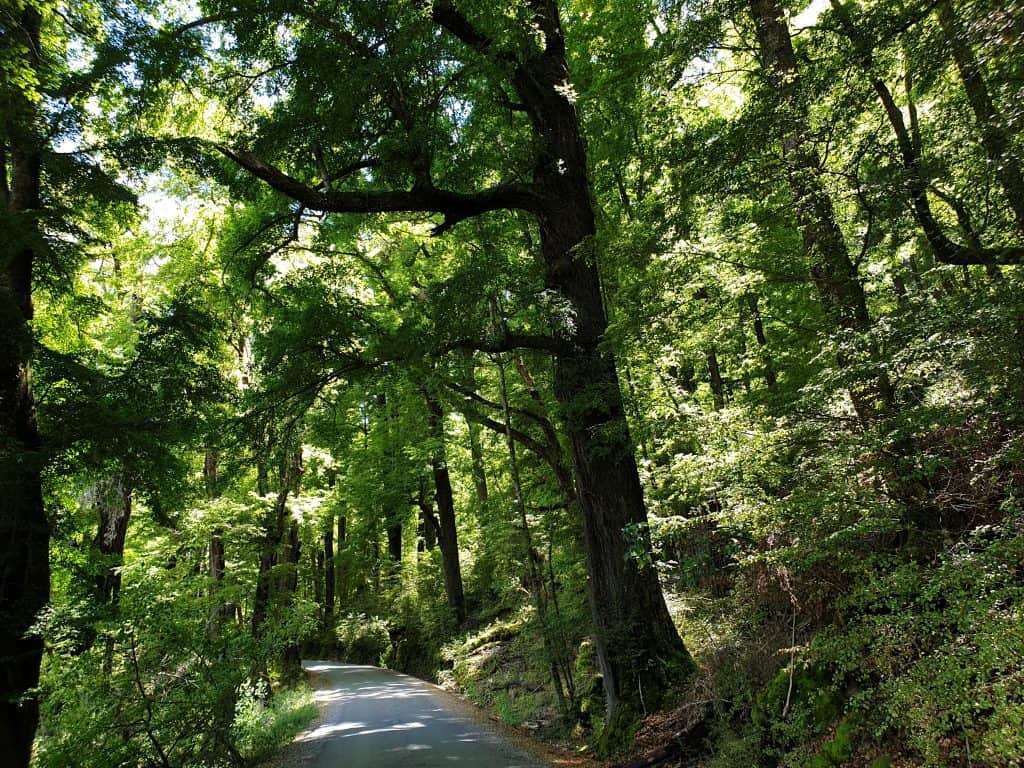
As with a few other places in New Zealand, there is one road down to Milford Sound. Now while you can absolutely hop on a tour and be driven down there, it also happens to be one of the most spectacular drives I’ve ever done and its one you’ll want to stop along the way to ogle at the scenery so I would recommend self-driving if you can. The road takes you down through mountains which means rain inevitably ends up on the road. I saw first hand the diligence they apply to road maintenance, with crews on many of the bends or particularly wet parts of the road monitoring the conditions.

Water running down the cliff towards the road on the drive to Milford Sound
Now I was lucky on the day of my trip to Milford Sound. Despite the likelihood of running into problems I was able to get in and out with no issues and had a great Milford Sound cruise. It was my next stop that my travel plans would require some serious adjustments.


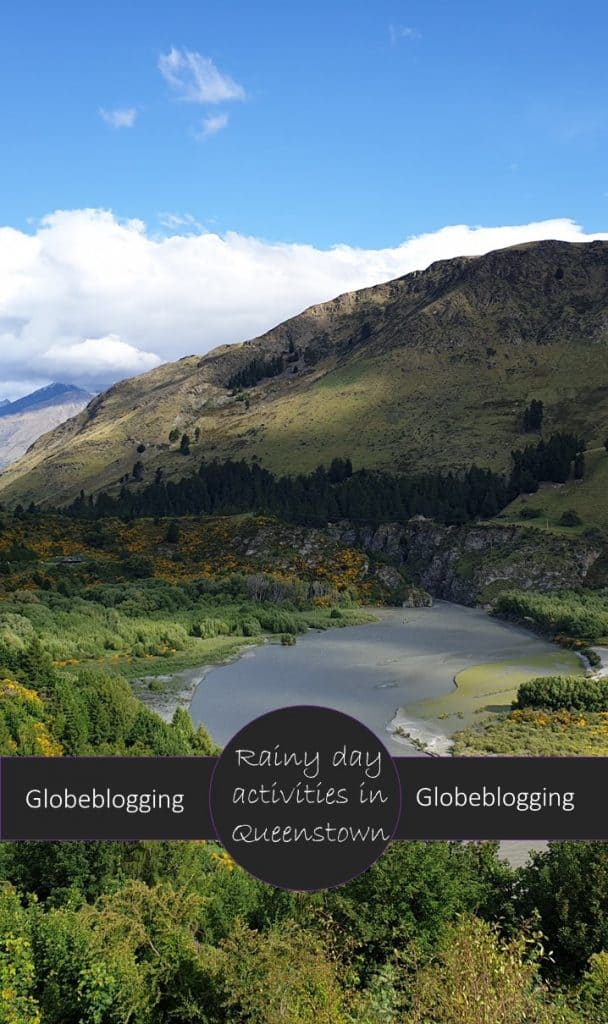
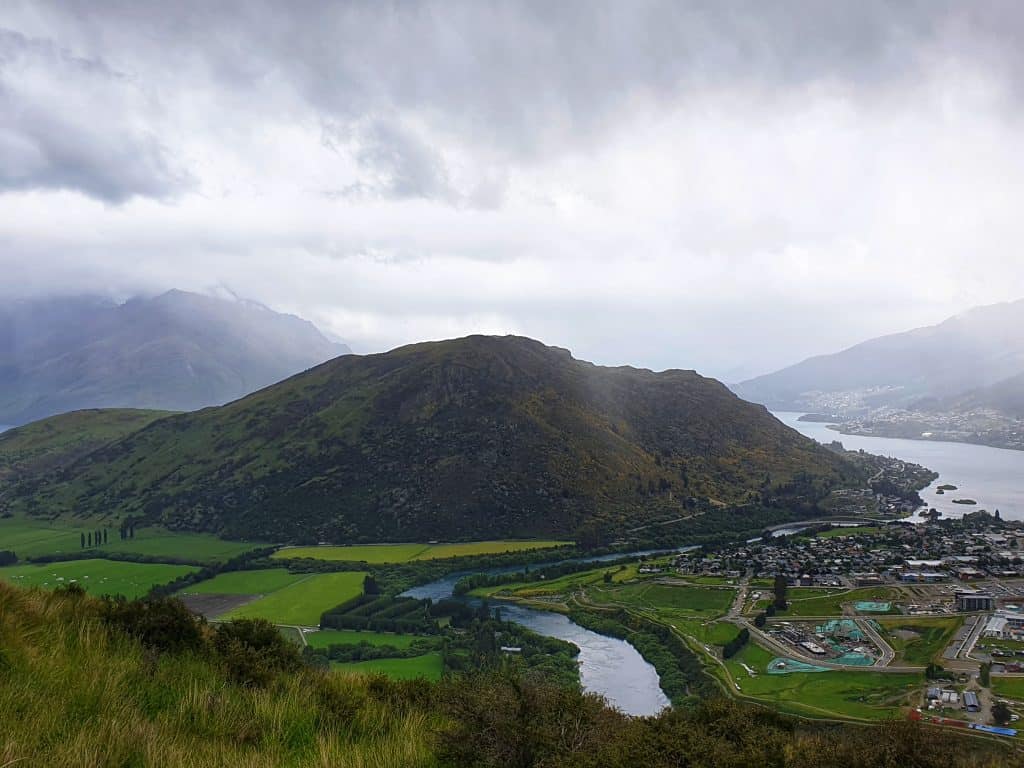
When its raining in Queenstown

Now I know so far this probably seems like mostly a painful inconvenience, but it gets worse!

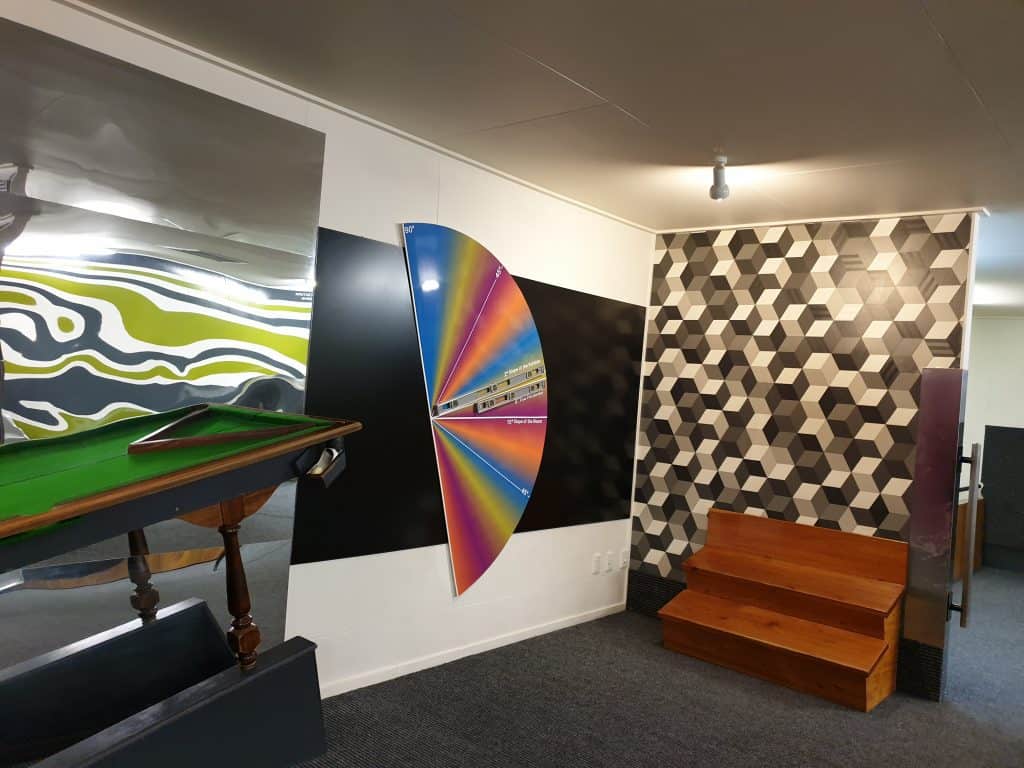
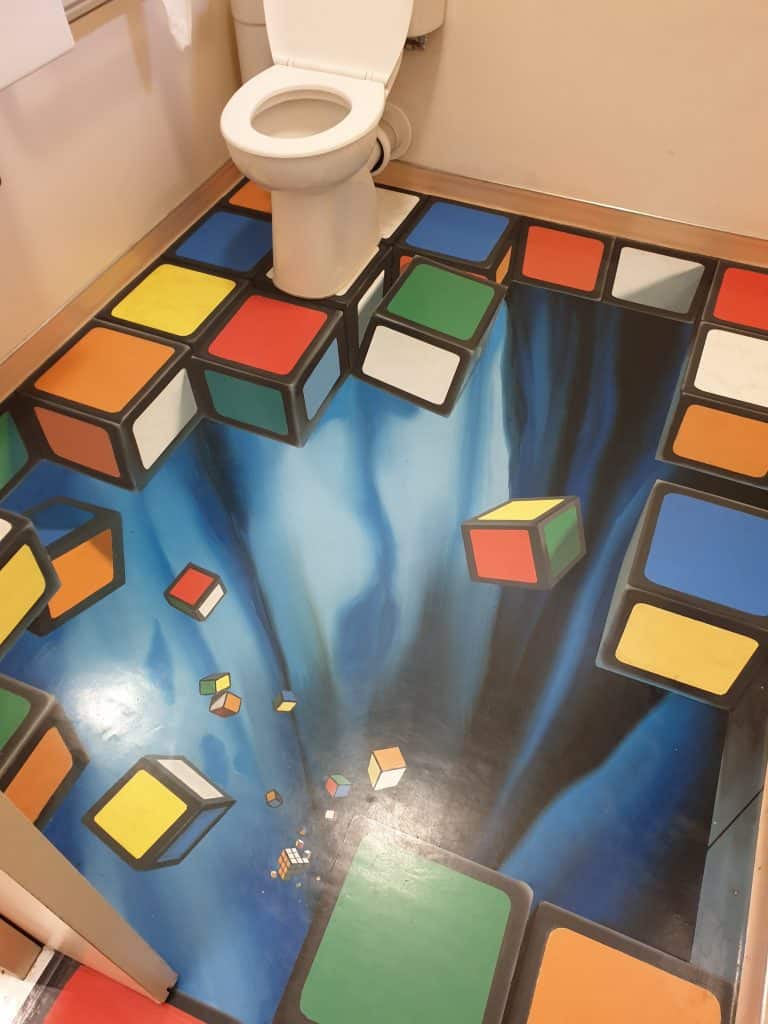
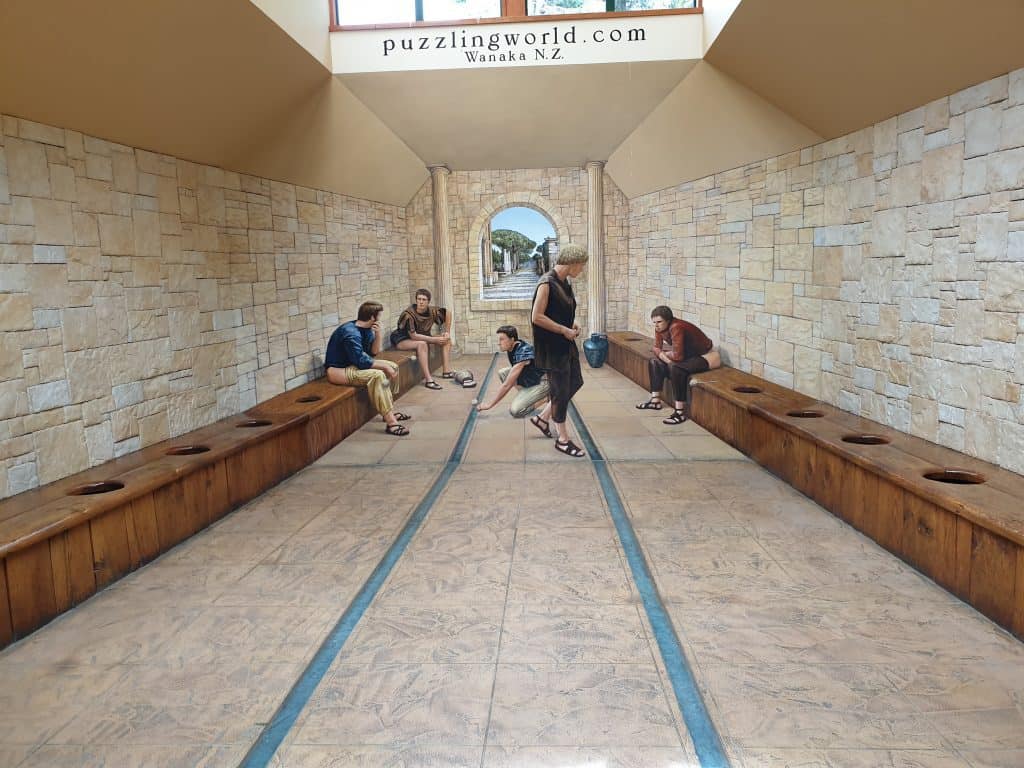
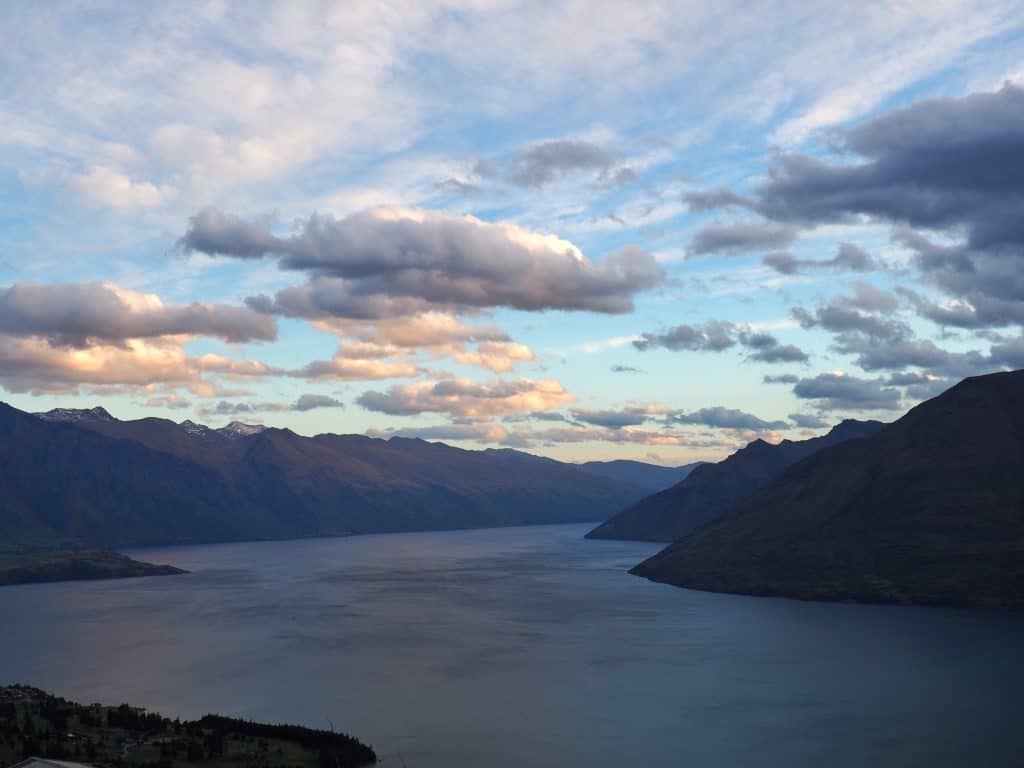
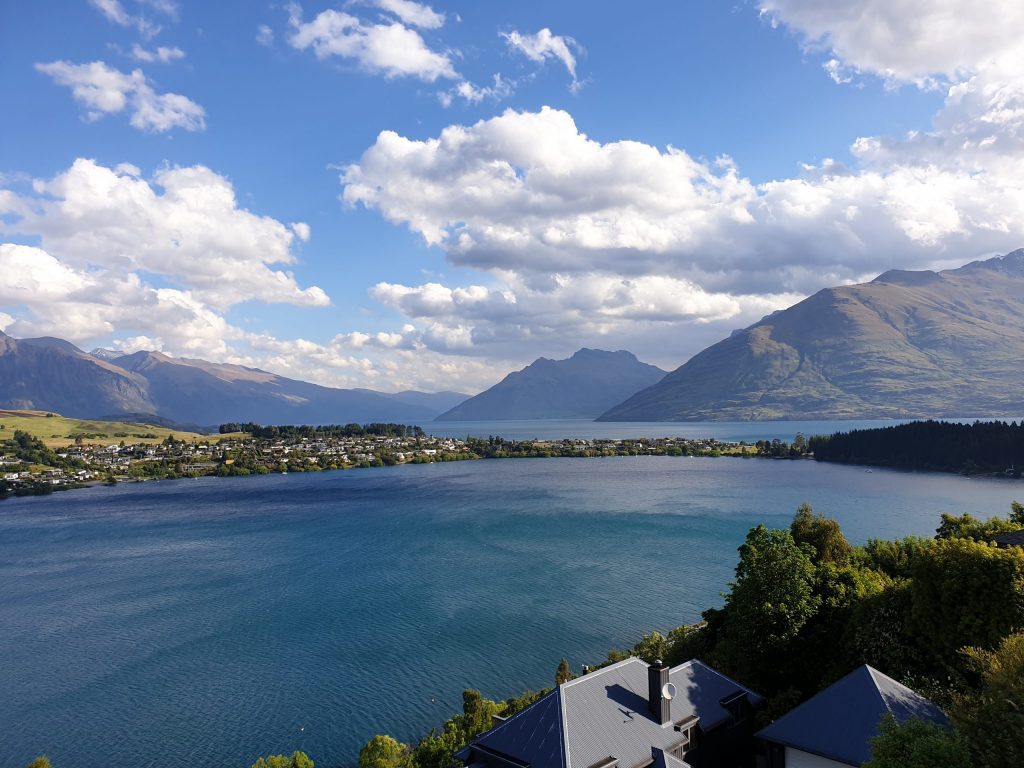
I spent three nights in Queenstown, the longest stay in a location for the whole of the trip. There were times I was squeezing in activities in the breaks in the weather, while others I just had to find and embrace the things to do in Queenstown when it rains.

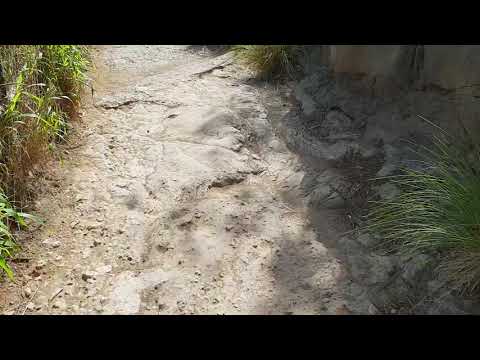
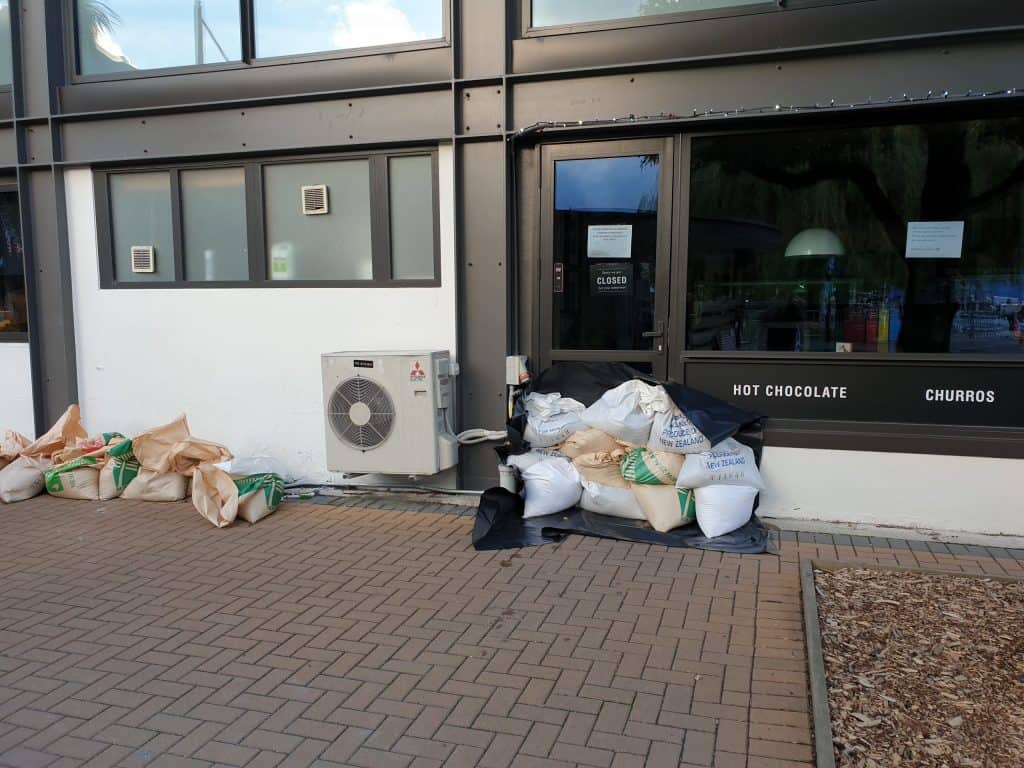
Meanwhile, the stairs leading down to Lake Wakatipu were underwater and the lake was mere inches from overflowing.

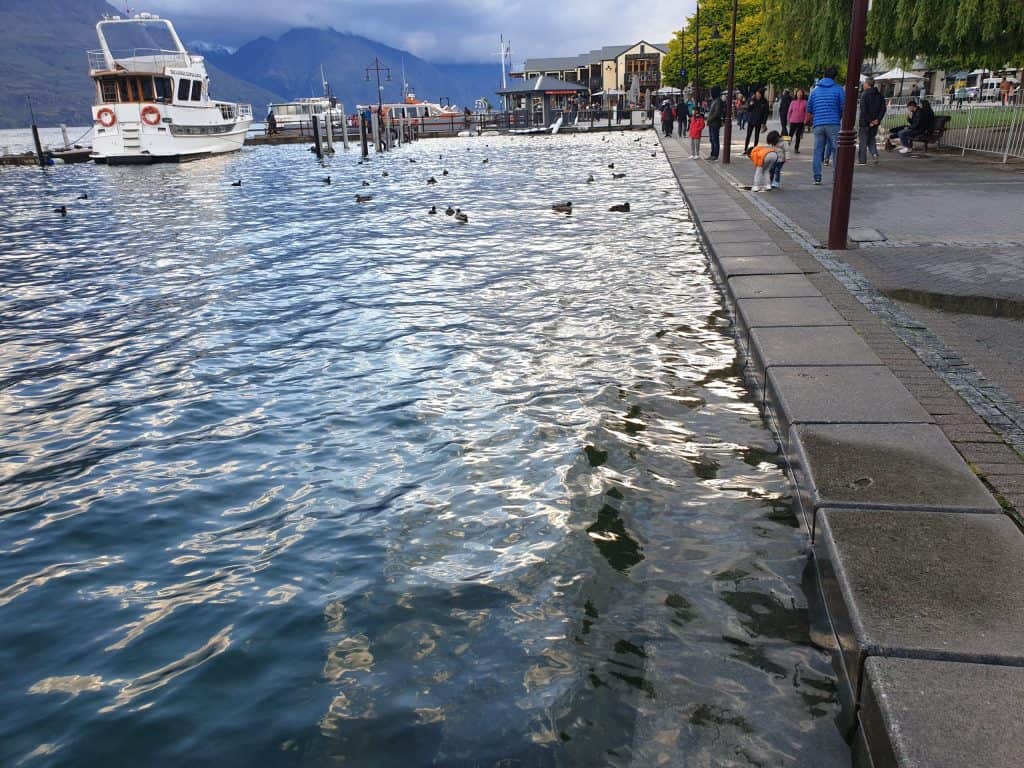
Along the edge of the lake the stores were closed and sandbagged ready.

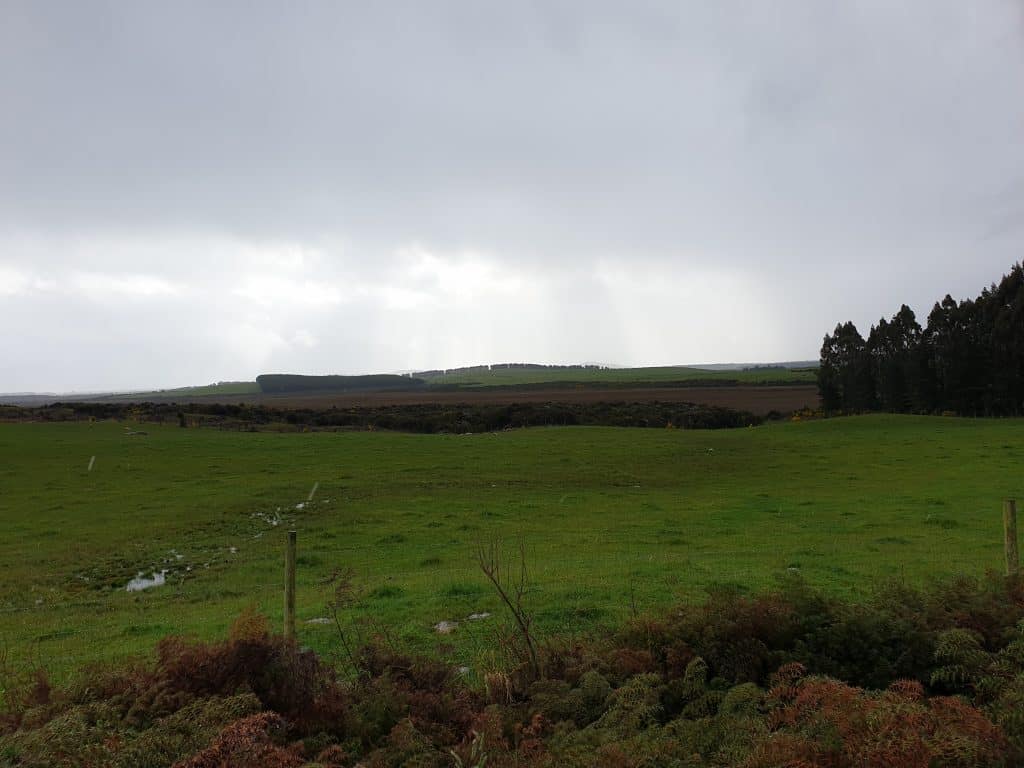
The next destination on my planned route was the Franz Josef Glacier, via the Haast Pass, before carrying on to Greymouth and then crossing the Canterbury plains back to Christchurch for my flight home. I had one final night unplanned and was tossing up whether I spent it on the plains and doing some hiking, or whether I returned to Christchurch to be ready for my flight the following afternoon.

Remember how I mentioned there are a few places in New Zealand where there is just one road. Well the road between Queenstown and Franz Josef is another example. I’d now learned of the importance of checking the status of roads, and discovered the morning after I arrived in Queenstown that the road was closed. It wasn’t flooded, instead all the water had caused a landslide which was now covering the road! Not only that but the status of the road from Franz Josef was shaky too, pardon the pun.

I checked the road status regularly, hoping for a miracle. None arrived. Instead I was faced with having to cancel the next leg of my trip, and find a new way back to Christchurch.

Even now looking back it surprises me how chill I was about all of this, given I tend to like things going according to a plan and I was now having to throw out the plan.

There wasn’t just a new route to find, there was accommodation to find along a new route, and cancelling tours and accommodation which had been both booked and paid for, and attempting to get these refunded.


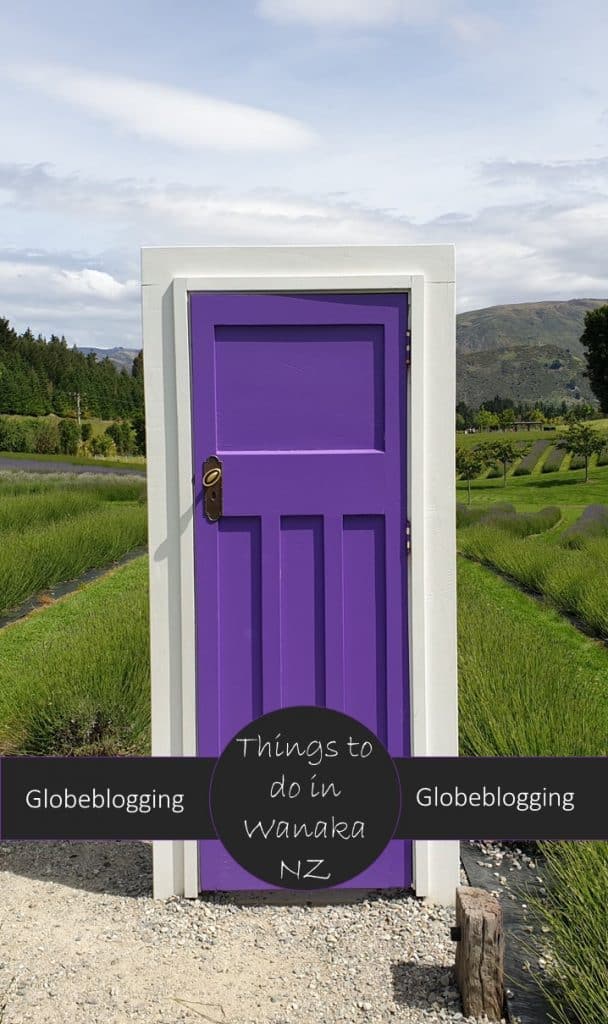
Car trouble in Glenorchy

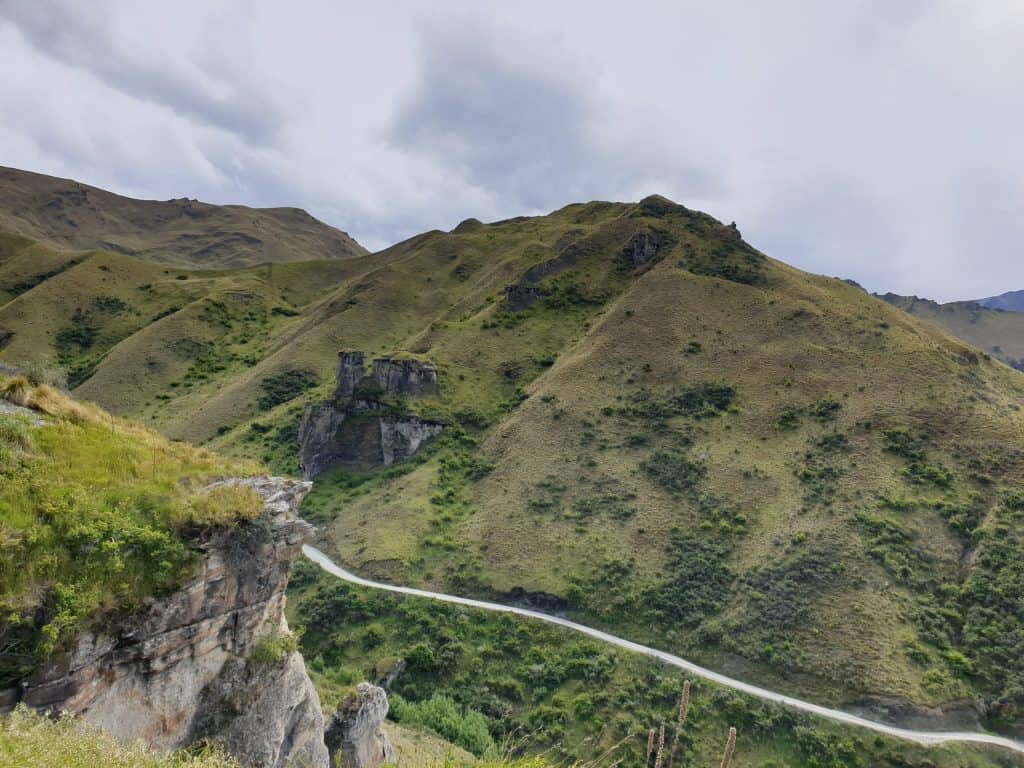
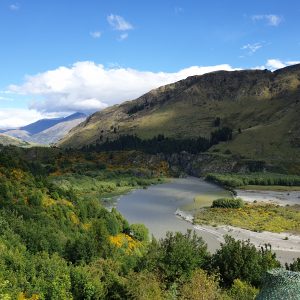
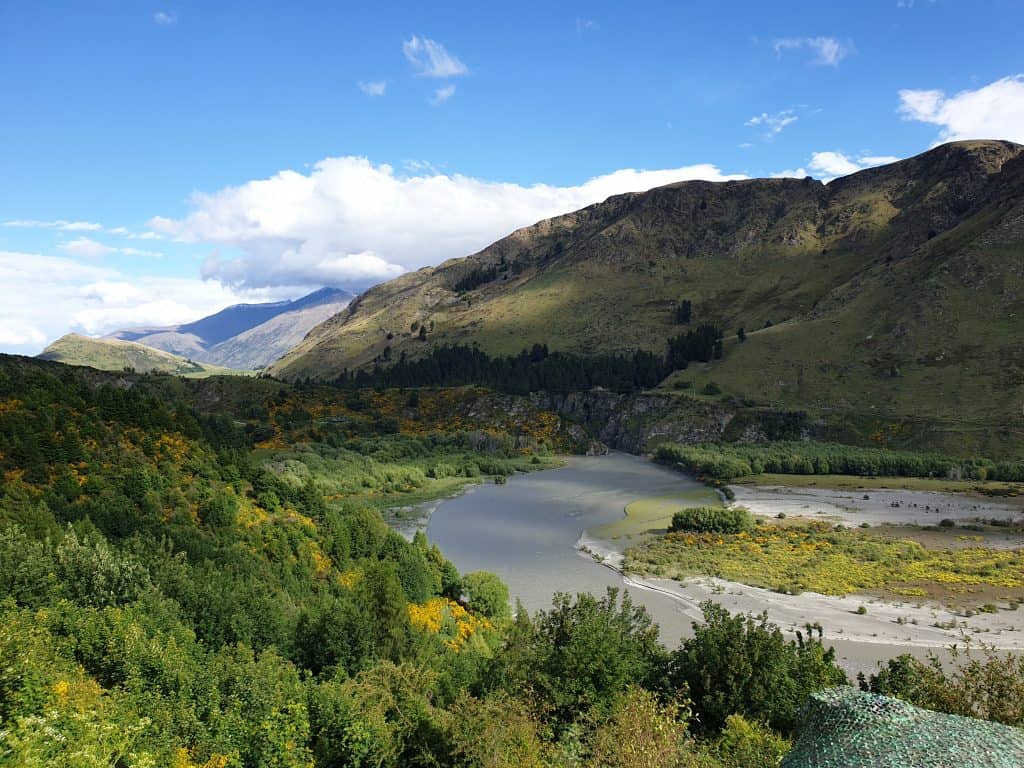
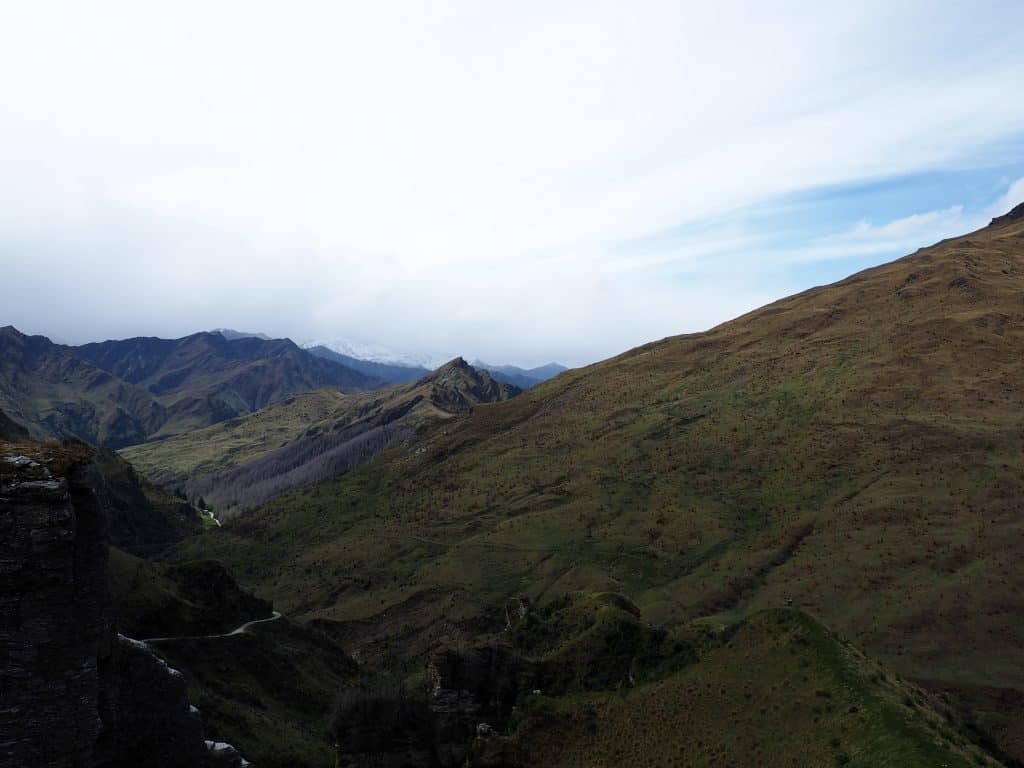
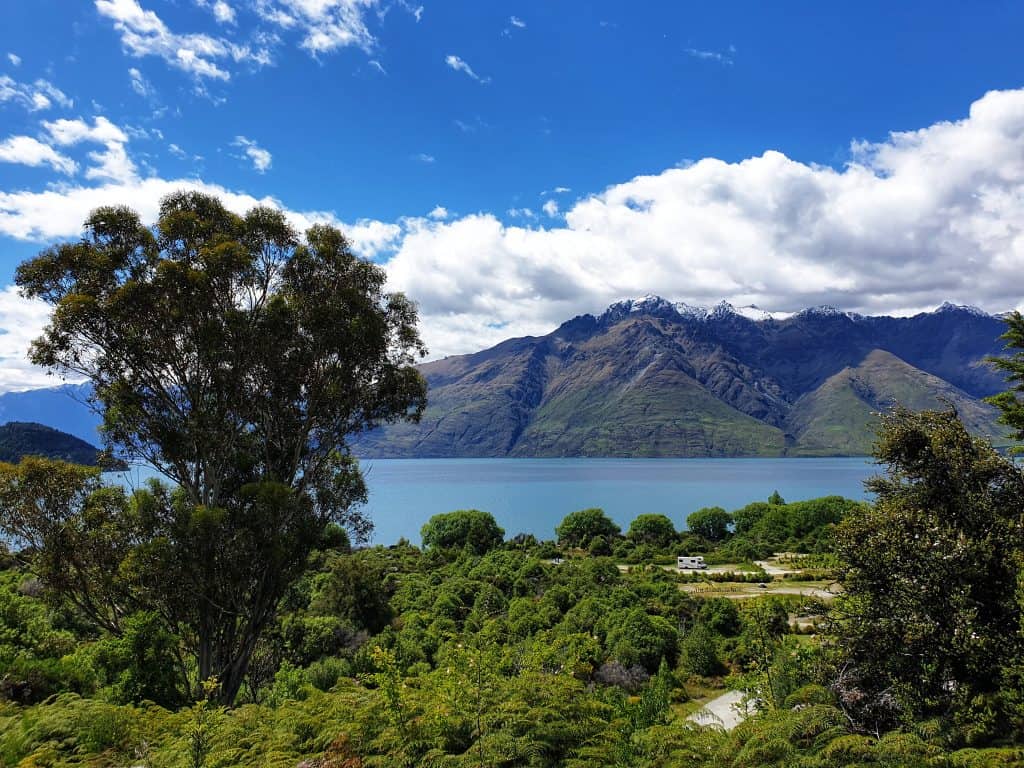
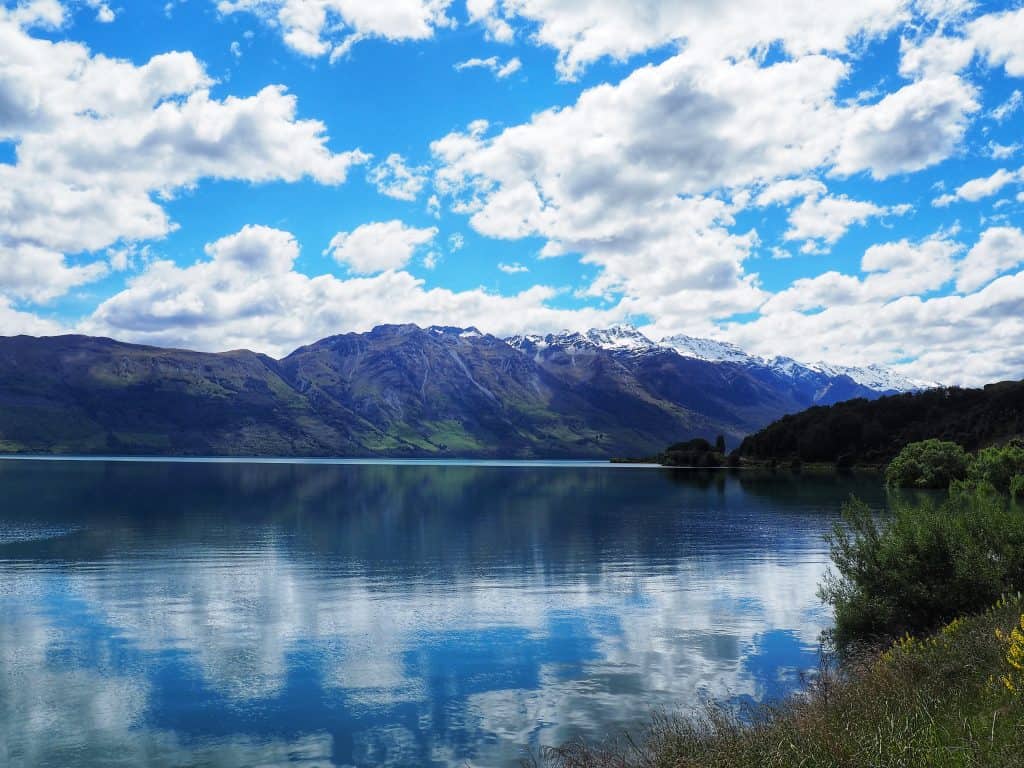
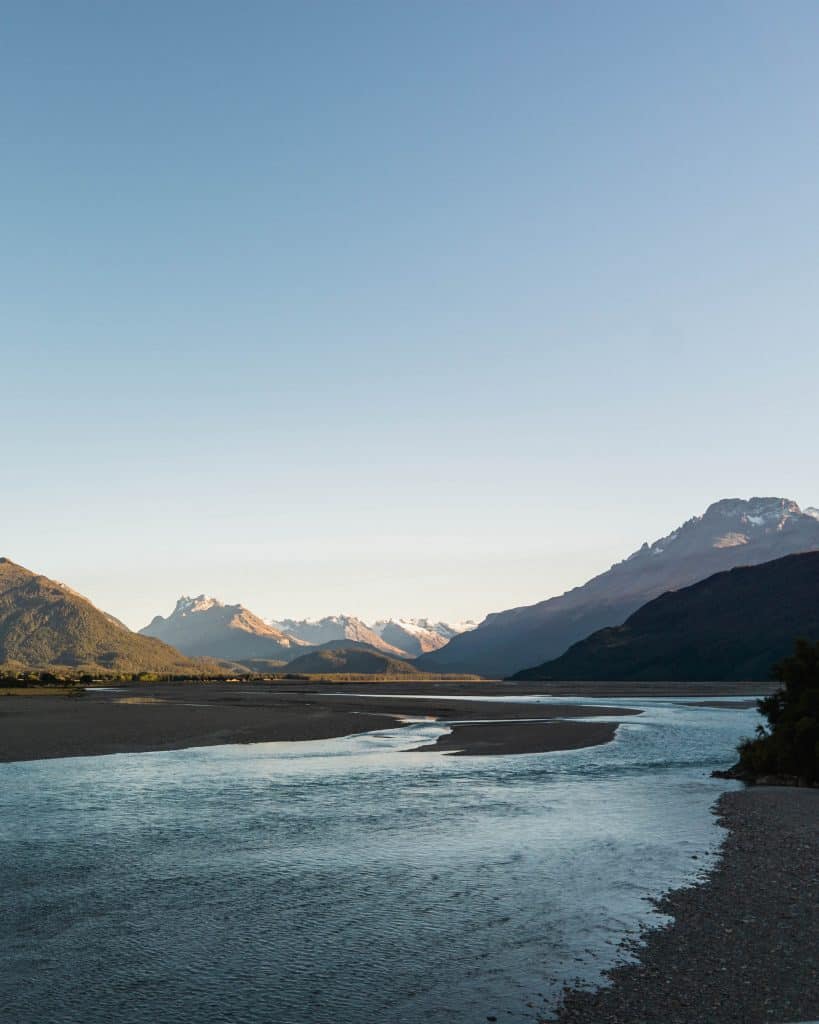
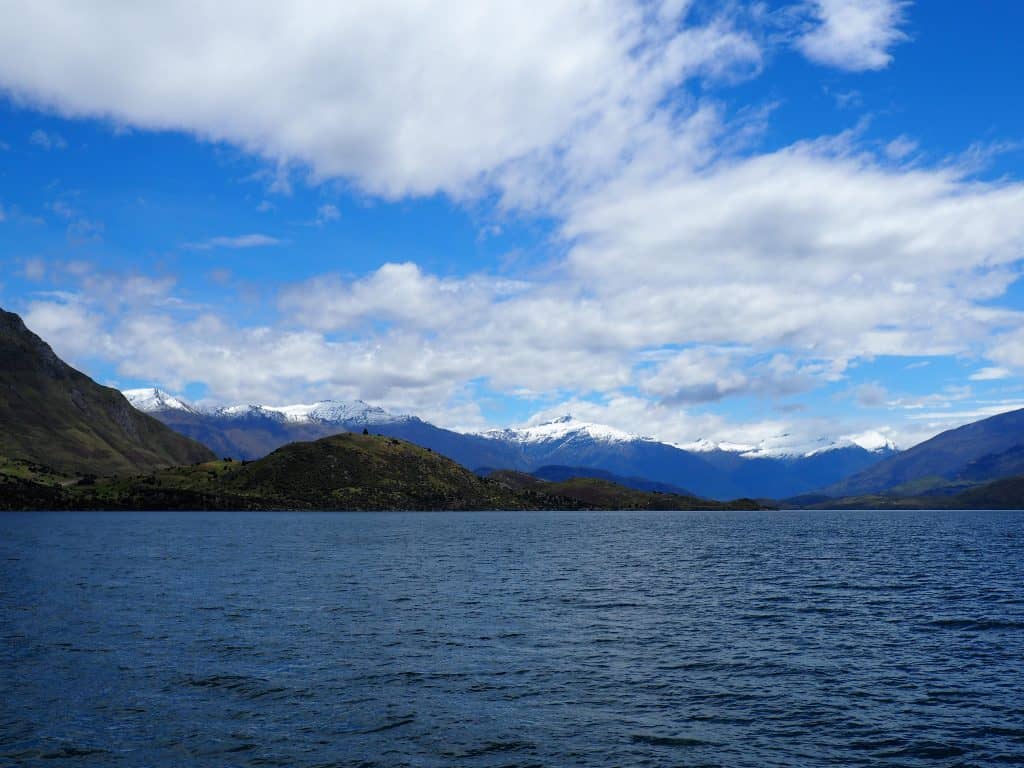
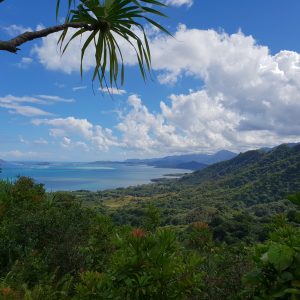
A few people had mentioned Wanaka as being worth the visit. It was along an inland route and only a little over an hour from Queenstown, so it also afforded me the opportunity to drive around Lake Wakatipu out to Glenorchy, a really stunning drive which I would not have had the time to do if I had been driving to Franz Josef as planned. By now the weather had largely cleared and it was a fabulous day for the picturesque route.

And the view from Glenorchy is just as stunning!

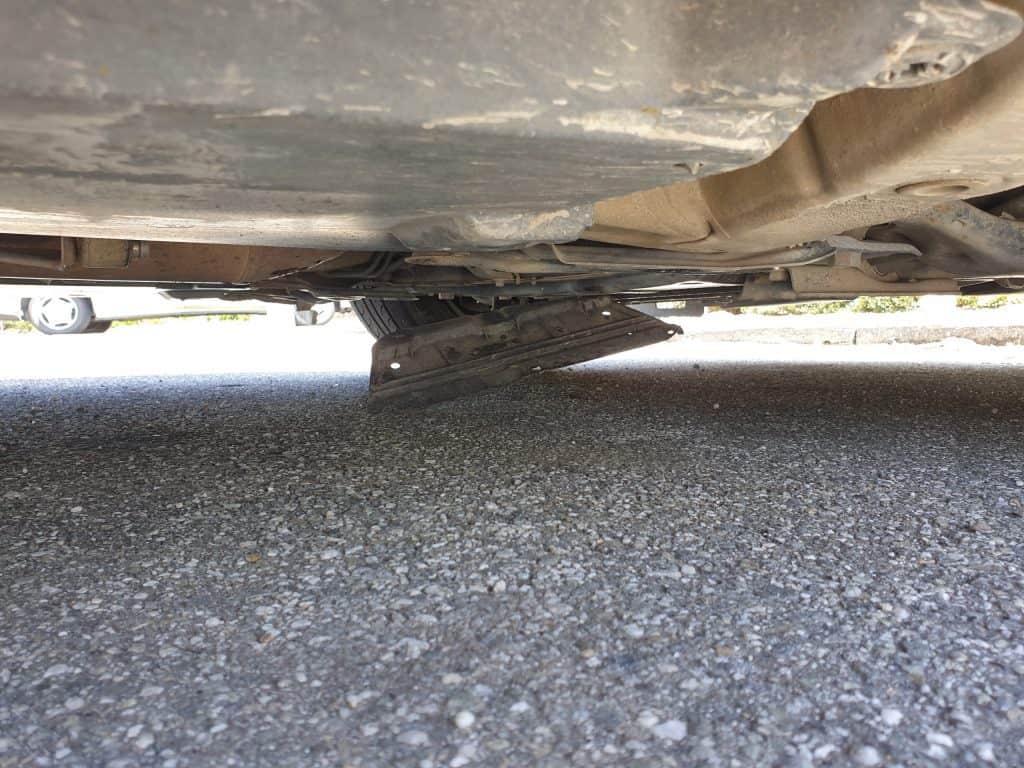
Someone who had been driving behind me for a while approached me in town to tell me that there was a piece of my car hanging down. Now I’ve had a few rentals in my time and this was a first for me! Thinking that was all I needed I rang the rental company (and I have no hesitation recommending Apex rentals by the way) and they asked me to send them photos so that they could assess. So here I was lying on my stomach in a carpark in Glenorchy photographing the undercarriage of my car! After seeing the photos the company called me back and said the mechanic had reviewed my photos and it was nothing to worry about, it was just a protective cover that had come loose and I was good to proceed. I became acutely aware of a scraping noise from under the car after that, realising that I’d actually been hearing it for a while.


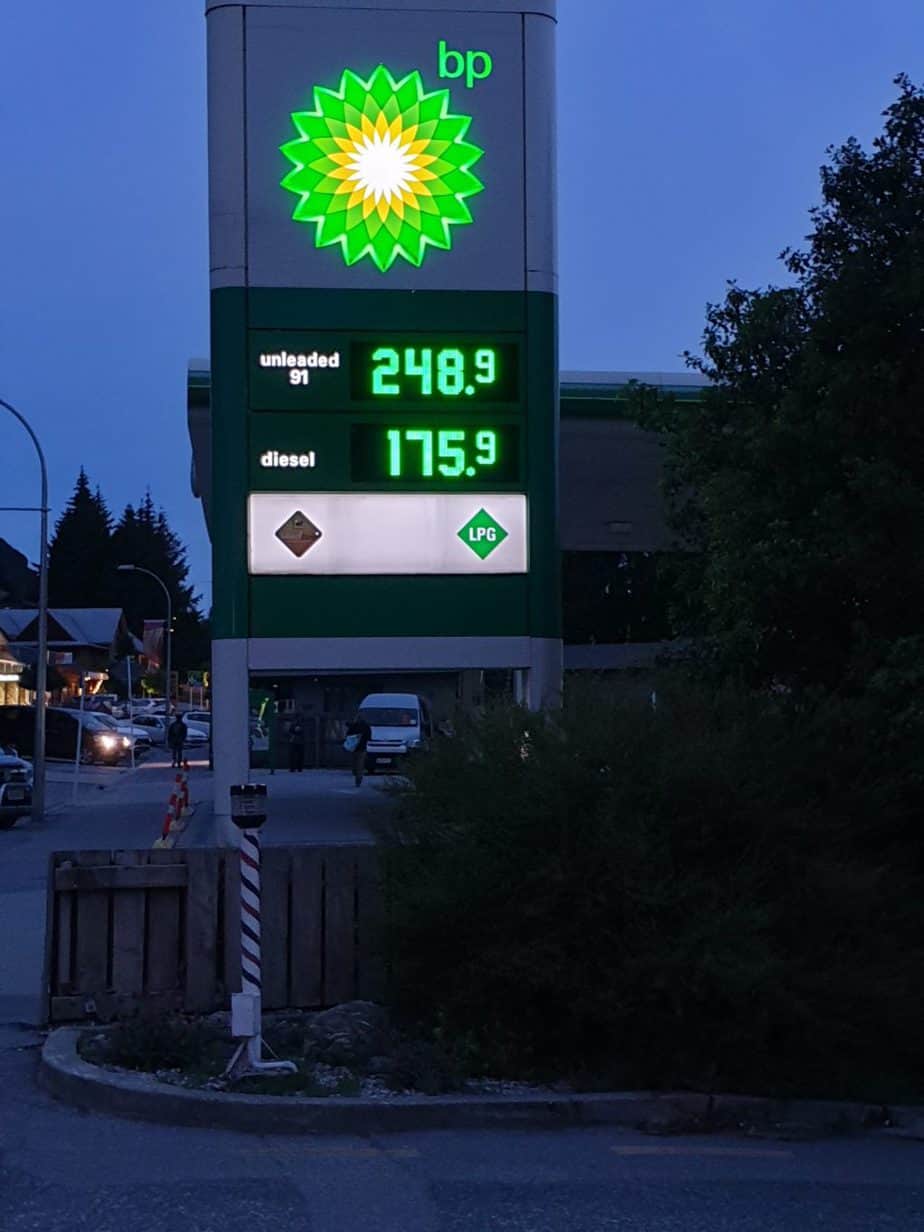
By the way, its a long drive between fuel stations so best top up before leaving Queenstown if you’re running low!
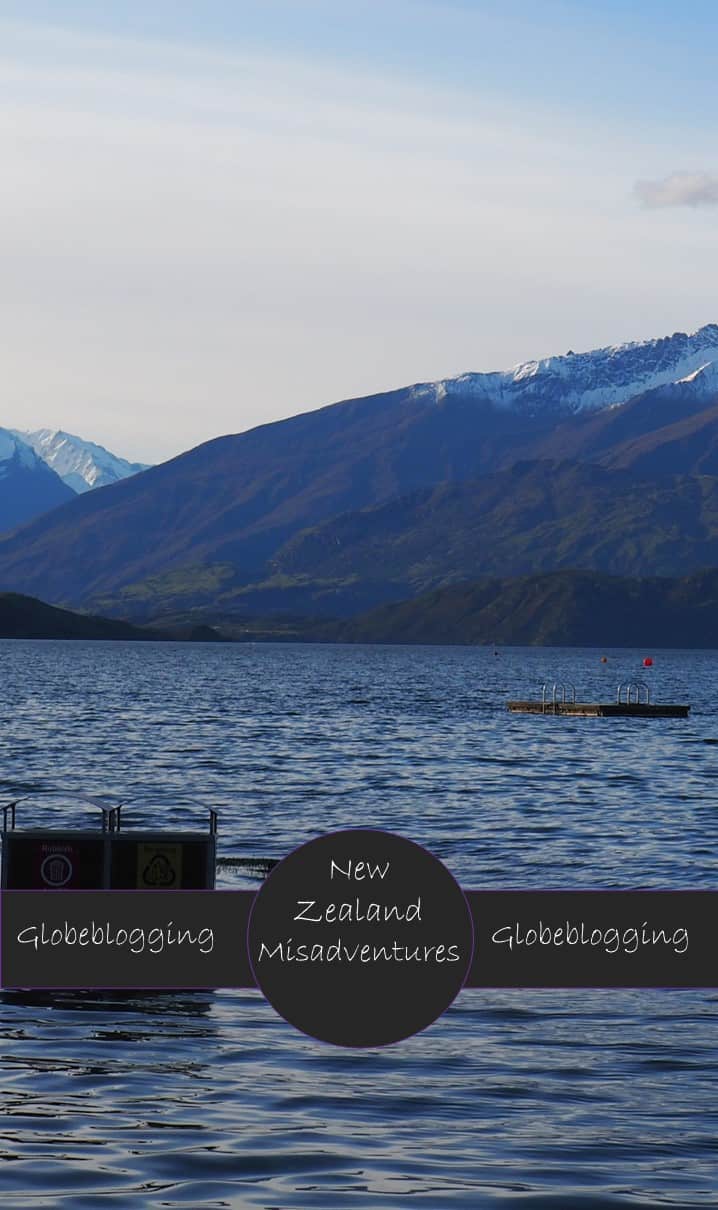
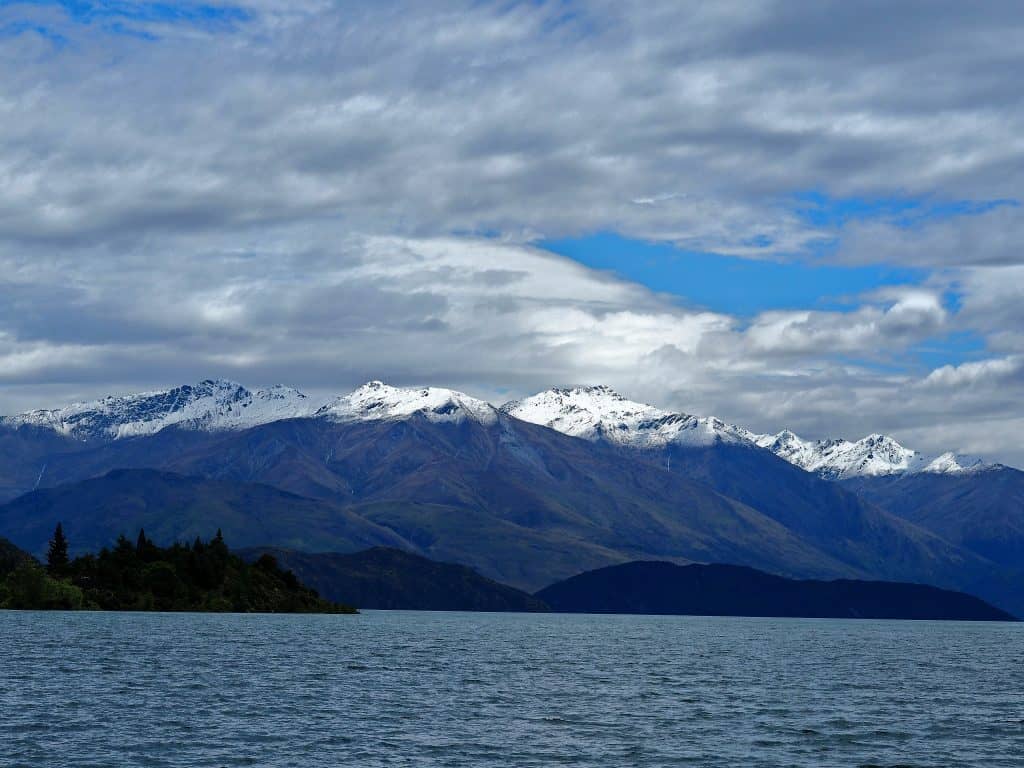
 

A flooded Wanaka

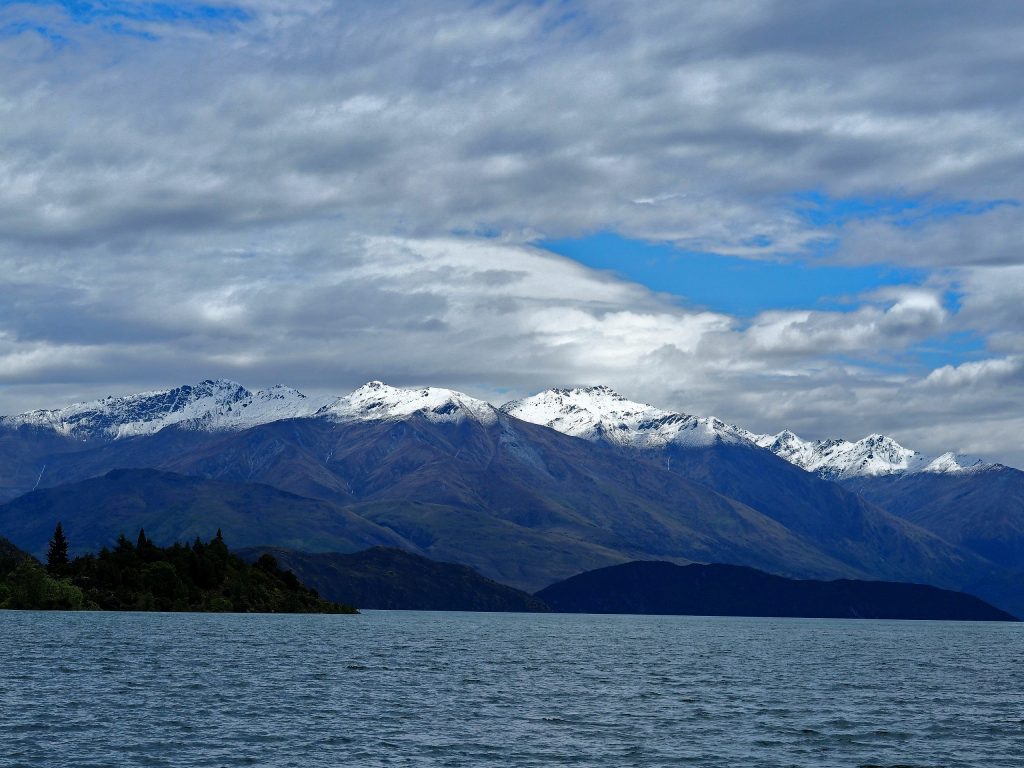
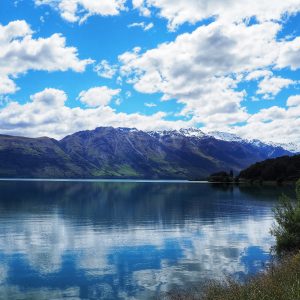
Wanaka is famous for its lake and a particular willow tree which grows out of it that has become quite the instagram sensation.

Unfortunately for me, it was a little more underwater than normal. While the waters had receded the streets and shore alongside the lake were still flooded and closed.

I couldn’t get anywhere near the tree from town so I drove out of town to try and walk down from the other side.

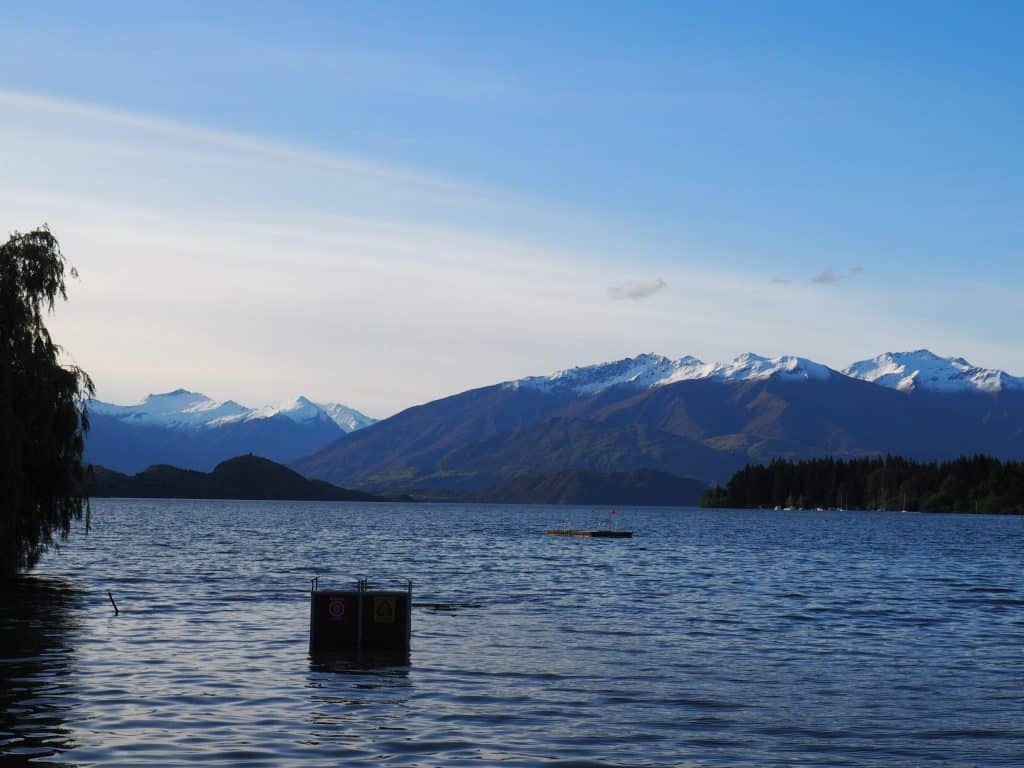
As you can see, no lovely snow-capped Southern Alps instagram shot for me!

But I got them with some bins instead!

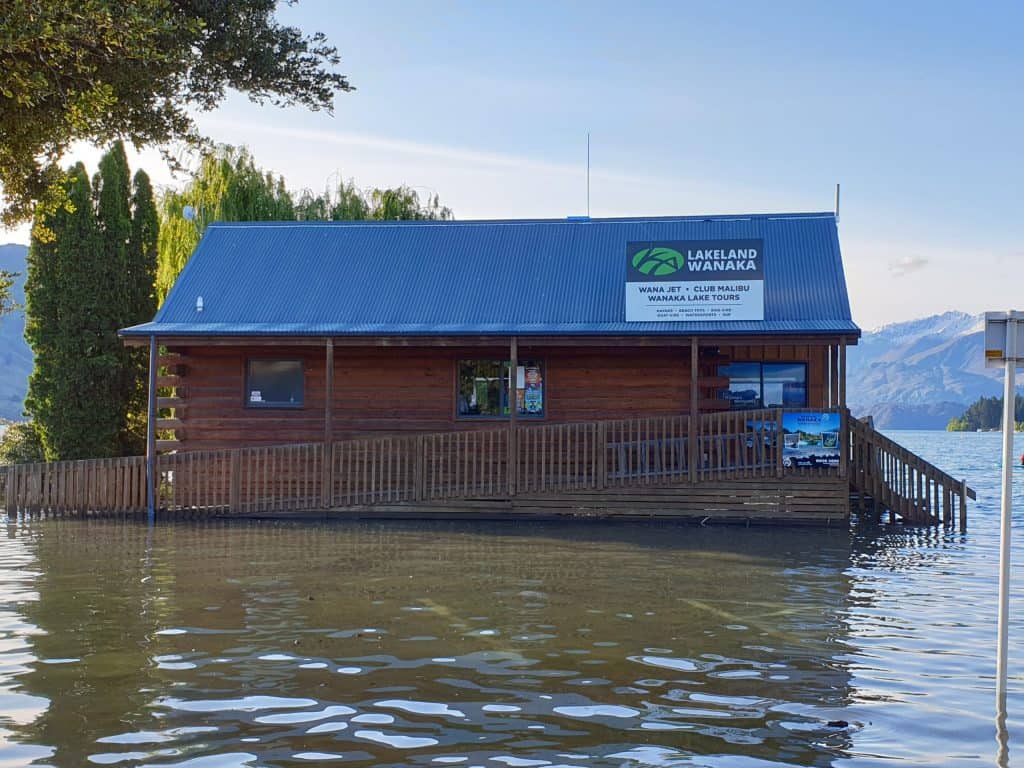
And the usually lakeside tourist centre, was now a mid-lake tourist centre.

Despite this, I did have a really fun day in Wanaka before heading to my next stop, and I had fortunately been able to get a credit for my Franz Josef accommodation which I could use for accommodation in Wanaka.


Twilight in Twizel

Understandably, I was bitterly disappointed about missing what would have been my first helicopter flight with a landing on the Franz Josef Glacier. My best friends husband suggested I try for Mount Cook instead and I was able to secure a flight for my second last morning. It would leave no room for a reschedule if it was cancelled.

Now accommodation in Mount Cook is pretty pricey unless you’re camping, which I didn’t have the equipment to do, so I booked in Twizel for the night which was less than an hours drive from Mount Cook.

Twizel is one of the world’s best locations for stargazing and is part of the Aoraki International Dark-Sky reserve. Of course, one of the best things about travelling New Zealand in the summer is the length of the daylight hours, and its still not super dark at 10pm. So be prepared for a late one if you head here for the stars in December. I did have a look, but since I had an early start the next morning I didn’t wait up for the show.


A Glacier Landing

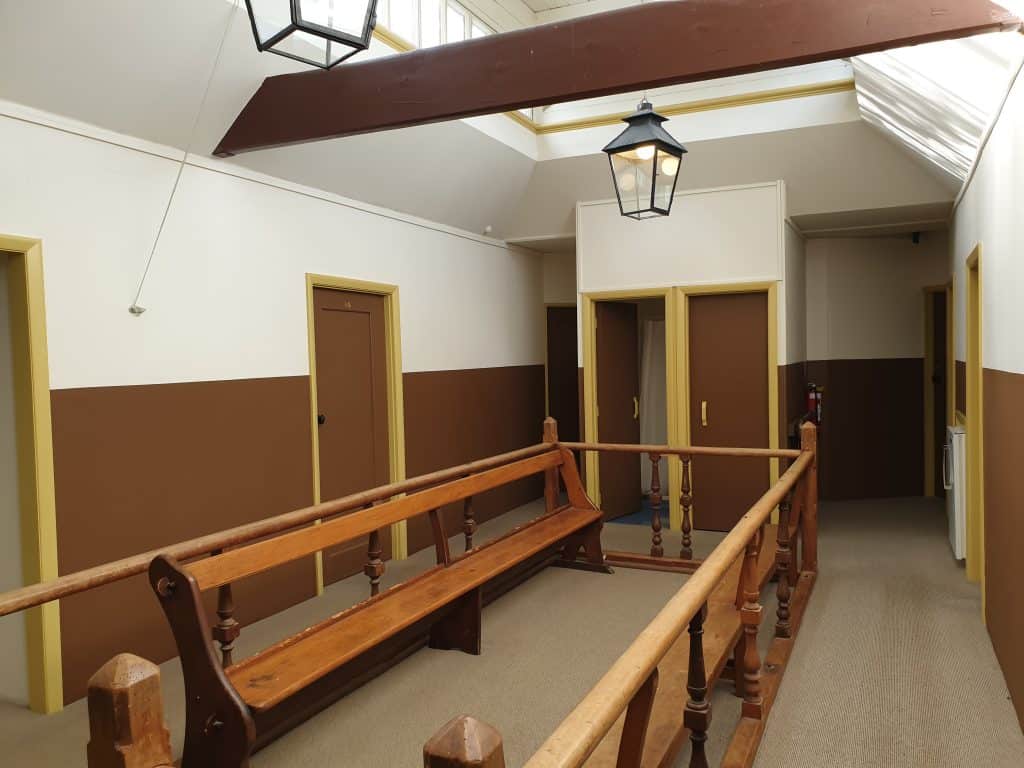
I spent the night in backpacker style accommodation so had to trot off down the hall to use the shared showers. Upon returning to my room afterwards the lock to my room was jammed and given reception didn’t open for at least another hour I was mildly paniced that I was going to be missing my flight. Thank goodness I’d taken clothes down to the bathroom so I wasn’t standing in the hall frantically trying to get into my room wrapped only in a towel!

I was just starting to plan how I could break into the room through the window I had left ajar due to the lack of air-conditioning, a potentially painful feat given its elevation from the ground, when like that pivotal moment in a horror film it swung open in front of me and I once again had access to my things. I was careful not to latch the door while I finished my packing and when I checked out and told them of the lock difficulty he told me it happened all the time.

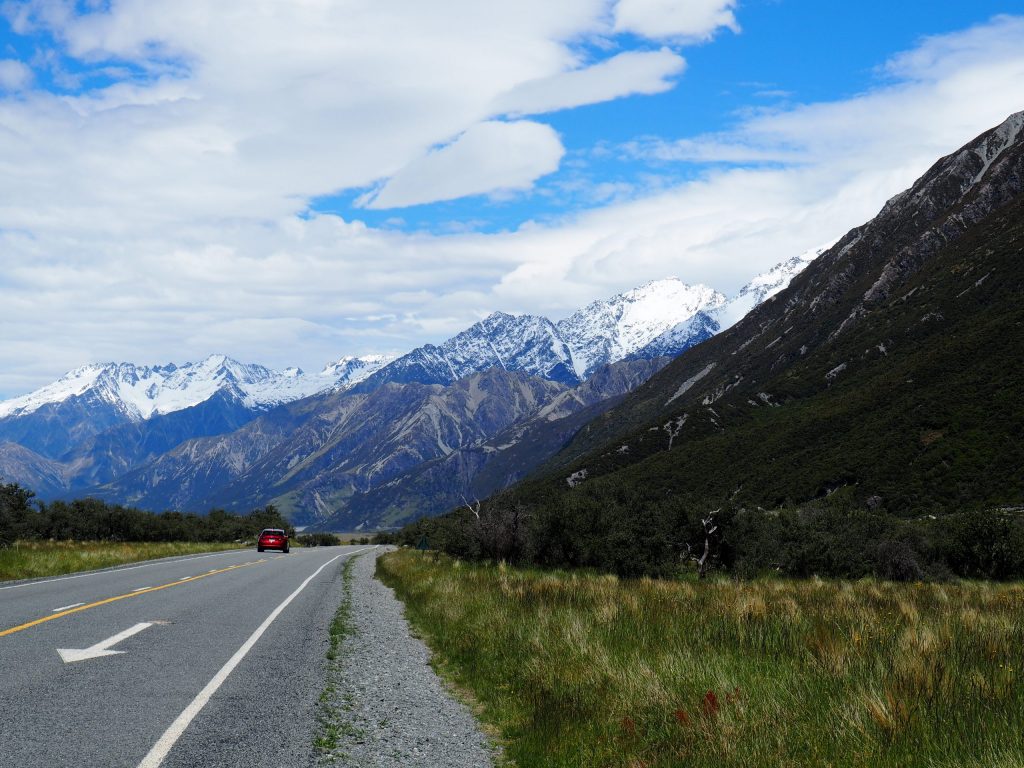
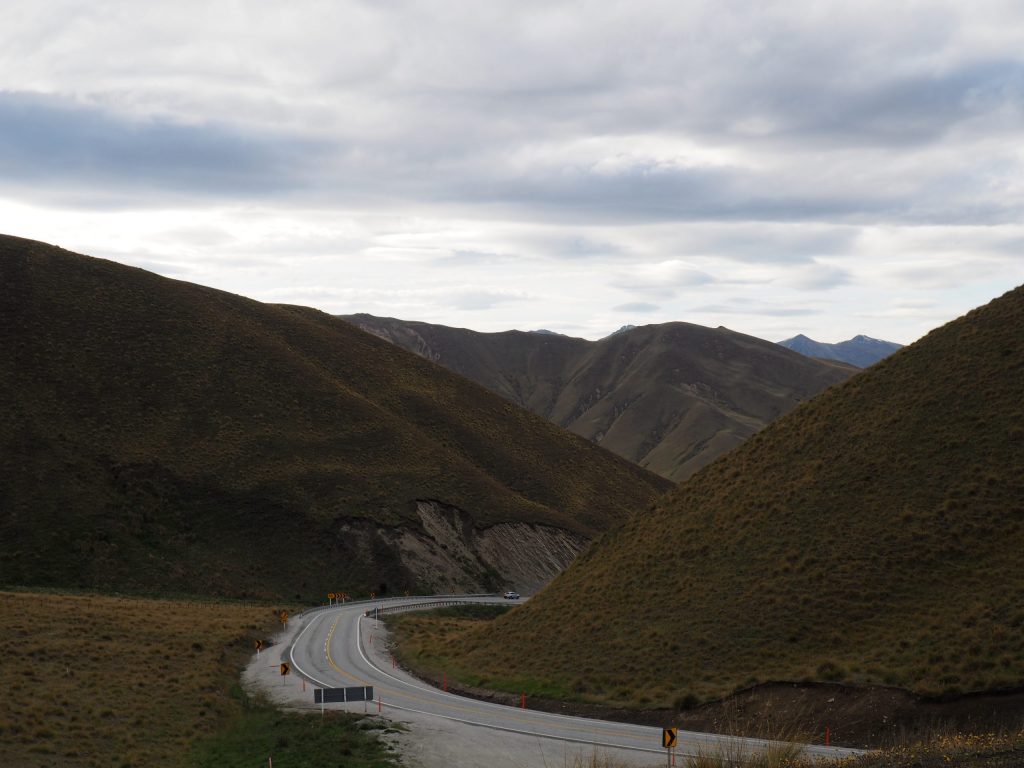
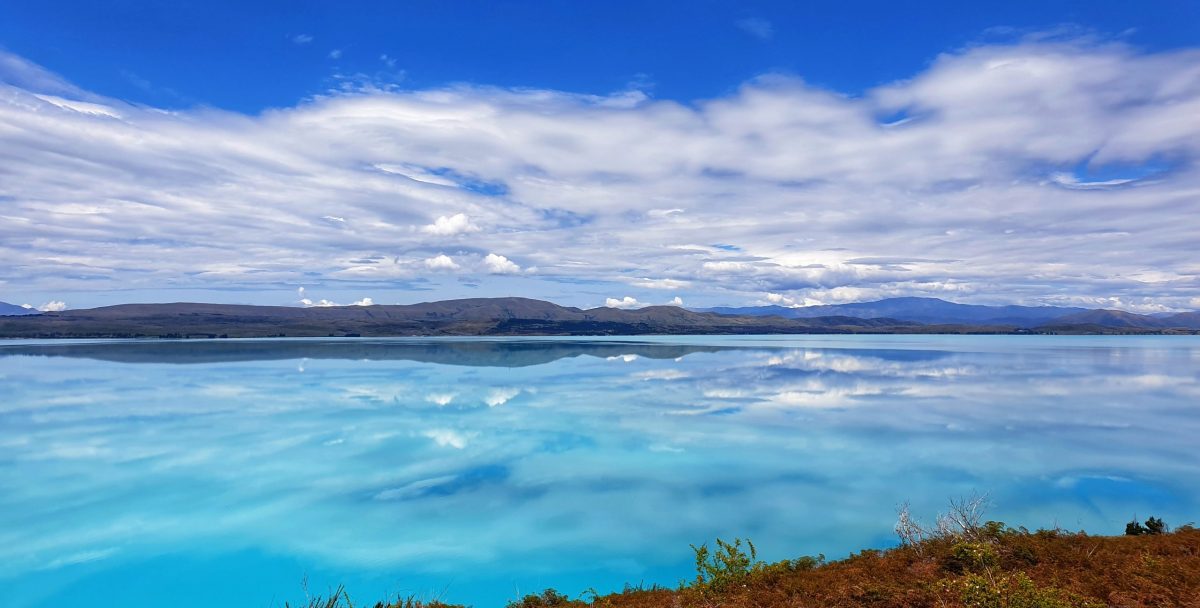
The drive from Twizel to Mount Cook is yet another example of the spectacular journeys available in New Zealand. Leave some time to stop by Lake Pukaki as you go. This pristine lake is fed by glacial waters and is truly a sight to behold!


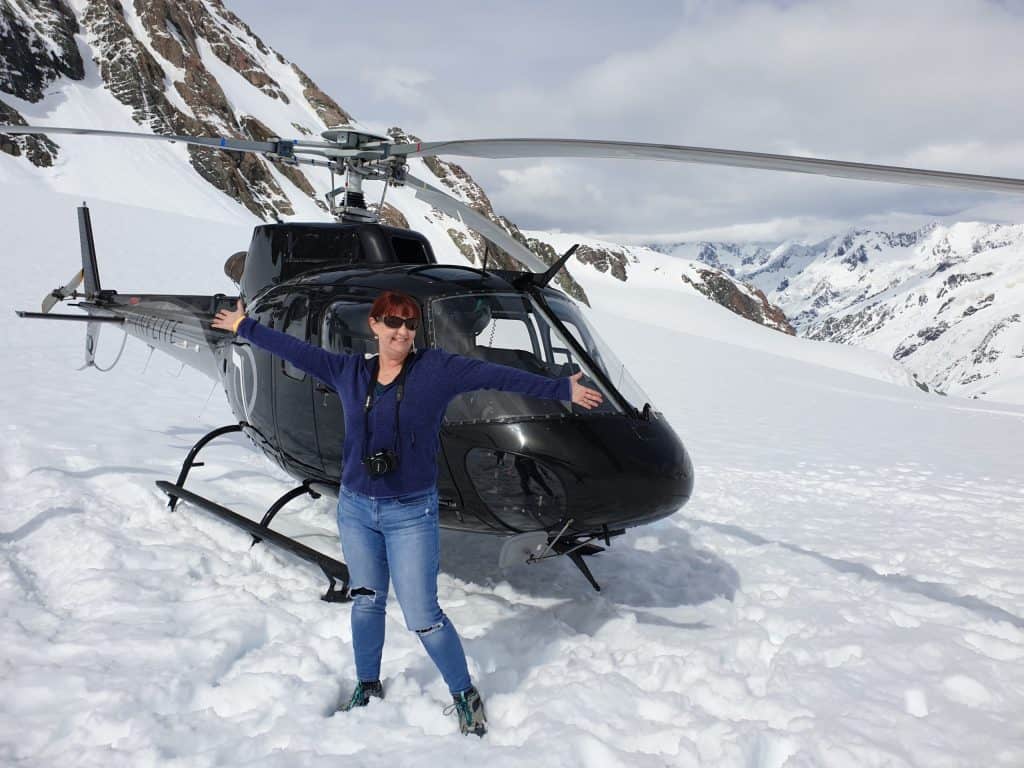
It was a perfect day for flying when I reached the Aerodrome, and for once lady luck was on my side. Since I had been the only booking for their shorter flight, I had been upgraded to a longer flight for no extra charge. Since it was my first time on a helicopter the other passengers were kind enough to give me the window seat so I had pole position as we flew through the clouds past the top of New Zealand’s highest mountain, and landed on the Tasman Glacier, the largest on the South Island. I got to see the Franz Josef Glacier from a distance in the air.

You can check out footage of the flight below;

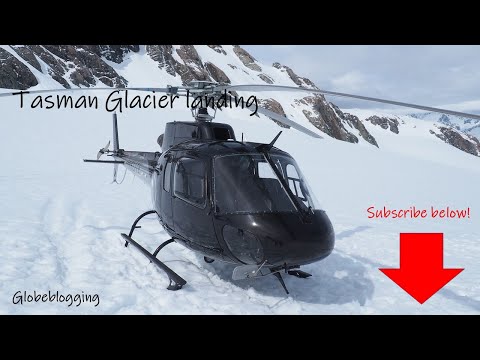
This was honestly one of the best experiences of my life and definitely a highlight of my trip to the South Island, despite everything that went wrong along the way! I would not hesitate to recommend a trip with Inflite Helicopters to anyone visiting the South Island!


Back in Christchurch

After all the mishaps along the way, I decided I was best off spending my final night on the South Island in the same city as the airport to minimise the chances that anything else could go wrong!

When I returned my car at the airport they told me people had been stranded in Franz Josef with no electricity for days, and were abandoning their cars there to hire helicopter flights out. So while I was disappointed to miss part of my trip, I was probably the lucky one for not making it there! And it’s just another excuse to go back!

But probably not in December…


Tips for dealing with last minute changes

  1. It can be to your advantage to have tours booked through one provider so it’s just one company to deal with. I had booked almost everything through Get Your Guide as an agent and they were amazing at processing all my cancellations and getting refunds issued to me super quickly, which was great considering I had to be paying for alternative arrangements. They have tours all over the world.
  2. Check the cancellation policies on your accommodation. I got caught out here because I was too close to the date of the stay to be able to cancel, however booking through an accommodation agent can help here too. I appealed to them to waive the cancellation policy due to the unavoidable natural disaster. They liaised with the hotel for me, the hotel agreed to the cancellation and while they wouldn’t return the funds, they did put a credit on my account and I was able to apply this to the new accommodation I had to book.
  3. Double-check your bookings! In the flurry of activity of re-planning the last days of my trip at short notice it completely slipped my mind to cancel my accommodation in Greymouth until hours before I was due to arrive. This ended up being the only thing I was out of pocket on, and since it had been my own fault anyway I was happy to wear that one.
  4. Google is your friend. Having easy access to an internet enabled device will just make your life easier all round. Pick up a local SIM if your plan doesn’t cover the region.
  5. Disrupted plans can be stressful, but try to embrace the opportunity for adventures you wouldn’t have otherwise had. Missing out on something is an excuse to go back!


I had a lot of fun writing this and reminiscing about the mishaps on the way and I hope you enjoyed it too! If you did please share!

Self driving New Zealand; what you need to know

If you love a good road trip, they don’t come much more spectacular than New Zealand, where around every corner it seems there is yet another breathtaking view to pause for.

Hiring a car and driving round the islands offers the flexibility of designing a trip just how you want it, with the freedom to stop and check out whatever you like. Whether its for snow-capped mountains, perfect reflections or epic landscapes, believe me, if you’re a photography fan you’ll be stopping a lot!

I’ve driven myself around a large portion of this remarkable country, so if this is something you’re also looking to do read on for some of the things you’ll need to know about driving in New Zealand!


Can I drive in New Zealand?

It’s always a good idea to check the official advice for any changing requirements, but you’ll need to meet the following;

  • Hold a current, valid overseas licence or permit. This needs to be in English, and if not you will need an accurate translation.
  • Have not been disqualified or suspended from driving in New Zealand.
  • Normally you would need to have been in New Zealand less than 12 months, but this is currently extended to 24 months in some cases due to border closures.
  • You haven’t been issued a New Zealand licence since you last entered.

Under normal circumstances you can drive for a maximum of 12 months from the date you arrive in New Zealand. This resets every time you enter the country.

You are permitted to drive the same class of vehicle as your overseas licence permits.


Road Rules in New Zealand

If you’re a fellow Australian, you shouldn’t have too much difficulty adjusting to the driving in New Zealand, because it isn’t all that different. You must give way to your right and keep left. Warning and regulatory signs are almost the same, but signs indicating parking and stopping zones are different. Don’t expect to see warning of approaching a speed or red light camera. Abiding by stop signs and red lights are strictly enforced.

Drink driving laws are strict and are tightly enforced and could result in suspension of your licence and gain you a criminal record. Drivers under 20 years old have a zero alcohol limit while for over 20 the limit is the same as Australia.  The law prohibits driving if you have taken a drug which impairs your driving ability. This includes some prescription drugs.

As in Australia, you are not permitted to be handling your mobile phone while driving. I took my windscreen phone holder over with me.


Car hire in New Zealand

Generally you will need to be over the age of 21 to hire a car in New Zealand. Depending on the hire company you may find you need to pay additional charges if you are between the ages of 21 and 25. I did find one company that will hire to drivers from the age of 18 so check carefully the specific requirements of the company. There are many to choose from but I rented through Apex on both islands, finding them cheaper than the bigger companies with plenty of pick up and drop off options. They were also great to deal with in relation to any issues.

It’s always best to get the insurance that means you don’t fork out a massive excess in the event of an incident. After all no one plans to have an accident. Also pay attention to any fine print about where the vehicle isn’t covered by the policy. There are many unsealed roads in New Zealand if you are exploring further afield.

Skippers Canyon near Queenstown is listed as one of the most dangerous roads in the world and no vehicle is insured to travel on it. It was used as composite location in the Lord of the Rings.


Skippers Canyon


Driving in New Zealand: what they don’t tell you


Petrol

While driving yourself around the country may sound like a great holiday on a budget, you’ve probably forgotten to take petrol prices into account.

Like Australia, fuel is sold by the litre, and it is very expensive. The further away the truck has to deliver it, the more expensive it gets.

Below was the price in Wanaka on the South Island in December 2019. It’s an argument in favour of hiring a smaller and more economical car.


Saving money on fuel in New Zealand

With prices this high, you may as well save some money wherever you can! I wish I’d found about about these earlier in my trip!

  1. Download an app called Gaspy to see fuel prices in your area.
  2. Look for unmanned petrol stations operated by Gull and Waitomo which are able to sell petrol cheaper.
  3. Most of the fuel companies have discount cards, some of which visitors are eligible to signup for. You can usually find the cards at the counter and activate them online, saving you 6 cents per litre or even more!
  4. Shop at supermarkets that include fuel discounts on their receipts to save up to 6 cents per litre.


Roads in New Zealand


Motorways

Basically every main road outside of a city is a motorway. But don’t expect a Motorway to look like they do in Australia with multiple lanes for each direction.

The motorways will generally have two lanes, one for each direction. From time to time a passing lane will appear.


Speed Limits

Much the same as Australia, the speed limit in urban and built up areas is 50 km/h.

Outside of that, most of the speed limits are generally 100 km/h.

I found this mildly terrifying at times. While my licence history would attest to the fact I generally have no issue going fast, many of the roads are winding with not a great distance of visibility ahead so it seems awfully fast. Not all of the roads are in great condition either, I clipped a pothole doing 100 km/h on a rural road and I can tell you it gave me one heck of a fright.

Don’t feel pressured to drive faster than you feel safe to. I did see a couple of accidents on my travels so I think some tourists do feel like they need to do the limit. Pay attention to the signs indicating to slow down before corners.

Remember if you aren’t comfortable doing the top speed, be courteous and pull over when it is safe to do so and allow other cars to pass. This is particularly important on roads with a solid yellow line, which indicates cars are not allowed to travel into the other lane to pass you (though many still do!)


Roadworks

I have never seen as many roadworks as I did in New Zealand. They are always working on the road quality.

They are also really prompt at getting on top of road issues. When driving down to Milford Sound, one of the wettest places in New Zealand, part of the road was gathering water from the rain. Crews were there monitoring and cleaning up so the traffic could be kept flowing or it could be closed promptly to keep the road safe.

You can check out some footage of the drive down to Milford Sound below, it is truly a spectacular drive and I loved being able to stop along the way whenever I wanted to take photos.


Check if your journey is impacted by any issues or closures at the NZ Transport Agency. This was absolutely critical to me to monitor landslides which had taken out the road to my next destination. Staying up to date meant I was able to adjust my travel plans before I departed.


Trains

There are over 3000 road level railway crossings in New Zealand. While they will have warning signs a couple of hundred metres beforehand, its amazing how they can sneak up on you when you’re going 100 kms! Keep watch for the warning signs of tracks approaching.


Navigating

My first visit to New Zealand was before the time of smartphones and google maps, and I drove all over the North Island with barely a glance at a map. You might need a little help in cities of course, but if you’re traveling between towns and cities you can virtually point your car in the right direction and follow the signs. My pronunciations did make for some giggles the one time I needed to ask for directions.


Weather

I can speak from experience and say that December in New Zealand is wet! To the point of Wanaka being flooded and I had to find some indoor activities in Queenstown.

Some parts of New Zealand will get heavy snow during winter and this can impact on the roads. Most rental companies will provide snow chains with vehicles if required, but this is something to consider if these are not conditions you are accustomed to driving in.


Have you got any tips about driving in New Zealand to share? Let me know in the comments below!

And as always please share!

Christchurch Street Art – A photo journey

Christchurch is at once a city of ruins and rebirth.

The 2011 Christchurch Earthquake was shallow, and focused just miles from the centre of the city already weakened by a quake the previous year. It caused widespread damage across Christchurch, and stole the lives of 185 people.

A stroll around the city will reveal buildings still in their damaged states, a complex program of public works still underway to restore them. Fencing and scaffolding abound, and heated debates continue regarding the repairs. The Christchurch Cathedral, which suffered significant damage to the building, is protected by fences standing as a monument to the disaster, and the subject of debate whether to repair the building, or leave it as such.


Surprisingly, Christchurch has been named as one of the street art capitals in the world by Lonely Planet (click here for Australia), alongside cities including New York, Barcelona and Berlin. Something happened after the quake. Like a phoenix rising from the ashes Christchurch embraced beauty and creativity and began to purposefully decorate the city. Christchurch holds plenty of hidden treasures for lovers of street art with murals and sculptures at every turn. I quickly fell in love with the quirky artworks around the city and set out to find them on my explorations, but I barely scratched the surface!

It begins even as you leave the airport.


While art abounds throughout the city of Christchurch, these are the ones you can expect to find within walking distance of the main hub of the city.


Where to stay in Christchurch

For the budget conscious looking for somewhere quirky and unique, you can’t go past the Jailhouse Accommodation.

Built in a restored women’s prison, the rooms are inexpensive and basic but comfortable. Display rooms have been left to show how the prison once was. It might get a little claustrophobic for a longer stay, but I had a pleasant stay in both a double and a single room. It is located a pleasant 10-15 minute stroll out of the main part of town.

A double room at the Jailhouse

While you can easily walk from the Jailhouse to any of these artworks, you can also take the Christchurch Hop-On Hop-Off tour on a vintage tram to reduce the walking.


A walking exploration of Christchurch

I embarked upon my explorations of Christchurch on the same side of the river as the Jailhouse, following the path of the Avon River into town. Those so inclined can even take a guided Edwardian punt on the Avon.

You can even find sculptures along the bank of the river.

While it may not be art, this route will take you past the memorial to the victims of the Christchurch Earthquake and it is worth a moment to stop by. Rocks painted by children for their lost parent broke my heart.

The inscription reads;

“A violent and destructive earthquake shook greater Christchurch on 22 February 2011. The lives of 185 people were lost and many were seriously injured. This was one of thousands of earthquakes experienced in the region, starting on 4 September 2010. Our communities were forever changed.

We remember: Those who died, those who were hurt, and those who experienced loss. We offer our thanks: To those who came for us, to those who risked their lives for ours, and to those who supported us. Together we are stronger.”


Christchurch Street Art; Murals


The street art in Christchurch consists of both murals and sculptures, many of which carry messages about the earthquake or a vision for a future Christchurch. On my first exploration walk I stuck to the same side of the river as the Jailhouse.

A shout out to Watch This Space and Find Christchurch for helping me identify the works I didn’t capture the name of at the time.


These aerosol cans were left over from the Spectrum Street art festival, and became a permanent fixture to encourage art within the city. They form part of a collection of eight, the other five create an evolving art space for street artists to practice.

Artists: The three semi-permanent cans were painted by established street artists Jacob Yikes, Ikarus and Wongi Wilson.

Location: Corner of Manchester and Lichfield streets


Artwork Name: Portrait of a Woman

Artist: Australian street artist Rone

About: The painting is of young model Teresa Oman with the Silver Fern associated with New Zealand

Location: Worcester Street


Artwork Name: Kristen

Artist: Australian artist Askew One, who now resides in New Zealand

Location: Gloucester Street


Artwork name: Rise from the Rubble

Artist: Brandon Warrell

About: Chosen by the public as the winning design to be painted on the wall of the Ibis hotel, Rise from the Rubble features a kowhai tree and silver eye. The artist hoped to bring inspiration to the people of Christchurch by acknowledging the loss but looking to the future as the city rebuilds.

Location: Cathedral Square


Artist: Jacob Yikes

Location: Worcester Boulevard/Cathedral Square


Artist: Berst

Location: Gloucester Street


Artist: Kevin Ledo

About: This mural is of Whero O Te Rangi Bailey, a Maori elder. Ledo is known for his mural portraits, this was painted from a photograph by Stuart Robertson.

Location: On the side of the Crowne Plaza Hotel, corner of Colombo and Armagh Streets


The grand buildings of the Christ’s college, Arts Centre and Canterbury Museum are home to a number of artworks.

Artist: Belgian artist ROA

About: Monochrome works are the trademark of ROA, also known for painting large animals. This work depicts a Kiwi and Moa.

Location: Canterbury Museum, Rolleston Avenue


Artist: Wongi Wilson

About: This artwork was commissioned by Rollickin Gelato for their new shop in Cashel Mall

Location: Cashel Street


Artist: Ruby Jones

Surprisingly, although Ruby Jones seems to have a number of artworks in Christchurch, I wasn’t able to locate any information about this one. Given its in my camera roll next to the gelato work, and the wall is the same colour, I think its pretty fair to say this one can be found in the same location.


Christchurch Street Art; Sculptures


Artwork Name: Woods from the Trees

Artist: Regan Gentry

About: This eight metre high sculpture is of a stand of native rimu trees, using wood felled for a family home which was salvaged after the earthquake and used to create this urban forest. It speaks of a future where nature is a part of the city of Christchurch.

Location: Corner of High and Tuam streets


Artwork Name: Chalice

Artist: Neil Dawson

Location: Cathedral Square


Artwork Name: Conduct Cumulus

Artist: Seung Yul Oh

About: This work uses the concept of bubbles to symbolise the citizens working individually and collectively to rebuild Christchurch.

Location: The quadrangle of the Arts Centre, Worcester Boulevard


Artwork Name: Stay (part 2)

Artist: Sir Antony Gormley

About: This is the twin to another statue which is in the Avon River. They are made of cast iron and intended to represent the two sides of Christchurch post Earthquake.

Location: Arts Centre, Worcester Boulevard


Artwork Name: Ka mua Ka muri

Artist: Kazu Nakagawa

About: The sculpture is a phonetic render of a well known Maori proverb that talks of walking backwards into the future. It was gifted to Christchurch by the artist in 2019, after the terrorist attack on a mosque.

Location: Arts Centre, Worcester Boulevard


Artwork Name: Stay (part 1)

Artist: Sir Antony Gormley

Location: Avon River, near the Gloucester Street Bridge


Naturally, as you would expect there are a few pieces on display around the Christchurch Art Gallery too.

Artwork Name: Reasons for Voyaging

Artist: Graham Bennett

Location: In front of the Christchurch Art Gallery, Montreal Street


Artwork name: EIGTBA

Artist: Martin Creed

Location: Side of the Christchurch Art Gallery, Worcester Boulevard near the corner of Montreal Street


Artwork Name: Vaka A Hina

Artist: Semisi Fetokai Potauaine

About: This 16 metre tall steel sculpture is visible from many blocks away. It is inspired by a tale from Tongan folklore of the goddess Hina and her journey to the moon and represents unity and movement.

Location: Rauora Park, which is between Armagh and Lichfield Streets


Artwork Name: Spires

Artist: Neil Dawson

About: The aluminium sculpture is based on the geometry of the damaged spire of the Christchurch Cathedral

Location: Latimer Square


Name: 185 Chairs Earthquake Memorial

Artist: Peter Majendie

About: This poignant installation was originally intended to be temporary, but 185 Chairs has become a major tourist attraction in Christchurch. Erected on the first anniversary of the earthquake, the 185 unique chairs represent the 185 different individuals killed in the 2011 earthquake.

Location: It is currently on a vacant lot at St Pauls Trinity Pacific Presbyterian Church, but will need to move to another site.


While you are at the 185 Chairs memorial, don’t miss the opportunity to stop by the Transitional Church which is nearby. While it may not be art as such, it is a remarkable structure largely made of cardboard and has served in place of the damaged cathedral since the earthquake.


You should also wander by the Bridge of Remembrance and check out the beautiful tilework in front of it.


My Photography Equipment

If you are interested in what photography equipment I use and recommend, check out some of the results in my Photography Equipment List.


I hope you enjoyed this small glimpse into the streets of Christchurch and their wonders!

Don’t forget to share!

Things to do in Wanaka, New Zealand

You don’t have to look too hard to find postcard perfect scenes in New Zealand, and Wanaka is no exception.

Situated on Lake Wanaka, the town of Wanaka (pronounced Won-ah-ka) offers views of the snow capped mountains of the Southern Alps across the water and is the launch point for Mount Aspiring National Park. Although it had been recommended to me by my kiwi best friend, when mapping out my New Zealand South Island road trip it was a diversion from my route. I thought at a stretch I might be able to make a Wanaka day trip, given the distance from Queenstown to Wanaka is less than seventy kilometres.

Ah the best laid plans.

After a stretch of unusually bad weather on the South Island that saw Queenstown’s Lake Wakatipu nearly bursting its banks, I was left unable to get to my next destination when the only road to Franz Josef was taken out by landslides. I had to cancel and rebook the final days of my trip, and find a different route back to Christchurch in order to get my plane home. I was on the wrong side of the island to head back the way I had come.

And that’s how I ended up in Wanaka.


This post contains affiliate links. Making a purchase through these links earns a small commission at no additional cost to you and is a great way to show your support for this site.


Where to stay in Wanaka

I stayed at the Manuka Crescent Hotel, a few kilometres out of town. Due to the weather they had a number of cancellations and I was one of very few guests, so was lucky enough to be upgraded to a family studio for no extra charge. It was nothing fancy but it was clean, comfortable and spacious and reasonably priced. It was self-contained, which is a big point in favour if you are looking to save money on eating out. They also took the credits I had on the booking site from the cancellations of my other accommodation.


Where to eat in Wanaka

If you’re a coffee lover, Head to Urban Grind on Ardmore Street, a short walk from the lakefront. Not only are their brunches really tasty but their coffee is from a Christchurch company called Underground. I don’t think it is the same Underground as we get in Australia, but it was darn good all the same and had me going back there!


What to do in Wanaka

While there are plenty of things to do in Wanaka, if you are passing through and only have one day in Wanaka like I did, you’ll need to prioritise. So there are a few places that need to be on your Wanaka itinerary, especially if you are seeking those great photo locations.


The Wanaka Tree

Believed to have grown from a willow fence post at a sheep station, the willow tree growing out of Lake Wanaka has become a social media sensation for photographers and travellers alike. It is easily the most instagrammable spot in Wanaka. While there is nothing particularly special about the tree itself, it does make for a lovely shot with the mountains in the background.

Unfortunately due to flooding when I was there, despite hiking around the lake to try and get to it from the other side of town, this was the closest I could get. It was still a very pretty walk around the lake though!


If you happen to visit at a time when half the town isn’t underwater, you might be luckier to catch an image more like this one courtesy of Alyse from The Invisible Tourist.


Or if you’re up early you might get a photo like this spectacular shot from Jakub at Czech The World. Sunrise is one of the best times to photograph the Wanaka tree.

Unfortunately some recent vandalism to the tree has resulted in the lower branches being removed.


Location: Roys Bay, 59 Wanaka-Mount Aspiring Road, Wanaka


Cruise Lake Wanaka

There’s no denying the lake with the snow capped mountains of the Southern Alps reflecting off the water is pretty exceptional viewing. It’s worth taking a cruise on the lake just to get a better look! There are also islands in the lake that you can land on and hike up for spectacular 360 degree views. The Ruby Island cruise and photo walk will give you the chance to get those Instagram worthy shots with the Alps in the background.

Ruby Island

Unfortunately due to the water levels when I visited we were unable to disembark on Ruby Island as the dock was underwater. It still gave me the opportunity to get some great shots and see the landscape of the area. The boat is also licensed, so you can kick back with a beer or a glass of bubbly while you cruise and hear about the region.


Location: The collection point is the old jetty on the lakefront on Ardmore Street.

Cost:  Around NZ$50 per adult and NZ$20 per child under 15

Duration: 60 minutes

Operating Hours: Cruise departs at 1pm, you’ll be contacted to confirm your booking.


Puzzling World

Definitely one of the top things to do in Wanaka with kids, don’t make the mistake of thinking that this amazing place is just for the little ones, Puzzling World is just as much fun for adults! Especially if you love those tricky perspective shots!

Located just a five minute drive from the Wanaka town centre you can’t miss the leaning tower at the entry! You may have to wait a while for your opportunity for a clear shot though!


Now I’ve been a fan of giant mazes since I was a kid, so that on its own would have been enough to get me there. Built in the 1970’s it was the first of Puzzling World’s attractions and a concept the designer rolled out in twenty five other countries in the 1980’s. A passion for continuous improvement now sees this exceptional place full of various optical illusions that can confuse our brain. The tilted room even had me feeling woozy, and does come with a warning for people with balance issues!

The discrepancy between what we sense and what we see in The Tilted Room causes our brains great confusion

You won’t escape from the feeling of being watched in the Hall of Following Faces. They are cleverly sculpted to appear as if they watch your every move, no matter which way you turn.


The walls in the cafe seek to fool you…


And even the toilets are in on the act!


Even when they aren’t real…


Check out some sculptures in the gallery…


Before you head over to the main event, the giant three dimensional maze!


The objective of the maze is to climb to the top of every corner tower, and then find the designated finishing point. It’s harder than it looks, the solution requires both the upper and lower paths and all the walls look pretty much the same. While I climbed all four towers and in fact walked past the finish point on my exploration, I was unable to find it again after I had completed the towers. I ended up bailing into the courtyard garden after spending a considerable amount of time searching, going around the same paths over and over again and crossing paths with the same people searching and laughing everytime. If you want to make it more challenging you can choose to do the towers in a specific order.

Puzzling World is a really fun way to kill a couple of hours.


Location: Just five minutes from town on the Wanaka-Luggate Highway

Cost:  Around NZ$25 per adult and NZ$18 per child

Operating Hours: open daily from 8.30am – 5pm


Wanaka Lavender Farm

This was a surprise little gem for me and I’m really pleased I made the time to check it out because it was a lovely afternoon.

Caveat; If you don’t like the scent of lavender, or suffer from bad allergies, this is probably not a good place for you to visit. There are also a LOT of bees, but if you leave them alone they wont bother you.

I love lavender, and while I was a little sneezy it wasn’t anything I couldn’t live with. It was worth it to walk through fields of aromatic swaying purple flowers.


I was quite content to sit between the rows for a while and photograph the bees going about their business.


Instagrammers will love the lavender door standing in the middle of the lavender field…a lavendoor perhaps?


Meanwhile the farm has something for the kids too with a variety of animals including Shetland ponies, Alpacas, Donkeys, Lambs, Chickens and Pigs in residence.

Make sure to stop off in the shop to check out the locally made lavender products. While you’re there head into the tearoom and try the lavender ice cream! It’s a really subtle but not unpleasant flavour.


Location: Six minutes from Wanaka at 36 Morris Road

Cost: Nothing to visit the store and tearoom. To walk around the farm tickets are NZ$10 per adult and NZ$5 per child 5-15 years in peak season (December – February.) The rest of the year tickets are NZ$5 per adult and NZ$2 per child

Operating Hours: Open daily 9am to 5pm


My Photography Equipment

If you are interested in what photography equipment I use and recommend, check out some of the results in my Photography Equipment List.


Like this? Please Share!


Fun things to do in Dunedin – Stay at Larnach Castle

I know, you’re thinking what is a castle doing in New Zealand, a country not exactly known for an anglo history dating back to the time of castles. Well I thought the same.

Of all of my research on Dunedin attractions, and any recommendation I got, was that Larnach Castle was one of the best things to do in Dunedin.

Located on the Otago Peninsula, Dunedin is a derivative of the Gaelic term for Edinburgh, Scotland’s capital. It was settled by the Scottish in 1848 and many Scots emigrated to the city between 1855 and 1900. It became a wealthy city during the Otago gold rush in the 1860’s. (Source: Wikipedia)

Today it is the second largest city on the South Island, after Christchurch.


This post contains affiliate links. Making a purchase through these links earns a small commission at no additional cost to you and is a great way to show your support to this site.


Larnach Castle History

William Larnach arrived from Australia in 1867, after his appointment to the position of the Chief Colonial Manager of the Bank of Otago. He and his son discovered the site with its spectacular panoramic views of Otago Harbour when out walking one day, and William purchased the land in 1870. Over the next 16 years he oversaw the building of the castle, designed to rival the country homestead of his uncle in Sussex. While the plans for the castle had originally come from England, they were substantially altered by the Scottish architect R.A Lawson, who melded the Gothic revival fashionable in Britain at the time with the fashions from the Australian colony. The Australian influence is evident in the iron lace verandahs which surround Larnach’s home.


New Zealand at the time was still a far off colony, so materials for the construction were brought to the site from all around the world, including woods from Australia and North America, slate from Wales, iron from France, Venetian glass and bricks from Marseilles.  These were sailed into Otago Harbour and pulled to the site by ox drawn sled. Most of the stone was obtained from Otago. Craftsmen came from Europe to apply their skills in wood, stone and plaster to the construction.


Woodwork in the dining room

William moved his family into the castle prior to the completion of the interior, and the self-sufficient household entertained many guests, including four future Prime Ministers.

In the time before his death by his own hand  in 1898, William was married three times, his first two wives and eldest daughter all passing away. After legal battles between family members the property was sold in 1906.

In the following years the castle had many owners and uses, including as a lunatic asylum and a hospital. It fell into disrepair and was near ruined when it was purchased by the current owners, Barry and Margaret Barker, in 1967.

The Barker’s began a process of restoring the castle and neglected 35 acres of grounds to their former glory. Margaret hunted down original woodwork and furniture which had been sold over the years and returned it to the castle. While the restoration is ongoing, almost every room in the castle has now been returned to the original standards of William Larnach’s vision.

Larnach Castle is now the premier tourist attraction in Dunedin.


Where to find Larnach Castle

The castle is located at 145 Camp Road Dunedin, which is about 10 minutes out of the main town. You can follow the signs without too much trouble, although GPS will be beneficial getting through Dunedin.


Why you should visit Larnach Castle

If you love grand old buildings and gardens Larnach Castle will definitely appeal to you. With spectacular views over the Otago Harbour from both the grounds and the castle tower it is a lovely place to walk around, and stop for a coffee or high tea in the cafe located in the castle ballroom. The gardens themselves have been rated a Garden of International Significance. You can also walk through the majority of the castle itself and see the restoration in progress or completed and furnished according to the style of the time.

It’s also a pretty spectacular, if somewhat hairy, drive from Dunedin.


Ballroom Cafe

Larnach Castle Tours

You can arrange a private tour for $200 per guide or just opt for the 45minute audio tour at reception when you arrive. I was content to wander round the castle and grounds myself.


Don’t miss the chance to check out the Harbour views from the tower.

Larnach Castle Prices

To gain access to the castle, gardens and grounds, purchase your tickets online from around NZ$34 per adult and NZ$12 per child over 5. A family pass for two adults and two children can be purchased for NZ$80.

Tickets for access to the garden and grounds only are NZ$17 per adult and NZ$5 per child over 5.


Larnach Castle opening hours

Larnach Castle is open all year round from 8am to 5pm.

The castle grounds are open from 9am, and last admission is 7pm from October to March and 5pm from April to September.


Larnach Castle Accommodation

I was keen to stay in unusual accommodations when I could, and Larnach Castle was already on my must do list, so when I discovered while researching Dunedin accommodation that you could actually stay at the castle, it was a no-brainer for me! Staying at the castle will also include full entry to the castle and grounds and the advantage of enjoying the grounds outside of the hours they are open to visitors.

You can’t stay in the actual castle itself, but there are a couple of options on the grounds.


Larnach Castle Stables

The option for the budget conscious, the 140 year old stable building has been converted into six rooms with shared bathroom facilities. A buffet breakfast and selection of cooked breakfasts is included in the stay and served in the hall on the ground level, which also features a guest lounge, internet station and a display of the original horse stalls. The rooms were clean and very comfortable and while they were small rooms, I found there was plenty of space.

Accommodation level of the stables
My room in the stables, might have been an issue if I was taller!


Larnach Castle Lodge

Custom built beside the stables on the castle grounds, these rooms will set you back more than double the cost of a stable room. They also include breakfast in the stables.

Breakfast in the stables

Book your Lodge or Stable stay.

Camp Estate

The estate is a country house containing five bedrooms, located 500 metres from the castle gate. It is considered the luxury level of accommodation.

Book your stay at Camp Estate


Dine at Larnach Castle

While open to non-guests May to August, if you are staying on the castle grounds this is a must do! Bookings are required and orders are required to be placed by 5pm on the day of your dinner to enable the chef to prepare the food. The menu can be found online.

The three course meal is NZ$80 per adult and NZ$27 per child, and includes one free beverage. Dinner is served in the castles dining room at 7pm and numbers may be limited. There were seven guests the night I dined and both the food and service were exceptional. The menu uses local seasonal ingredients so dishes on offer will change regularly.


Braised Beef Cheek main


Chocolate Brownie Dessert


My Photography Equipment

If you are interested in what photography equipment I use and recommend, check out some of the results in my Photography Equipment List.


Like this? Please share!


What to do in Queenstown when it rains

A rainy day can put a real damper on your travel plans, particularly if you happen to be traveling solo. I spent three days in Queenstown, and happened to be there at a time they were experiencing extraordinary wet weather, to the point of flooding fears, so it meant I was looking for creative things to do in Queenstown when raining. Luckily for me, while Queenstown might be known as the adventure capital of New Zealand, there’s plenty of other gems you can find to have fun when it’s pouring.


This post contains affiliate links. Making a purchase through these links earns a small commission at no additional cost to you and is a great way to show your support to this site.


Queenstown Indoor activities

Skyline Gondola

If taking the luge back down isn’t your thing, this is definitely an activity you can schedule in the rain. Even in the rain you can have a delicious meal with a view sitting 450 metres above Queenstown and Lake Wakatipu.

Sister to the Gondola in Rotorua, on New Zealand’s North Island, the first gondola travelled up Bob’s Peak in 1967, and has become a New Zealand Icon.

At the top there is both a cafe and a Restaurant depending on your tastes and budget. If you are there later in the evening the buffet restaurant may be the only option still open. It is more expensive but the food was good quality and there is a great selection to choose from.

Lets face it, its the best section of the buffet right!

I would recommend purchasing tickets in advance as they are a little cheaper. Since my visit was seizing the opportunity of a break in the wet weather I just turned up, and it was definitely more expensive that way. You can choose the basic gondola ride or the ride plus meal deal. You will need to choose a seating time for the meal.


Location: Brecon Street Queenstown. Just follow the signs. There is parking available at the bottom.

Opening Hours: 9am and the last gondola departs from the bottom at 9pm. The last gondola down will be when the restaurant closes. Open 7 days.

Price: Prices start at NZ$44  per adult and NZ$26 per child for the gondola ride only


Odyssey Sensory Maze

This is a definite must-do if you have kids along, but its just as much fun for the adults!

The Odyssey Sensory Maze is a series of rooms that will mess with your senses. Strobe and coloured lighting, mirrored walls and rooms of complete darkness await you as you feel your way through the maze. The kids will love wading through the balloon pit and ball pit and finding the right path to get through the jungle room. All participants are given gloves and instructed to keep their hands in front of them, good advice especially when you get to the room of mirrors where you really can’t trust your eyes.

You’ll be asked to give up any loose items before you enter, so no photos I can share on this one. I’d recommend not leaving anything in your pockets, if something falls out in that ball pit you aren’t likely to be seeing it again!

Also my hot tip for the balloon room, which comes up first, is go low. It is deceptive how far away the floor is under the piles of balloons and I took a tumble on my first round through.


Location: 57 Shotover Street Queenstown. I’d recommend not taking the car as parking is for limited times.

Opening Hours: 10am – 9pm Sunday to Thursday and 10am – 10pm Fridays and Saturdays.

Price: NZ$32 for an adult single entry and NZ$22 for a child if you just walk up. Tickets can be prebooked online for a discounted rate. I’d recommend paying the extra $5 for the one hour experience, which includes 3D goggles to get the most out of the lighting effects and means you can go through the maze as many times as you like in the space of an hour. I got quicker each time but was able to easily get around four times in the hour. Expect it to take longer with kids.


Fear Factory

I love a good haunted house. It’s always my favourite attraction at any theme park or carnival! Fear Factory is next level.

This is probably not one for the kids. Children younger than 7 cannot enter and under 12 must be accompanied by a parent or guardian. Children between the ages of 12 and 16 may enter without a parent or guardian provided one signs for them.

This was another one I couldn’t take in any loose items so no photos, but there are photos on their website you can check out for yourself.

I don’t want to give too much away, but this is another maze, and it is pitch black. A row of red lights in the ceiling is your only clue to finding your way through. It’s likely you’ll do a lot of jumping out of your skin and shrieking along the way, things are much scarier in the dark.

If at any time you feel you can’t handle it you can call out a designated password at any time, at which you will be taken through an emergency exit. A couple went in before me and I was still waiting for my turn to go in when they exited with the girl in tears. It certainly helped to lift my heart rate somewhat, probably not helped by going through on my own.

They will touch you, they will appear out of nowhere to scream at you, and they will follow you menacingly. You’ll jump simply because you didn’t know someone was there.

I did get stuck going in a circle a few times, unable to find the next light. The actors did help me with laser pointers but the front desk attendant said they don’t always. They must have taken pity on me flying solo.

If you love a good scare, you’ll find this super fun!


Location: 54 Shotover Street Queenstown.

Opening Hours: 11am – 11pm 7 days

Price: NZ$40 Adults and NZ$20 for kids for walkins, or save NZ$5 by booking online at least 24 hours in advance. A family ticket can be purchased for NZ$99.


Onsen Hot Pools and day spa

Relatively new to Queenstown, this is an awesome way to spend a couple of hours pampering yourself.

Take some time out to relax in a cedar lined hot tub looking out over the Shotover River Canyon, and pair it with a face or body treatment. They’re open late too, so you can either sit back and enjoy the mountain view with your included refreshments, or on a clear night take in the stars.

For the fans, the Shotover River featured in Lord of The Rings in the scene where Arwen washes away the Ringwraiths. It was spliced together with a location on the Arrow River. You can check out more Lord of The Rings locations near Queenstown too.

Bookings are essential as they do fill up quickly, I was only able to get the hot pool experience booking the day before.

Swimsuits are required to be worn, and I’d advise being already in yours when you arrive as your time will start from when they let you into your private room, you don’t want to waste precious soaking time getting ready!

Location: 162 Arthurs Point Road, Arthurs Point, Queenstown.

Opening Hours: 9am to 11pm 7 days

Price: Prices start at NZ$87.50 for a single adult bather during the day, though the price per person reduces with more adults in the tub. Childrens rates are NZ$32.50. Packages start from NZ$300.


Queenstown Outdoor Activities

Milford Sound day trip from Queenstown

Milford Sound is pretty much the wettest place in New Zealand, so chances are it’s going to be raining when you get there anyway. It is no less spectacular and in fact all the more atmospheric with the mist and the rain. Located in Fiordland National Park, Milford Sound runs inland from the Tasman Sea, and the body of water is surrounded by spectacular cliff faces with cascading waterfalls. A cruise on the sound is an experience that shouldn’t be missed.

In any conditions it is a place that will take your breath away and if it isn’t on your itinerary to drive yourself as I did, it is worth considering looking at doing as a Milford Sound day tour from Queenstown. The drive down to the sound is a sight to behold in itself, so it is worth taking advantage of the luxury glass roof coach on the way to your cruise of the sound. Be aware though, it will be a long day!


Location: Pickup from your accommodation

Opening Hours: Pickup before 7am

Price: From NZ$191 per person


If you would rather drive yourself and have the luxury of stopping for photos along the way, I had a great experience with the Southern Discoveries Scenic Cruise.


Location: Take the shuttle bus or walk from the Milford Sound visitors centre

Opening Hours: Multiple cruise times on offer starting from 9am

Price: Start from NZ$54 per adult for the basic cruise


Jetboat Ride

I didn’t get to do this one myself, but I did hear it raved about. And since you’re going to get wet anyway it doesn’t matter if it’s raining!

I have included a few options to choose from below.


Queenstown Night activities

Bar Crawl

Now I’m not a big drinker by anyone’s definition, but I was flying solo on a Saturday night in Queenstown with no concrete plans the next day and I walked past a sign in town advertising a bar crawl.

It sounded like a great way to experience the Queenstown nightlife and meet some people doing it!

The evening includes entry to four bars, discounted drinks and a shot at each venue. There a couple of companies that run them, but the Kiwi Crawl ticket also includes pizza, games and prizes.


Location: The London, next door to Fergburger where you will undoubtedly end up at some early hour of the morning.

Opening Hours: The event will kick off at 9pm and go for four hours

Price: From NZ$34


Minus 5 Ice Bar

Queenstown has an Ice Bar!

I was keen to check it out but unfortunately it wasn’t included in the bar crawl and there is an entry fee of NZ$35 which includes a cocktail. You’ll be provided warm clothing upon entry and have the opportunity to immerse yourself in a place crafted entirely from ice.

There is an ice bar crawl that includes this in the itinerary in addition to four other bars, shots and pizza, so if the ice bar takes your fancy that might be the way to go.


Location: The London

Opening Hours: The event will kick off at 9pm and go for four hours

Price: From NZ$34


Pub on Wharf

If live music is your thing, head on down to the waters edge, if its not flooded that is, and sit down for a drink or meal at Pub on Wharf.

With a roaring fire and live music on offer every night of the week from 9pm and a decent feed, its a pretty good place to kick back. The musician playing the night I was there was top notch and the meal was massive and tasty.


Location: 88 Beach Street Queenstown

Opening Hours: Food is served from 10am until 10pm with a break from 4 – 5pm.

Price: Free to enter. Mains start from NZ$20


Where to stay in Queenstown

Given I was spending a few days in Queenstown I was keen to splash out a little and rented an Airbnb looking over Lake Wakatipu. I woke up in the mornings looking out over this beautiful lake.

Check out your other options for accommodation in Queenstown below.

If a hotel or Airbnb isn’t your style, freedom camping in New Zealand is hugely popular and can be a great way to keep accommodation costs down.


My Photography Equipment

If you are interested in what photography equipment I use and recommend, check out some of the results in my Photography Equipment List.


Have you got any other great suggestions for rainy day activities in Queenstown? Let me know below and if you liked this don’t forget to share!

Where to find Lord of The Rings filming locations on NZ’s South Island

Any fan of The Lord of The Rings and Hobbit movies knows well that the picturesque countryside of New Zealand plays such a critical role it is almost another character. Checking out the filming locations offers the opportunity for a jam packed holiday of spectacular scenery.

This post contains affiliate links. Making a purchase through these links will earn a small commission at no additional cost to you, and is a great way to show your support for this site.


Planning your Lord of The Rings road trip

The Lord of the Rings filming locations can be found on both the North and the South Island, so depending on what time you have available you may need to pick one or the other, since there is a lot of ground to cover on both islands.

While seeing the filming locations was not the primary purpose of my visit to the South Island, as a long time fan of the books and movies I was keen to squeeze in as many locations as I could. I was reliant on the internet for finding locations, but I found there was a lot of incomplete and inaccurate information online, so if you are serious about visiting the actual filming locations used I would recommend purchasing the official Lord of the Rings Location Guidebook to plan your trip. I found this gem in Queenstown and found it had a number of locations I had not seen referenced online. Australian readers can find it here. Information from the guidebook has assisted in the compilation of this post.

The Hobbit Trilogy Location Guidebook  is also available, or click here for Australian readers.

I planned a South Island road trip that enabled me to catch a number of locations on the way. Unfortunately due to weather and road conditions I was unable to see as many as I would have liked, and was only able to see some due to the route I took. Some locations are also inaccessible by a 2WD vehicle so tour recommendations available through Get Your Guide have been included. I booked all of my tours through Get Your Guide, and due to circumstances outside of my control I had to cancel a number of them. They were super helpful and great to deal with. They were also prompt with all refunds which was great for me trying to make alternative arrangements.


Locations Near Christchurch

Mt Sunday: Edoras

Where to find it: Hakatere Potts Road, Ashburton Lakes. This can be planned as a diversion on the drive between Christchurch and Dunedin.

Mt Sunday is in the middle of nowhere, and has 20km of unsealed road to get to it. I did make it out there in a 2WD Corolla, but parts of the road are a little rough. A remote lodge approximately 5km before it is the closest source of refreshment or amenities. A short hike to the top will offer panoramic views of the plains below bordered by the mountain ranges. The day I was there it was the middle of a thunderstorm, so I had to be content with snapping a quick picture and dashing back to the shelter of my car.

Continuing past Mt Sunday will take you further into the Rangitata Valley, which was digitally altered to use for the location of Helm’s Deep.

Tip: Put Mt Sunday into your GPS ahead of time, as once you get close the the mountains you will lose phone service and wont be able to. I wasted nearly an hour searching for the location because I had input Ashburton Lakes into my GPS and consequently took a wrong turn. It was a pretty drive through the Hakatere Conservation Park though.


Te Anau Lord of The Rings locations

Bordering the Fiordland National Park, Te Anau is a great spot to stop over if you are planning a drive to Milford Sound. It’s pretty much the closest accommodation outside of the sound itself – which is likely to hit the hip pocket somewhat!

It’s also a great point for a number of Lord of The Rings filming locations.


The Kepler Mire: The Dead Marshes

This is one that is actually absent from the guidebook, but I have found it referenced online in a number of places. The Kepler Mire is a string bog that was was used for the flying Nazgul scenes. The Dead Marshes themselves were a built set.

When I went it was fenced off preventing access so I was only able to see it from the road. This may have been due to the significant amount of rain.

Where to find it: A couple of kilometres along Mount York road.

Tip: Accommodation is available at Barnyard Backpackers, a short distance from the Mire. It was a clean, comfortable and inexpensive hostel.


Waiau River: River Anduin

Flowing into Lake Manapouri, parts of the Waiau River were used for the River Anduin and where the Ent-wives made their gardens.

Where to find it: An easy vantage point to reach by car can be found a short distance down the Kepler Track. Off the Te Anau and Manapouri highway follow the sign for Rainbow Reach, and follow the unsealed road to the carpark. A short distance from the carpark along the Kepler Track is a swing-bridge across the river. There is an option to complete a 10.9 kilometre section of the Kepler Track along the river through the Beech forests, or for the more energetic, you can walk the full 67 kilometres.

Local tour operators also offer a jet boat trip along the river to Lake Manapouri.


Lake Manapouri: Rivendell

The alpine mountains on the right of Lake Manapouri are home to the Norwest Lakes, used in scenes after the Fellowship leave Rivendell and Arwen’s flight with Frodo from the Ringwraiths. It is accessible by helicopter.

The day I visited the mountains were shrouded by cloud, but Lake Manapouri makes for a pretty photo regardless.

Where to find it: 20 kilometers from Te Anau town centre. No fancy directions required, pop the lake into your GPS or follow the signs.


Takaro Road: Fangorn Forest

The large stretch of forest along this country road were used in filming scenes in Fangorn Forest, and it was immediately recognisable driving up to it.

Where to find it: A short drive from Te Anau town centre, turn onto Kekapo Road from the Queenstown highway. Approximately 9 kilometres along is the unsealed Takaro Road. The forest commences approximately 5 kilometres along but can be seen earlier.


Mavora Lakes: Fangorn Forest and Nen Hithoel

The turn off for Mavora Lakes is off the Te Anau highway, a further 39 kilometres along is an additional filming location of Fangorn Forest and where the riders of Rohan burnt the orcs. It is also the location of Nen Hithoel, the end of the Fellowships journey down the River Anduin and where Sam and Frodo take their leave for Mordor. The swing-bridge at North Mavora was used for the scene when the Fellowship departs Lothlorien.

Unfortunately I ran out of time to visit these locations.


Queenstown Lord of the Rings Locations

Not all of the locations used in or near Queenstown are accessible by an ordinary vehicle, so it is worth looking at tour options running out of Queenstown. I wanted to do the full day Lord of the Rings tour, however it books out fast and I wasn’t able to get a spot. Instead I chose a half-day 4WD tour with Nomad Safaris (now Outback New Zealand) which turned out to be a heap of fun!


The Remarkables: Dimrill Dale

This was included in the tour I did, however the roads are suitable for a 2WD vehicle also.

Where to find it: If you’re doing this location yourself take The Remarkables Ski-field access road, you’ll be able to pull over along the way to have a view of the mountain range that is home to the location used for Aragorn leading the Fellowship after their escape from Moria. If you are keen to take in the specific location itself, it is a 20 minute hike from the Ski-field carpark. Alternatively, you can book a helicopter flight with an alpine landing.

This location also features in Mission Impossible and Vertical Limit.


Deer Park Heights: multiple locations

Visible from a number of vantage points across Queenstown, you can also just spin around from the Ski-field carpark to see this location. You won’t be able to get any closer, the location is no longer open for public access.

This location was used multiple times in all three films due to it’s landscape and 360 degree views from the top. A change in camera angle offered an entirely different backdrop. It features in the scenes where the Rohirrim flee Edoras for Helms Deep, Gandalf walking, and Aragorn plunging over the cliff after battling a Warg.


Kawarau River: The Argonath (Pillars of the Kings)

The Pillar’s of the Kings that the Fellowship float past were digitally added in against the cliffs through which the Kawarau River flows. Our guide told us that Peter Jackson’s attention to detail was such that he asked Viggo Mortensen’s wife for photographs of his father and grandfather, and these were the faces which appeared on the Argonath.

Where to find it: The entrance road to Chard Farm Vineyard, directly opposite the AJ Hackett Bungy Jump, New Zealand’s first established Bungy.


Skippers Canyon: The Ford of Bruinen

This is a location you wont get to without a 4WD tour, as it is listed as one of the most dangerous roads in the world. A sign greets you upon entry advising that rental vehicles are not covered beyond this point. The road has no security fencing and is bordered by sheer drops to the canyon below, and is two-way despite being dangerously narrow in some places. In winter much of the area is a ski-field.

Footage from Skippers Canyon was used to create the canyon walls of the Ford of Bruinen.


Pssst…looking for somewhere to stay in Queenstown?


Arrowtown Lord of the Rings Locations

Arrow River: The Ford of Bruinen

Located a 20 minute drive from Queenstown, Arrowtown is a quaint old gold mining town that is worth a visit regardless.

Where to find it: The Arrow River can be found a short distance from the town centre. If you tackle this one yourself you’ll have some river wading to do, but the Nomad Safari’s tour will drive up the river the 200 metres to the location.

The Ford of Bruinen is where Arwen summons the water to wash away the Ringwraiths. The scene was spliced together from three locations, the others being the Kawarau River and Skippers Canyon, but the Ringwraiths actually cross the river in this spot as the water was not too deep for them to do so.

If you’re on the tour you’ll stop for afternoon tea here and have the opportunity to pan for gold.


The Gladden Fields

Featuring in a brief sequence on the history of the ring, it was here Isildur was attacked by the Orcs and lost the one ring into the Anduin River.

Where to find it: A short walk from the Arrowtown centre, turn left into Nairn Street and continue to a riverside path through the trees.


Glenorchy Lord of the Rings locations

The Queenstown to Glenorchy drive is spectacular, offering views of snow-capped mountains over Lake Wakatipu. However, you will need to take a tour in order to access the locations. Nomad Safari’s also offer a half-day 4WD Glenorchy tour.


Twelve Mile Delta: Ithilien

Where to find it: On the road from Queenstown to Glenorchy, 12 kilometres from Queenstown. Signs on the main road will direct you down to a large camping area. From here you are able to walk to the locations where Sam and Frodo see the oliphants and where they cook the rabbit Smeagol has caught. The campground pictured is where the battle takes place.


Mt Earnslaw: The Misty Mountains

Where to find it: You’ll find Mt Earnslaw towering over the town of Glenorchy, but it is also visible as you drive around Lake Wakatipu.


Isengard and Lothlorien

Where to find it: From Glenorchy, follow the signs for Paradise. I wasn’t able to make it all the way to these locations due to a river crossing I wasn’t prepared to brave without a 4WD. I got close though, and the forest along the way is the same type that was used for Lothlorien.

Dart River Adventures offer river trips that allow you to experience these locations.


Delilah from Our Travel Mix was kind enough to send me over this photo from the Isengard location.


Wanaka Lord of The Rings locations

Southern Alps and Mt Aspiring: Misty Mountains

Where to find it: You can’t miss this one. Look out across the lake from town and those are the Southern Alps rising on the far shore.

This location was used in the scenes after Gandalf’s eagle-aided escape from Orthanc. It was also used to depict the Misty Mountains, this part specifically the peaks around Moria.


My Photography Equipment

If you are interested in what photography equipment I use and recommend, check out some of the results in my Photography Equipment List.


I hope you’ve enjoyed checking out these locations as much as I did. If so please share!

How to spend up to 4 days in LA

When you think of visiting LA, its hard not to think of the glitz and glamour of Hollywood. The City of Angels is California’s most populated city and the second most populated in the entire USA. An estimated 4 million people live in the sprawling expanse of the city, which covers an area of about 1,210 kilometres square. In a city of such immensity it can be overwhelming.

While there is plenty to do in the broader LA area and California, if it’s your first time in LA and you happen to be in town for a brief sojourn, here’s my recommendations for where to allocate your time, whether you have 2 days in LA or 4 days in LA. The Mediterranean climate means that even in February, the coldest month of the year, it is usually still comfortably warm, making LA a great place to visit all year round!

It is worth taking a look at the Go Los Angeles card before buying any tickets. It will provide you transport and discounted entry to many LA attractions, and can result in good savings if you are already intending to visit the included attractions.

Los Angeles 2 day itinerary

Day 1: The Hollywood Experience

While the taste of Hollywood permeates much of LA, Day 1 is dedicated to immersion into the Hollywood tourist experience.


Hollywood Bus Tours

Short tours can be a great way to see a city in a limited time, and often saves you the headache of worrying about transport. LA is home to the rich and famous, and many of the bus tours will include a cruise past celebrity homes, and other LA landmarks such as the Chinese Theatre, Rodeo Drive and Venice Beach.

The Chinese Theatre, home to the Academy Award cermonies

If you are spending 4 days in LA I recommend looking at the Hop On, Hop Off bus. You can buy a pass for several days which helps you getting around over the coming days, while having all the points of interest indicated to you on the way. If you are keen to visit some of the LA attractions, check out the Explorers pass, which features a number of attractions.


If a tour including celebrity homes is more your style, check out the Hollywood and Celebrity Homes Tour, which runs for 2 hours and includes landmarks such as the Viper Room, Chateau Marmont, Rodeo Drive and the Capitol Records building. Celebrity homes will include Leonardo diCaprio, Tom Cruise and Elvis Presley.


Naturally you don’t want to miss the Hollywood Walk of Fame, a series of over 2000 stars embedded into the footpath of Hollywood Boulevard and Vine Street honoring stars of today and days gone by. While it’s not terribly exciting, it is a must see just for the experience, but watch out for the people on the street selling CD’s. They’ll make out they really want you to take their music home and when you give them your name they’ll scrawl it on the CD, give it to you then ask you to pay. Since it has your name on it they won’t take it back and the one who got me hit me up for more money than I had spent on the last CD by one of my favourite artists. They can also get quite aggressive if you refuse to engage with them, the next one yelled after me that I was racist when I wouldn’t take his CD and it tarnished my day somewhat.


Griffith Park and observatory

I spent an afternoon hiking in Griffith Park and it was one of the top things I did in LA! This is an activity you want to save for the afternoon, because the view of the sun setting over LA from the Griffith Observatory at the top is worth the trek!

The City of Angels from the wilds of Griffith Park

Griffith Park is one of the largest parks in North America, larger even than New York’s Central Park, covering an area of over 4,000 acres. It has a long and colourful history, which is why it is worth investing in a guided hike with a local to hear all about it.


The climb to the top will bring you into view of the famous Hollywood sign, no longer able to be directly accessed by the public, before finishing at the iconic Griffith Observatory. Even those who haven’t seen the Academy Award winning La La Land, are usually familiar with the scene of Ryan Gosling and Emma Stone dancing in front of the Observatory.

Linger outside on the viewing platform to watch the sunset over LA, then take advantage of the free entry to the Observatory to stroll around the exhibits inside.


Getting there: If you aren’t on the hop on hop off bus, an Uber from the Walk of Fame to Griffith Park cost me less than USD$10.


Day 2: Universal Studios

You might think that Universal Studios is the destination for a family day out, but what I discovered is that it is uniquely suited to the solo traveler. I honestly had such a fun day at Universal Studios and it is tied for my favourite day in LA.

Universal Studios perfectly combines the traditional theme park with the movie theme, although perhaps with less roller-coasters. If the idea of shows and rides doesn’t take your fancy but you still want the movie experience, you can also do a tour of the Warner Bros Studio. A friend of mine did this instead and raved about it.

You can get your ticket for Universal Studios here.

The entire place looks like a movie set. Old New York style buildings house stores and various eateries, and at various interludes throughout the day also performers yelling down their lines to characters and tourists in the street below. Costumed performers mingle in the street with excited tourists eagerly holding their cameras. If you have ever been to Movie World on Australia’s Gold Coast it is like that, on steroids.

It is also the first time I have seen a theme park with a dedicated single riders line, and this is what makes it a great option for even the solo traveler. The single riders line gets used to fill any gaps in seating from odd numbered groups and I walked virtually straight onto every single ride. It’s a great way to maximise the value you get out of the day.

The majority of the rides are a combination of virtual reality and motion, screens showing you the scenes as the car rocks, shakes and moves around you. It is masterfully done, you really feel you are flying through the air on a broomstick behind Harry Potter, or plunging down a massive roller coaster with The Simpsons. I would recommend not eating or drinking before the Harry Potter one, my stomach was actually quite thankful for the fact the ride was on the shorter side. Don’t miss out on trying the Butter Beer in Harry Potter World – it’s delicious! And the store is delightful for fans of the movies.

Hagrids House at the Wizarding World of Harry Potter

The longest ride is the Studio Tour, one of only two without the Single Rider line and the longest wait of my day at 30 minutes. It contains a clever combination of experiences and sights, showing the current sets of several shows as well as a standard New York set used in many shows and movies that is just the facade. Sets are flooded on cue to flow water around the train then disappear as suddenly. In the car lot cars from Fast and the Furious, Back to the Future, Knight Rider and Transformers rest awaiting their opportunity to ride again. On the set of Amity from Jaws, Bruce the Great White circles the lake and performs for the excited spectators. A 3D experience created by Peter Jackson himself, of King Kong fighting dinosaurs around the train as it rocks with every blow, and a thrilling Fast and the Furious battle between Dominic’s team and protagonist Owen Shaw. It is the epitome of Hollywood magic.

The Jurassic Park ride offers the classic log ride, from which riders walk away drenched, and there are multiple shows on offer throughout the day. The Walking Dead attraction is like walking through the classic Haunted House while zombies leap out at you.

Before I got in trouble for taking photos…whoops!

The official Universal Studios app is available to download which shows maps of the park, real time queue information and show timetables. It’s a great way to plan your day and make sure you see and do everything you want to do.

Check the Universal Studios site for up to date information on opening hours.

Universal Studios isn’t too far from Griffith Park so an Uber is likely to be inexpensive.


Los Angeles Itinerary, 4 days

If you have 4 days in LA, start with the 2 day itinerary, and add these!


Day 3: Santa Monica Pier

Because whats a little getaway without a trip to the beach!

Aged over a century, Santa Monica pier is a Los Angeles icon. It is one of the most filmed locations in LA, and has been featured in movies since 1914, including Beverley Hills Cop, Forrest Gump and Iron Man, and the beach is immediately recognisable from Baywatch.

The Pier itself feels like stepping back in time and is at once familiar due to the prominent placement in movies of Pacific Park, a family amusement park located on the pier. It is so long that multiple musicians can busk along the stretch, and their playing doesn’t interfere with each others.

I was content to spend a couple of hours wandering round the pier, park and beach. I’ll always eat seafood if I am by the ocean and scoped out the restaurants on the beachfront for something to take my fancy. But I still ended up back at the pier devouring coconut crumbed prawns at the bar in Bubba Gump, and savouring the first cider I had enjoyed in weeks.

If you are looking for something a bit more organised, and haven’t had your fill of celebrity yet, you can take a highlights of LA tour which will include both Beverly Hills and Santa Monica.

This one is a way out of town so an Uber will set you back around USD$30, so the bus is likely a better choice.


Day 4: Shop

If you’re flying internationally, there’s a good chance that you’ll be flying in the evening or night, so what do you do all day when you have to check out of your hotel in the morning? I know some people like to book an extra night so as to have the room until they leave, but LA has an alternative for you!

The biggest shopping outlet I had ever seen.

Citadel Outlets is home to over 130 top brand stores and restaurants open until 9pm, and it’s the perfect way to spend your final day in LA for a couple of reasons.

First of all, they provide a free baggage check service. So you can pack your bags and check out of your hotel, check them in at the outlet and then shop to your hearts content! Just be sure to leave some room in the case for all the goodies you’ll doubtless pick up.

Secondly, the outlets are in close proximity to the airport, and you can arrange for a shuttle to collect you from your hotel to the outlets, then from the outlets to LAX ready for your flight home.

Getting there

By Shuttle: Book online to save on VIP packages including transfers between your hotel, Citadel and LAX.

By Train: The LA Metrolink stops near Citadel. Click here for timetable information.

By Uber: This was my choice, it was cheaper overall than the shuttle packages, though I didn’t get the perks of the VIP package. Prices will of course depend on the time of day but the total of my trips came to just over USD$54.


Where to stay in LA

I sought advice from a friend who is an LA local and was advised to look in the quieter part of town around Silverlake, away from the main hub but still accessible. I was dying to try out a tiny house and had a great experience staying in the Cozy Casita.

You can check out other options in the Silverlake area below.


Like this? Share it!

The Unmissable Diamond Head Hawaii hike

No visit to Hawaii is complete without a Diamond Head crater hike. If you’re staying in Waikiki you’ll see the extinct crater from virtually the whole area. The reward for the walk is spectacular panoramas of the Hawaiian coastline from the 760 foot peak, along with what remains of the US military lookout posts from WW1 and WW2. It is one of the best known and most popular hikes on Oahu.

This post contains affiliate links. Making a purchase through one of these links earns a small commission at no additional cost to you and is a great way to show your support to this site.


What is Diamond Head?

The Hawaiian name for the crater is Le’ahi, which translates to “brow of the ‘ahi fish” which reflects the appearance of the crater from Waikiki. Western explorers in the 1700’s mistook the craters calcite crystals for diamonds, earning the site the name of Diamond Head.

According to the information boards at the Visitor Center on the crater floor, about 300,000 years ago there was an eruption on the flanks of the Ko’olau Mountains. Large amounts of ash and fine particles settled around the centre of the eruption, forming a crater, and cemented into a rock called tuff. The crater is almost a perfect circle of 3520 feet diameter and has a floor area of 175 acres. The entire area including the outer slopes of the crater is over 475 acres.

Heavy rains and runoff from intense storms have deepened the gullies of the crater slopes, eroding an estimated 100 feet from the summit. The trail to the summit was built by the US Army Corps of Engineers in 1908 and climbs the interior face of the crater to the Fire Control Station at the summit. The state requests visitors keep to the marked trail so as to not add to the speed of erosion of Oahu’s premier natural landmark.

Declared a National Natural Landmark in 1968, the crater was opened for recreational use in 1976 and receives more than a million visitors each year. Some parts of the park are still restricted due to their use by Civil Defense, FAA and the National Guard.


Diamond Head’s Military History

The natural defense offered by the crater walls, and the view from the summit made it a natural choice for fortifications. Construction on Fort Ruger began in 1908 with the construction of Battery Harlow on the outer slopes. The Fire Control Station located at the summit was a critical component of the coastal defense system for Oahu, and built between 1908 and 1911. The station was used as an observation post for spotting the approach of enemy ships. Hikers heading for the summit will journey through the levels of the station.

Radar was not invented until WW2, however using triangulation with Mount Tantalus artillery spotters were able to calculate the position of ships at sea, guiding the 12 inch mortars of Battery Harlow on the slopes below and the guns of Battery Randolph at Fort DeRussy. The mortars were aimed to fire over the crater and out into the channel south of Oahu with a range of 8 miles, reaching both Honolulu and Pearl Harbor.

Three more batteries, Dodge, Hulings and Birkheimer, were added in WW1, and a fourth, Battery 407, in WW2. All artillery was dismantled in 1950 and was never fired during war. During WW2 the communications rooms and mess halls were added to the Fire Control Station.

Command post in Fire Control Station


How to get to Diamond Head

If you feel like extending your walk by 40 minutes or so, it is approximately 3 miles from Waikiki to the Diamond Head State Monument.

The public bus route #23 runs regularly, however as the stop is outside the crater it does mean an additional walk uphill into the crater. An all day ticket for the bus can be purchased for US$5.50.

The Waikiki Trolley will also visit Diamond Head along with other Honolulu attractions. You can purchase a pass for single or multiple days here.

By car, parking is available in the crater for a fee of US$5 per car.

The entrance fee is US$1, payable upon entry into the crater.

Top of the hill and outside the entrance to the Diamond Head crater

Diamond Head Opening Hours

The crater is open from 6am to 6pm every day of the year.

The gates are locked at 6pm each night and all guests must be out of the park by this time. For this reason last entrance to the hike is at 4.30pm.


How long does it take to hike Diamond Head?

It is a 1.6 mile, or 2.6 kilometre, route from the parking lot to the summit and back down, but it does climb nearly 600 feet (171 metres) in elevation. Duration depends on the experience you want, I took my time and spent the afternoon, wandering around looking at all there was to see at the top. The official site suggests 2 hours as the Diamond Head hike time but it could absolutely be done in less time than that.


What you need to hike Diamond Head

Unless you have specific requirements you will need three things; good shoes, sun protection and water.


Best time to hike Diamond Head

I have read that it is a popular place for both sunrise and sunset, but naturally this depends on the time of year and those events lining up with the crater’s opening hours.

In summer it would definitely be wise to avoid the heat of the day as there is minimal shade on the majority of the trail.


How hard is the summit hike?

The official website rates it as moderate difficulty. It will definitely elevate the heart rate but I didn’t find it a difficult hike, and I did see younger and older people on the trail. There are places to stop and rest on the way if needed and while the trail is uneven, it is not tough going. It is smoothed by plenty of feet!

There are also tunnels and several sets of stairs, as illustrated by the information board from the floor of the crater.


Check out the video for footage of the trail to get an idea of the terrain and the view on the way up the crater interior. It was a lot busier than it appears to be!


Staircase leading to one of the tunnels


Inside the tunnel


Spiral staircase between the levels of the Fire Control Station


The view from Diamond Head crater lookout

There is a reason why this location was chosen to be such a critical military post. From the top hikers have a view from Waikiki to Koko Head and it is a view well worth the climb!

Waikiki and Honolulu from top of Diamond Head

It can be a little windy at the top though, so holding onto your hats is advisable.


The views from the walk up Diamond Head

Don’t think that you have to wait for the top for spectacular scenery either! There is plenty to check out along the way if you need to take a moment to catch your breath. Most of the military locations are on the way up also.

Volcanic landscape on Diamond Head crater


Caption halfway up the crater and Diamond Head Lighthouse in the distance


View from a military post


Available facilities

Once you leave the vicinity of the Visitors Center on the crater floor there are no bathrooms or access to refreshments. At the Visitors Center there is a small store selling souvenirs, vending machines and food trucks. If the pineapple guy is there I recommend trying one of the fresh pineapple juices served in an actual pineapple, expensive but oh so worth it! Chill out at one of the provided picnic tables and enjoy the scenery while putting some calories back after your hike!


If this has whet your hiking appetite, Oahu also has some breathtaking waterfall hikes that you might want to squeeze into your itinerary.

If you are looking for other things to do on your trip to Oahu, check out my 7 day Oahu itinerary.

You may also want to check out the Go Oahu card, which offers special prices on many of Honolulu’s tourist attractions. You can purchase one here.


Where to stay on Oahu

Being the tourist hub for the island makes Waikiki pretty much accessible to any activity on the island. I can personally recommend the Coconut Waikiki Hotel or you can check out some other options below.


Like this? Please share!


Jurassic Park Hawaii; The Best of Kualoa Ranch Experience

Hawaii’s Oahu is an island jam packed with things to do no matter what your taste, but there was one thing recommended to me above all by other travelers while I was planning my visit. Kualoa Ranch, a place of which I had never heard but turned out to be right up my alley!

This post contains affiliate links. Making a purchase through these links earns a small commission at no additional cost to you and is a great way of showing your support to this site.


What is Kualoa Ranch?

Kualoa Ranch is a private nature reserve and working cattle ranch most well known as Hollywood’s Hawaii set, it has been the location for many Hollywood blockbusters including Jurassic Park, Jurassic World, Kong: Skull Island, Jumanji and 50 First Dates, as well as TV shows such as Lost.

It was also a key site during WW2 with numerous military bunkers and installations remaining. The largest of these, Battery Cooper, travels deep inside a mountain and has been a set for Hawaii 5-0. It now serves as a repository of military and movie memorabilia from the Ranch. You can check out the video walking through Battery Cooper below.

The expansive 4000 acre property that has been passed from generation to generation exists to protect the land, while working to develop sustainable agricultural and aquacultural practices. Hawaii does not produce enough food to support its population, and is reliant upon imports. In the event of a natural disaster blocking imports, the state would run out of food within a short period of time. Kualoa Ranch seeks to contribute what it can to the islands food supply.


Where is Kualoa Ranch?

The eastern shore of Oahu at Kaneohe Bay, 45 minutes from Waikiki.


How to get to Kualoa Ranch

If you don’t have access to a car, a bus service runs between Waikiki and the Ranch for a cost of USD $15 per person for a round trip. These can be booked online through the ranch when you book any tour or USD $10 per person with an activity package. There are a number of pickup locations which you can choose from. My bus departed from the Aloha bus landing at the Sheraton Waikiki. If you get the bus from this location be aware it is not obviously a part of the Sheraton Waikiki, I went past twice before I found it! You can find it on Royal Hawaiian Street, on the side that looks like it doesn’t actually go anywhere!


What is there to do at Kualoa Ranch?

The Ranch offers a wide range of different tours, from ATV’s, to horseback, bus and jeeps. These will cover different parts of the property, offering spectacular mountain and ocean views, military installations and movie sets.

There is also a well known Zipline that runs through the picturesque valleys and includes some hiking and a small petting zoo to enthrall the kids.

The resident turtle

If you are on the bus and unable to check out other locations on the eastern shore, I’d recommend considering a tour package and spending the day, to make the most of the time you invest getting out there. There are a variety of tour packages available or you can book and combine tours individually depending on times.

I chose to do the Best of Kualoa Ultimate Experience, which costs USD $123.95 per adult. This package includes three tours and an all-you-can-eat buffet lunch.

Kualoa Ranch tours do book out in advance, so this is one to plan ahead!


The Best of Kualoa Ultimate Experience

Upon arriving at the ranch you’ll be assigned your groups and program for the day.


Taste of Kualoa Farm Tour

First up for my day was the Taste of Kualoa Tour. At the main ranch my group boarded our trolley bus that resembled a rickety old windowless school bus and trundled out the front gate to travel along the highway to access the agricultural part of the property.

I’ll be honest, I picked this package for the other two tours included and I could have give or taken this one, but it was still interesting to hear the guide explain some of the ranch history and the efforts it makes towards food production, while learning a few Hawaiian words! For the first part of the tour the bus bumped along through the tropical garden while the guide pointed out local plants and explained their cultural uses and how they were brought to the island by the original Polynesian settlers. Other parts of the garden were reserved for growing more commercial produce, such as coffee and sugar cane.

I’m a movie buff, so the movie focused tours were more aligned to my interests. I was delighted when the bus stopped at a large dirt enclosure that was surrounded by a number of buildings that were actually movie sets. We were invited to stroll around as we wished but warned not to enter the buildings themselves, as they were merely a facade and not safe to access. A short stroll from the enclosure was the beautiful inland lake used in Jurassic World, which also offers a backdrop that is a popular setting for weddings. It is an ancient fish pond.


A popular choice for weddings

After taking in the views at the fish pond we board the trolley once again and are taken to the final stop via fields and aquaculture locations, housing varieties of fish and water plants. Our final stop is a hut where a variety of produce from the farm is spread out for us to try. The offerings vary by season, February’s were Papaya, Banana, dried fish and Poi – a key source of protein in the Hawaiian diet. Big bowls of Macadamia’s sat on the railing beside a cracking vice, the ground below littered with the shells ready to break down into the soil. The fish and Poi were not to my taste, but the small variety of Banana was sweet and delicious, and I indulged in plenty of Macadamias before we head back to the main ranch.

Taste of Kualoa Trolley tour runs for 90 minutes and individually costs USD $47.95 per adult and USD $36.95 per child under 12. It visits locations not covered by other tours.


The Hollywood Movie Sites Tour

Back at the main ranch there is time for a quick stroll in the store and a bathroom visit before I line up with my group for the second tour. We are divided into two buses, one for Japanese and one for English.

The Hollywood Movie Sites Tour takes you to another part of the property. Our first stop is the largest of the WW2 bunkers on the property, Battery Cooper which winds inside the mountain that it sits towards the top of. Built in 1943 it is now an exhibit of war and movie memorabilia which still serves as an active set, featuring in both the film Pearl Harbor and Hawaii 5-0. It offers spectacular ocean views from the entrance.


Next we travel to the lush fields bordered by imposing mountain ranges that were the setting for the Jurassic Park scene when Sam Neill and the children flee from the dinosaur herds. The famous tree stump behind which they hide from the T-Rex also features, and the guide is happy to snap away for everyone that wants a photo, complete with their own dinosaur!


This beautiful landscape has also been the setting for blockbusters including Kong: Skull Island, Jumanji, Mighty Joe Young, Godzilla and the television series Lost.

Field of bones from King Kong


Godzilla was here


Hurley’s one hole golf course as featured in Lost.

On our way back to the main ranch we stop off to meet Dakota. Always ready for a treat from the driver and pats from hands extended from the windows.

The Hollywood Movie Sites Tour runs for 90 minutes and individually it costs USD $47.95 per adult and USD $36.95 for a child under 12.

Book your Hollywood Movie Sites Tour


Jungle Jeep Expedition

I found it hard to pick my favourite between the Jungle Jeep Expedition and the Hollywood Movie Sites tour. The Jungle Jeep Expedition vehicle resembles an African safari bus, and is able to venture to parts of the property the bus cannot. Hence it is able to offer different locations. While the Ranch gives safety warnings of rough terrain,  I personally didn’t find it terribly rough, more slightly bouncy, it was a really fun tour. Each vehicle only seats up to 16 passengers, so it is also a smaller group than the Hollywood Sites tour.

The Jungle Jeep tour features more sets from Jurassic World, Jumanji and Kong: Skull Island, as well as some Netflix shows.

Currently filming on Netflix

The Jungle Jeep Expedition finishes with a climb up to a point that offers spectacular views of the valley below and ocean, a short 5-10 minute walk up the hill.

The Jungle Jeep Expedition runs for 90 minutes and individually it costs USD $47.95 per adult and USD $36.95 per child under 12.

Book your Jungle Jeep Expedition

Buffet Lunch

The other inclusion in this package is a all-you-can-eat buffet lunch at the Ranch restaurant, where you can sample meals produced from the Ranch produce. Since I started my tours with the first available in the morning, my lunch was scheduled after the Hollywood Sites tour.

Grab your food and head on out onto the deck to take in the scenery.

Alternatively the cafe offers a range of food options made to order.


Planning a trip to Oahu? Check out my 7 day Oahu itinerary.

You can also save on selected Oahu activities with the Go Oahu card.


Sharing is caring!